Serverless refers to applications where the management and allocation of servers and resources are managed by a cloud provider. This means that the cloud provider dynamically allocates the resources. The app is running in a stateless container that can be triggered by an event. One such example of the above and the one that we will be using in this article is about the AWS Lambda.
In short, we can determine “Serverless applications” as applications that are event-driven cloud-based systems. The app relies on third-party services, client-side logic, and remote calls (directly calling it Function as a Service).
Installing Serverless Framework and Configuring It for Amazon AWS
![]()
1. Serverless Framework
The Serverless Framework is an open-source framework. It consists of a command-line interface or CLI and a hosted dashboard, which provides us a fully serverless application management system. Using the Framework ensures less overhead and costs, quick developing and deploying, and securing the serverless applications.
Before you proceed to install the Serverless framework, you have to set up NodeJS first. It’s very easy to do on most operating systems – you just have to visit the official NodeJS site to download and install it. Remember to choose a version higher than 6.0.0.
After installing it, you can confirm that NodeJS is available by running node -v in the console. It should return the node version you have installed:
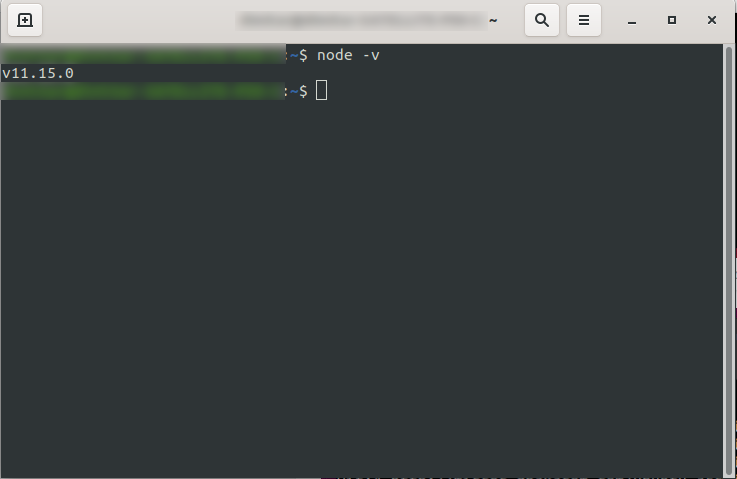
You are now good to go, so go ahead and install the Serverless framework.
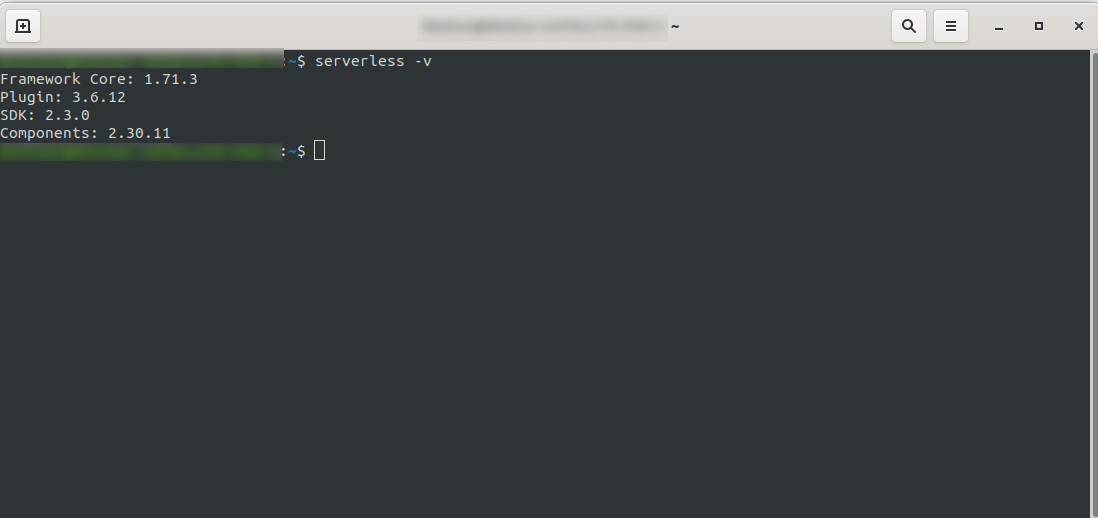
In order to do that, follow the documentation to set up and configure the framework. If you prefer, you can install it only for one project, but at DevriX, we usually install the framework globally: npm install -g serverless
Wait for the process to finish and ensure that Serverless has successfully installed by running: serverless -v
2. Create an Amazon AWS Account
Before you proceed to create your sample application, you should create an account in Amazon AWS. If you don’t have one yet, it’s as simple as going to Amazon AWS and clicking on “Create an AWS account” in the upper right corner and following the steps to create an account.
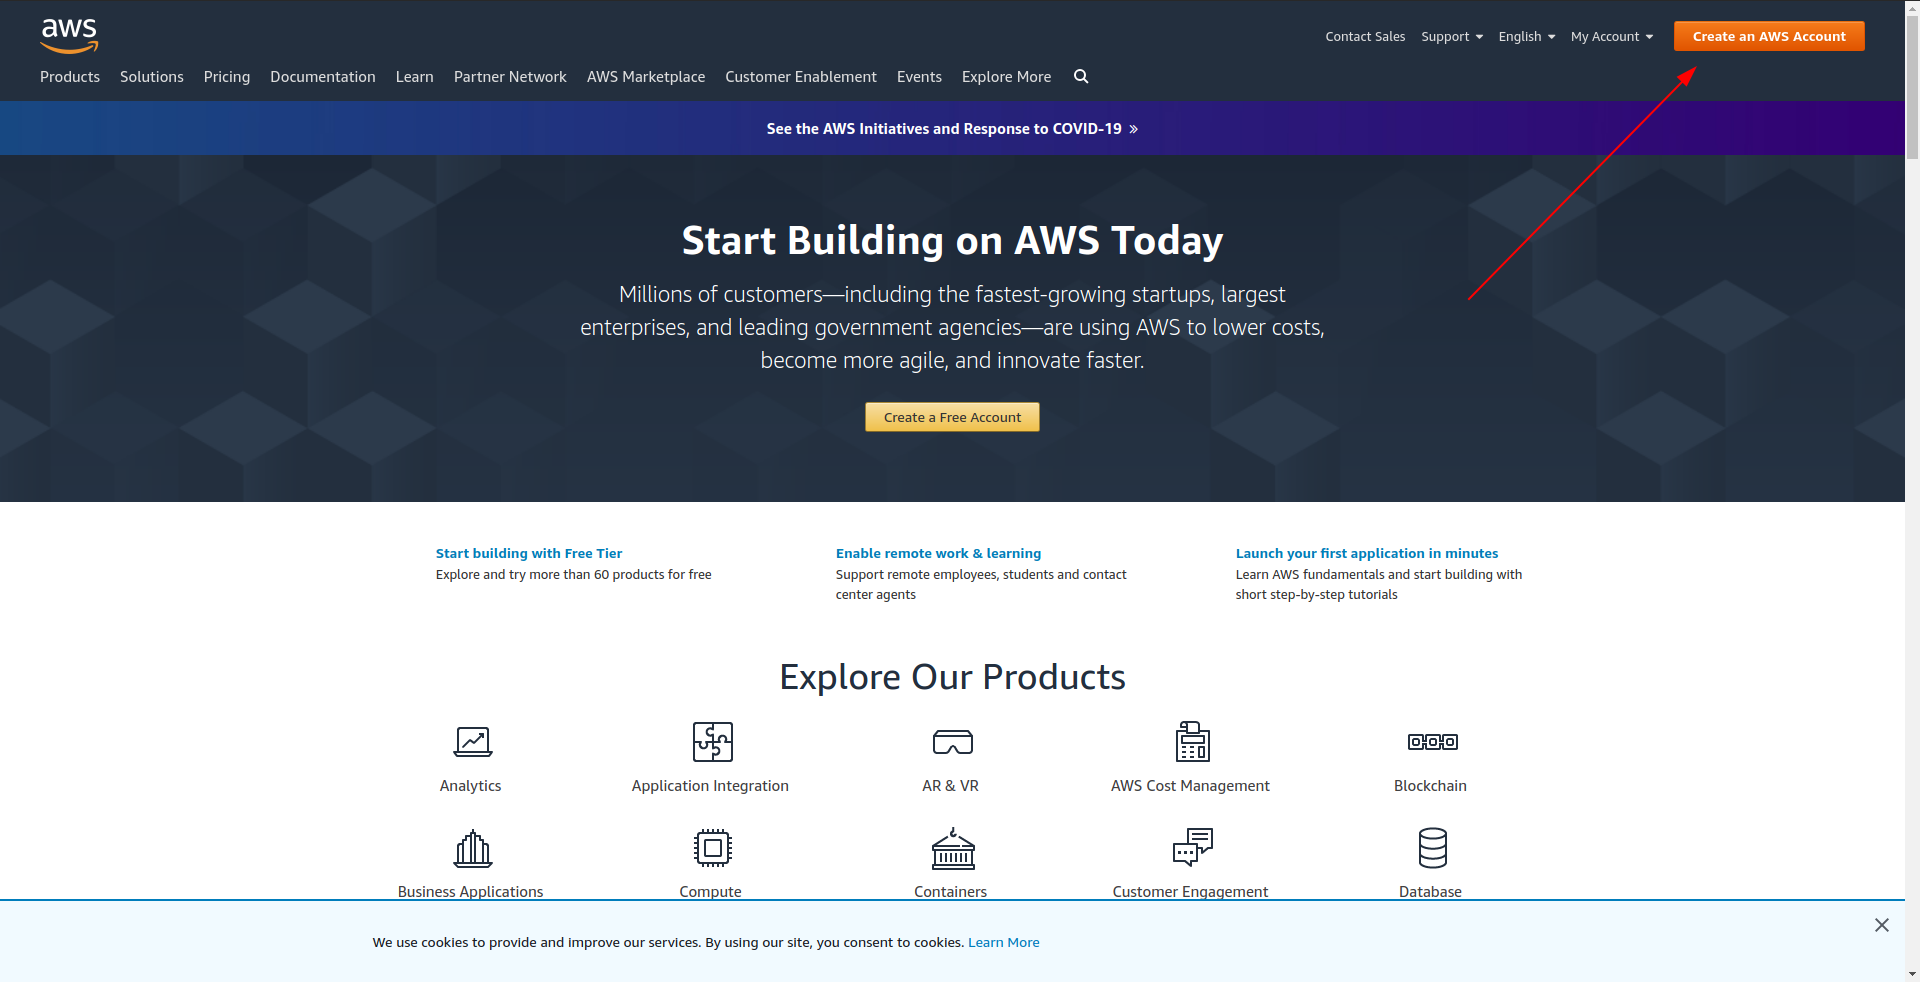
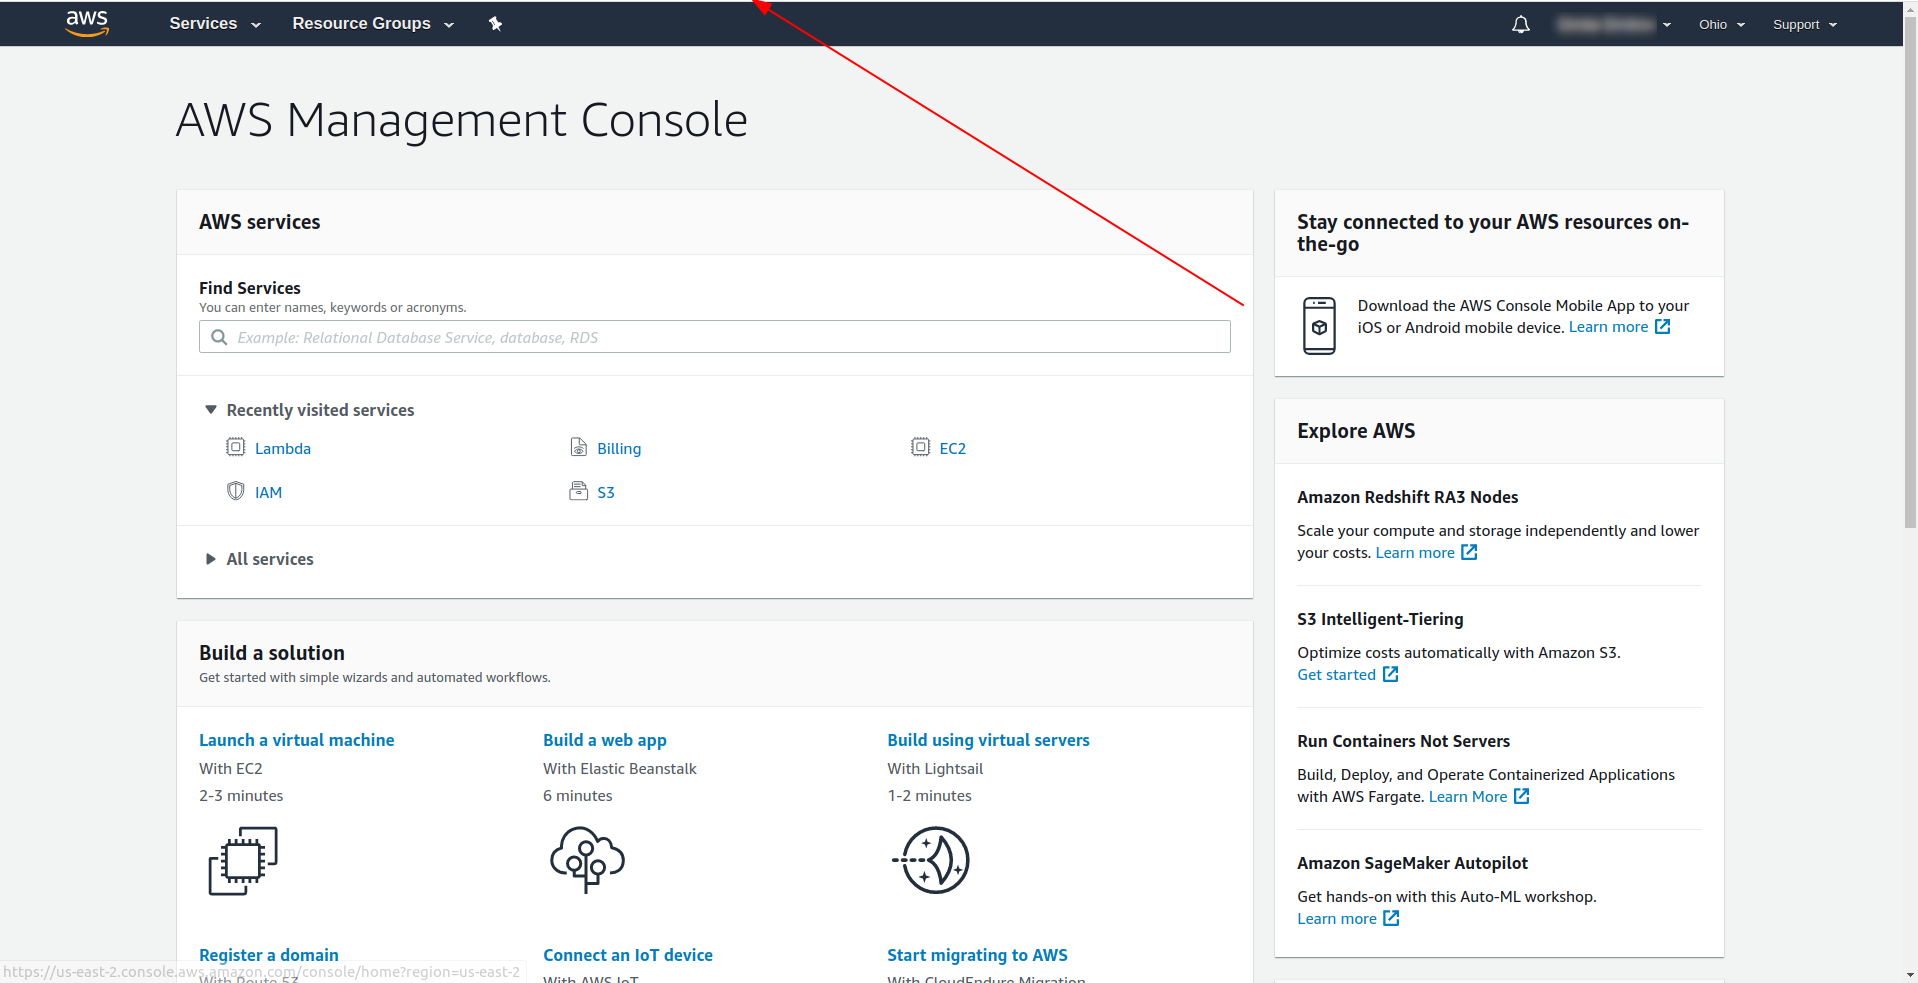
Amazon requires you to enter a credit card, so you can’t proceed without entering that information. On successful registration and login you should see the AWS Management Console:
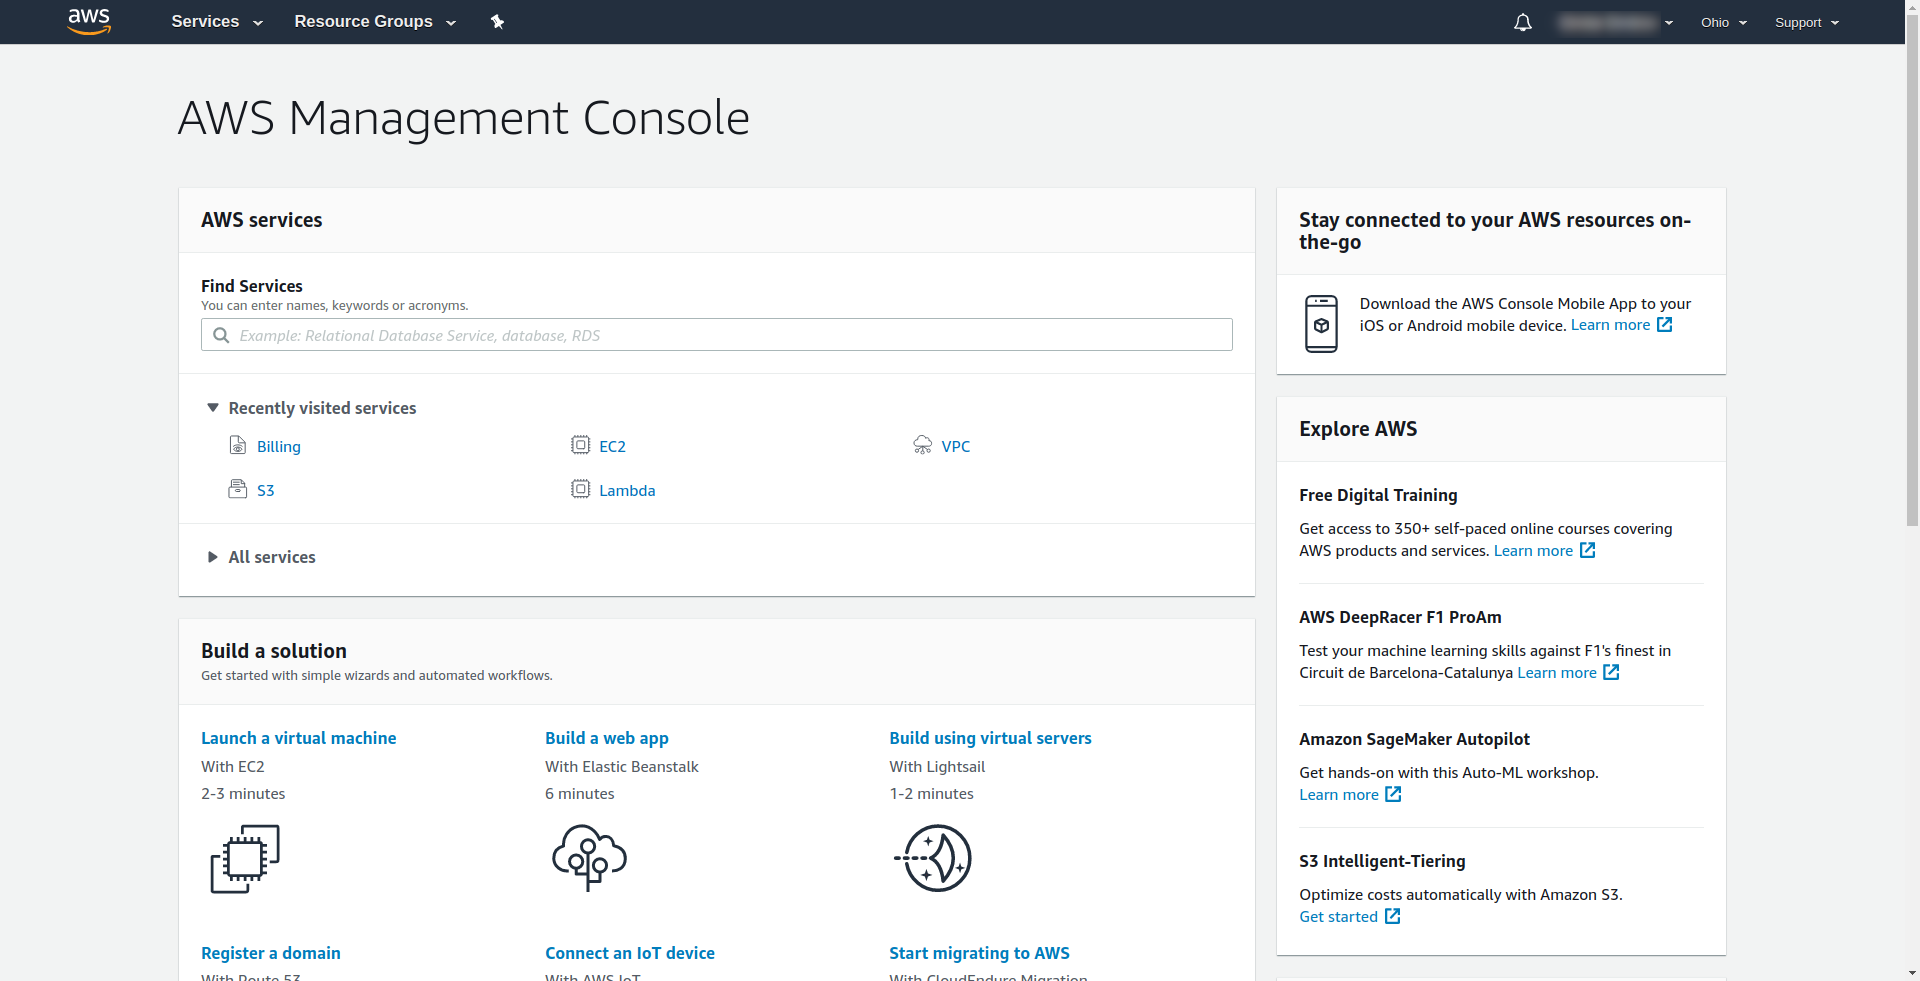
Great! Let’s proceed now with creating your application.
3. Configure the Serverless Framework with AWS Provider and Create an Example Application
In this step, we have to configure the Serverless framework with the AWS provider. Some services such as AWS Lambda require credentials when you access them to ensure that you have permissions to the resources owned by that service. AWS recommends using AWS Identity and Access Manager(IAM) to accomplish that.
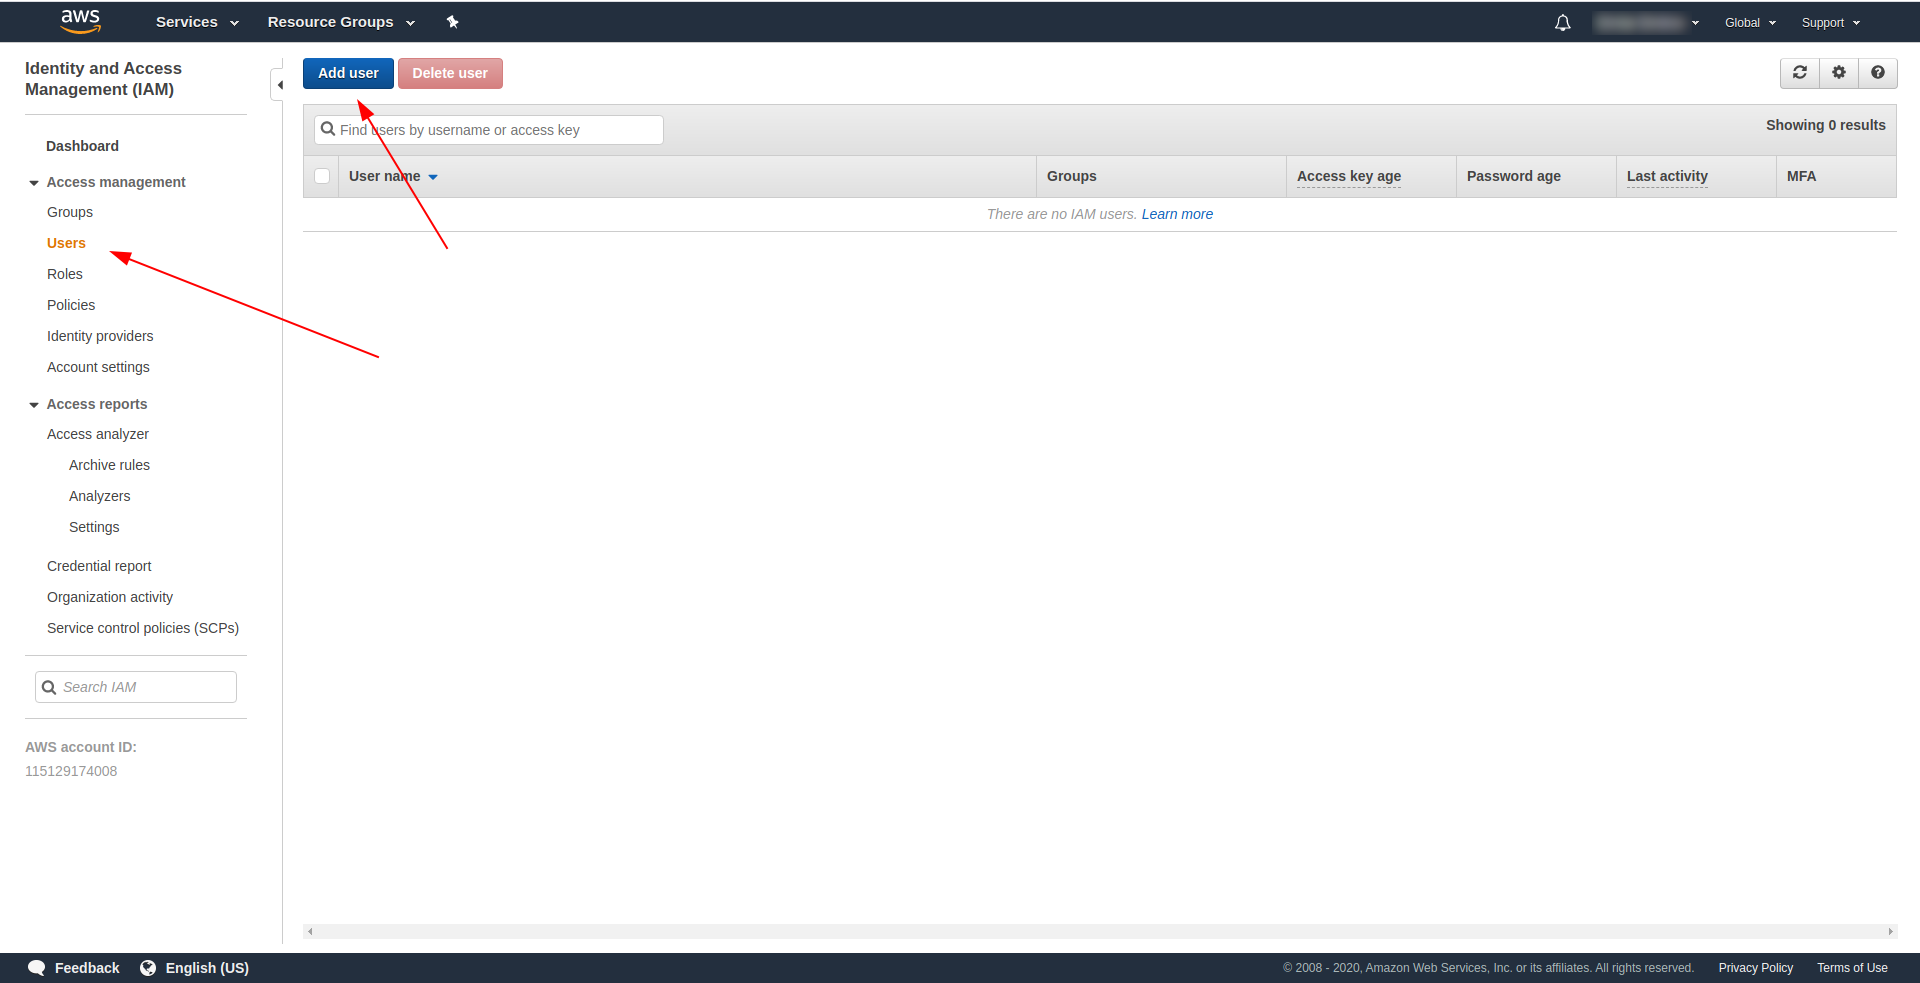
So, the first and most important thing is to create an IAM user in AWS to use it within our application:
At the AWS console:
- Type IAM in the “Find Services” field.
- Click on “IAM”.
- Go to “Users”.
- Click “Add user”.
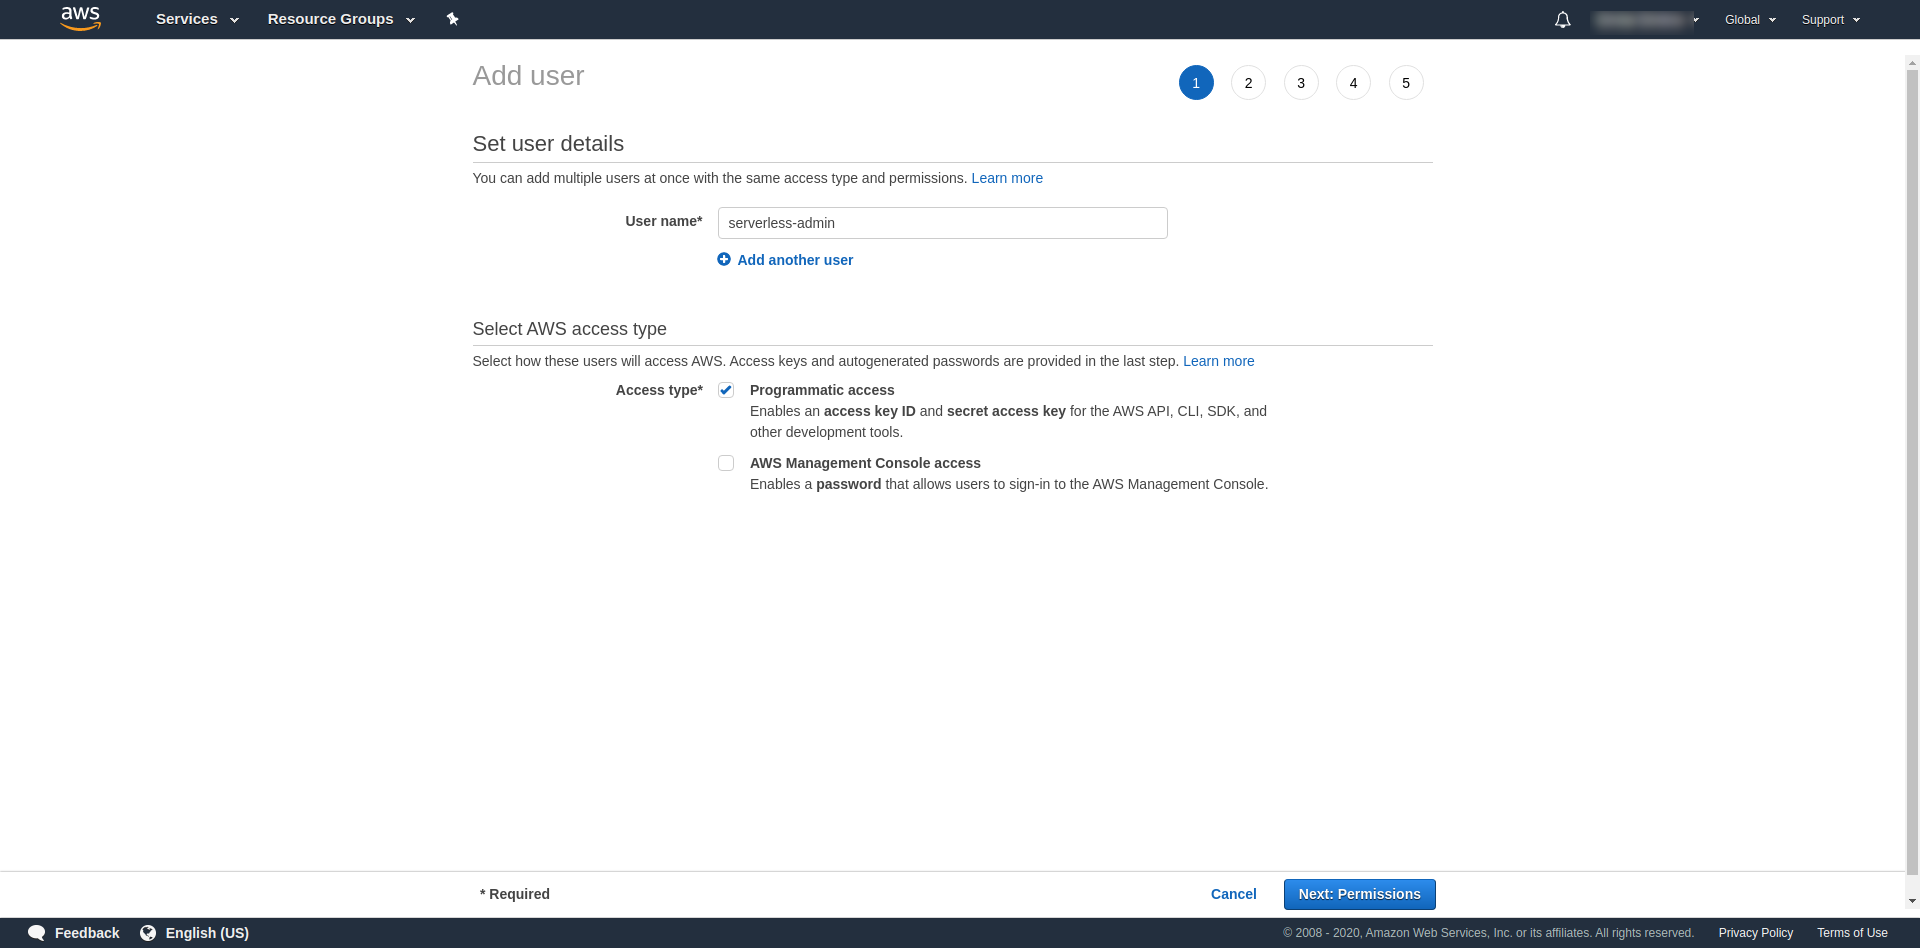
For “User name” use whatever you want. For example, we are using serverless-admin. For “Access type” check “Programmatic access” and click “Next permissions“.
After that, we have to attach permissions for the user, click on “Attach existing policies directly,” search for “Administrator Access” and click it. Proceed with clicking “Next tags”
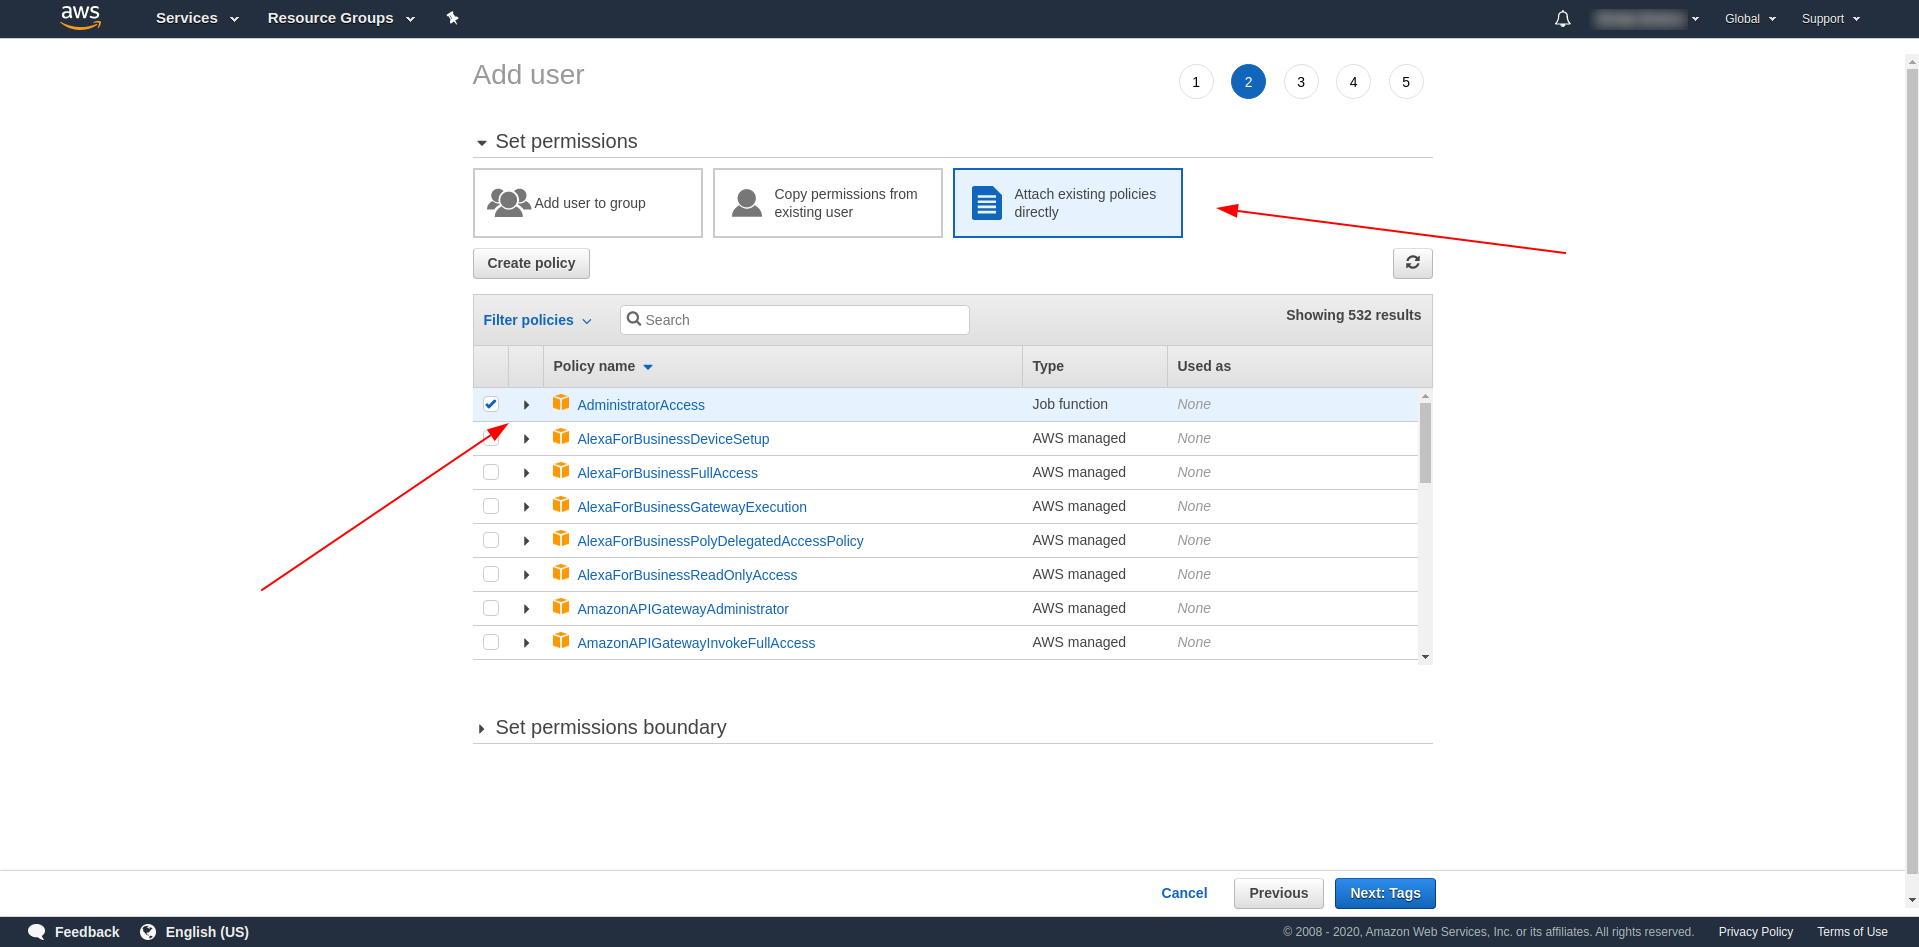
Tags are optional, so you can continue by clicking “Next review” and “Create user”. Once done and loaded, a success message shows up on the page with the credentials that we need.
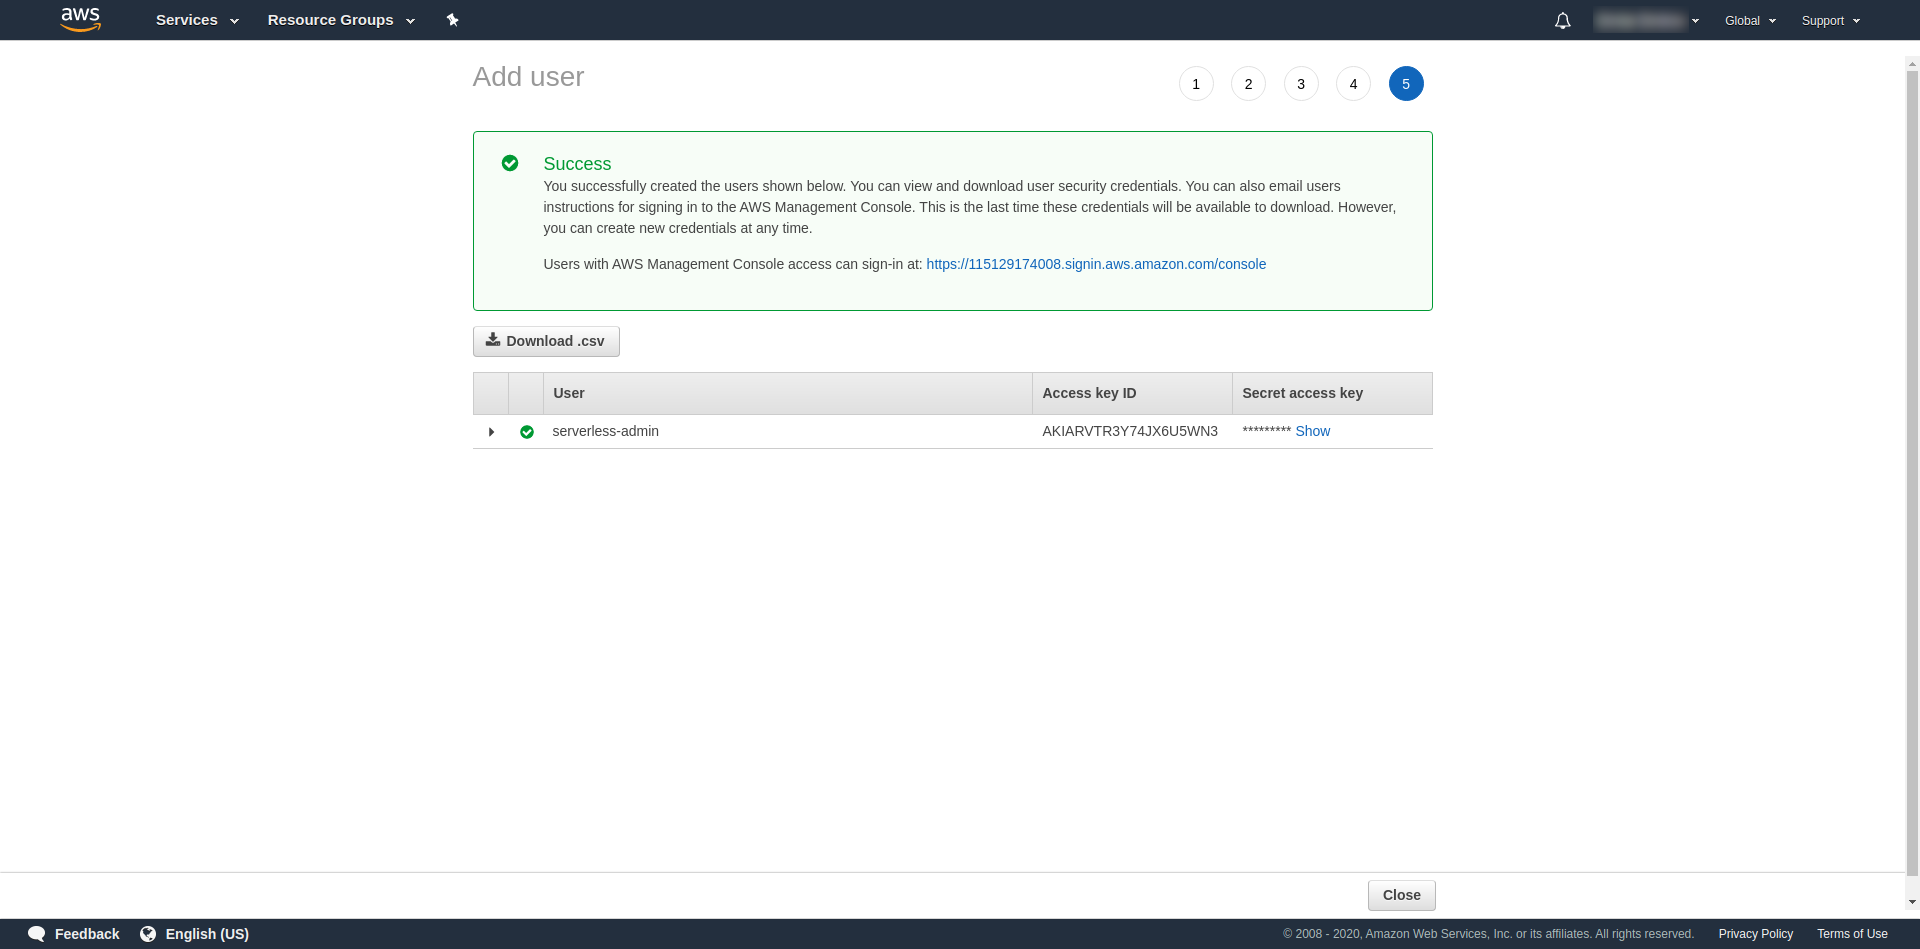
Now we have to run the following command:
serverless config credentials --provider aws --key key --secret secret --profile serverless-admin
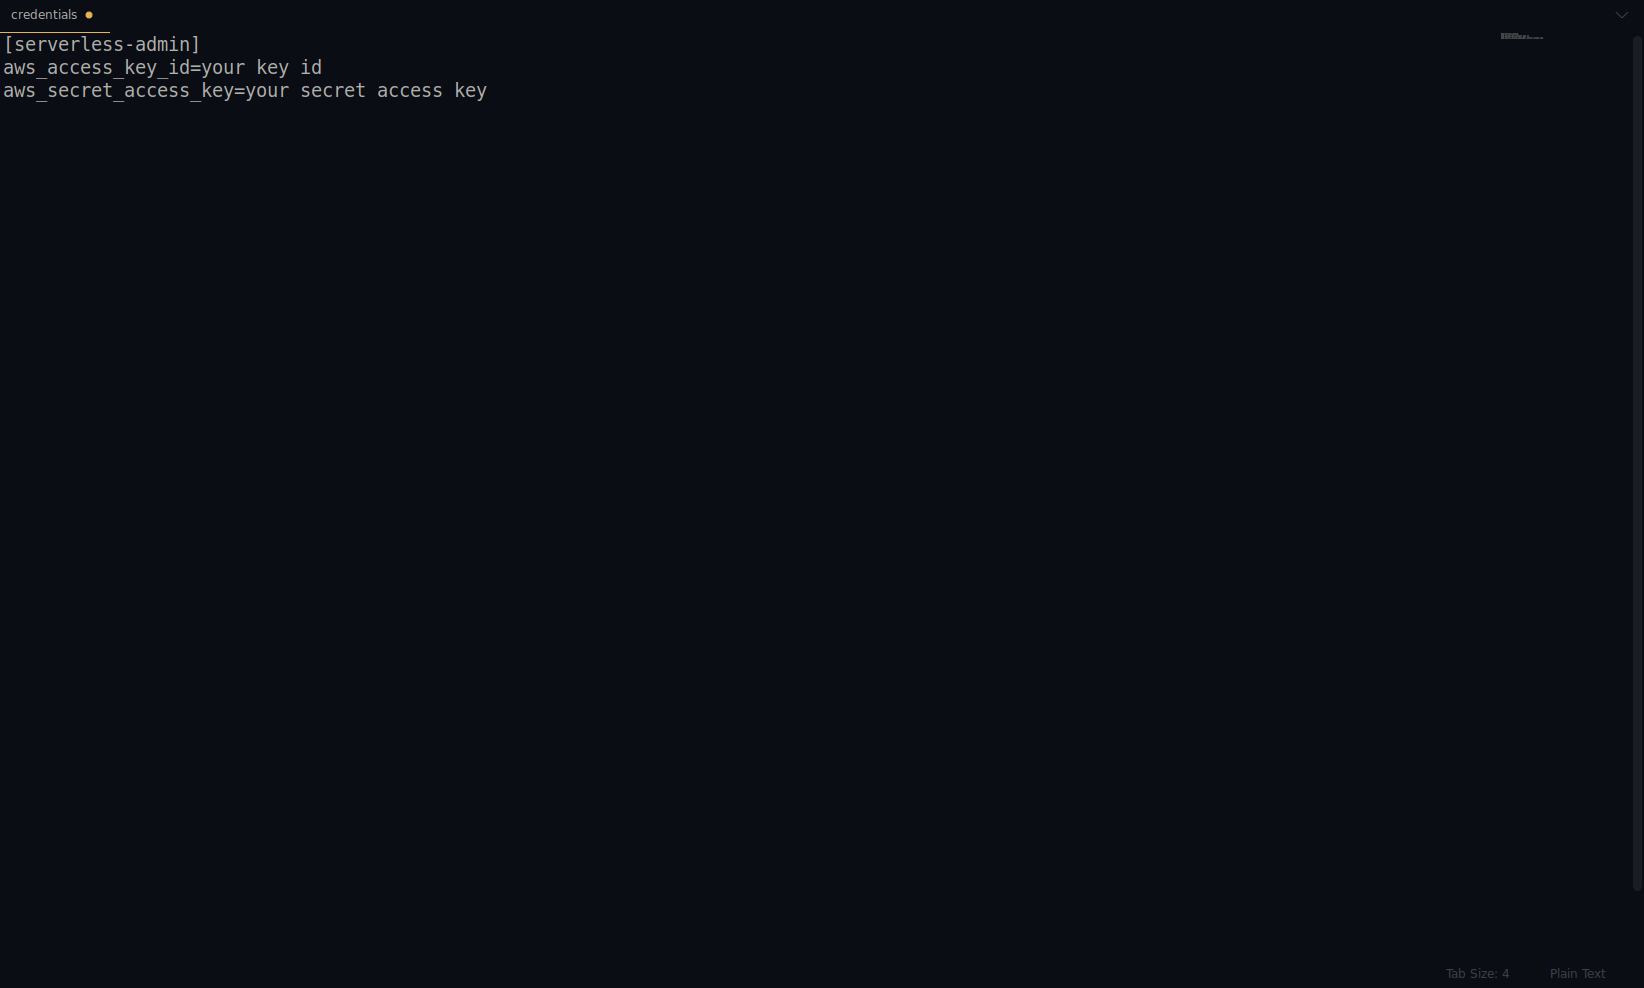
Replace key and secret with the one provided above. Your AWS credentials are created as a profile. You can double-check that by opening the ~/.aws/credentials file. It should consist of AWS profiles. Currently, in the example below, it is only one – the one we’ve created:
Great job so far! You can continue by creating one example application using NodeJS and the built-in start templates.
Note: Furthermore, in the article, we are using the sls command, which is short for serverless.
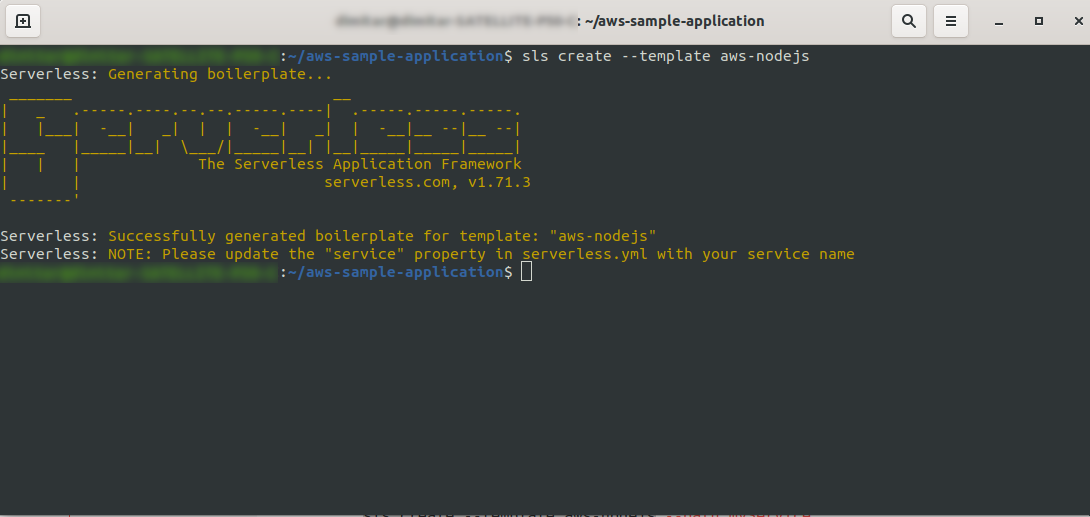
Create an empty directory and enter it. Run the command
ls create --template aws-nodejs
Using the create –template command specify one of the available templates, in this case, aws-nodejs, which is a NodeJS “Hello world” template application.
Once done, your directory should consist of the following, and looks like this:
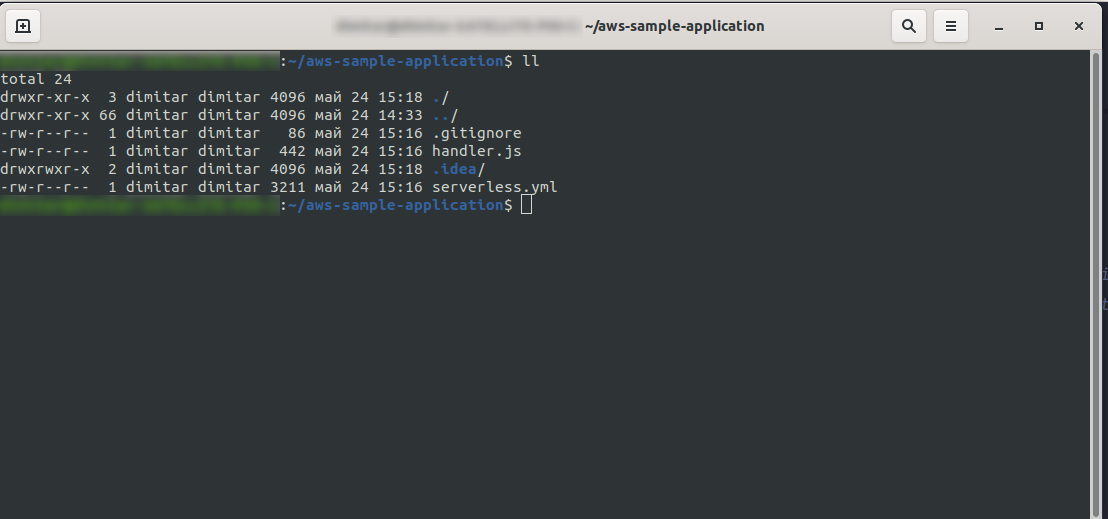
We have created the new files handler.js and serverless.yml.
The handler.js file stores your function(s), and serverless.yml stores the configuration properties that you will change later on. If you are wondering what the .yml file is, in short, it is a human-readable data serialization language. It is good to be familiar with it, as it is used when inserting any configuration parameters. But let’s take a look at what we have in serverless.yml file now:
service: aws-sample-application
provider:
  name: aws
  runtime: nodejs12.x
functions:
  hello:
    handler: handler.hello
- service: – Our service name.
- provider: – An object that contains provider properties, and as we see here, our provider is AWS, and we are using NodeJS runtime.
- functions: – It is an object that contains all functions that are deployable to Lambda. In this example, we have only one function named hello that points to handler.js hello function.
You have to do one crucial thing here before you proceed with deploying the application. Earlier, we set the credentials for AWS with a profile (we named it serverless-admin). Now all you have to do is tell the serverless config to use that profile and your region. Open serverless.yml and under the provider property right below runtime enter this:
profile: serverless-admin
region: us-east-2
In the end, we should have this:
provider:
  name: aws
  runtime: nodejs12.x
  profile: serverless-admin
  region: us-east-2
Note: To get the region, an easy way is to look up at the URL when you have logged in to the console: Example:
Now that we have the necessary information about our generated template. Let’s check how we can invoke the function locally and deploy it to AWS Lambda.
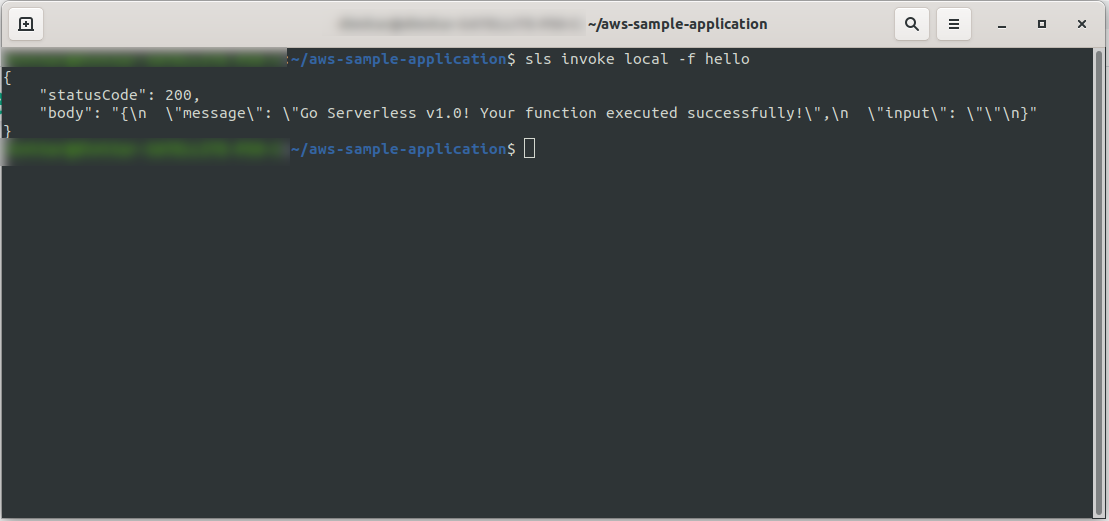
We can immediately test the application by invoking the function locally:
sls invoke local -f hello
It invokes the function (but only locally!), and returns the output to the console:
Now, if everything went OK, you can try to deploy your function to the AWS Lambda.
So, was that complicated? No, it wasn’t! Thanks to the Serverless Framework it is just a one-line code:
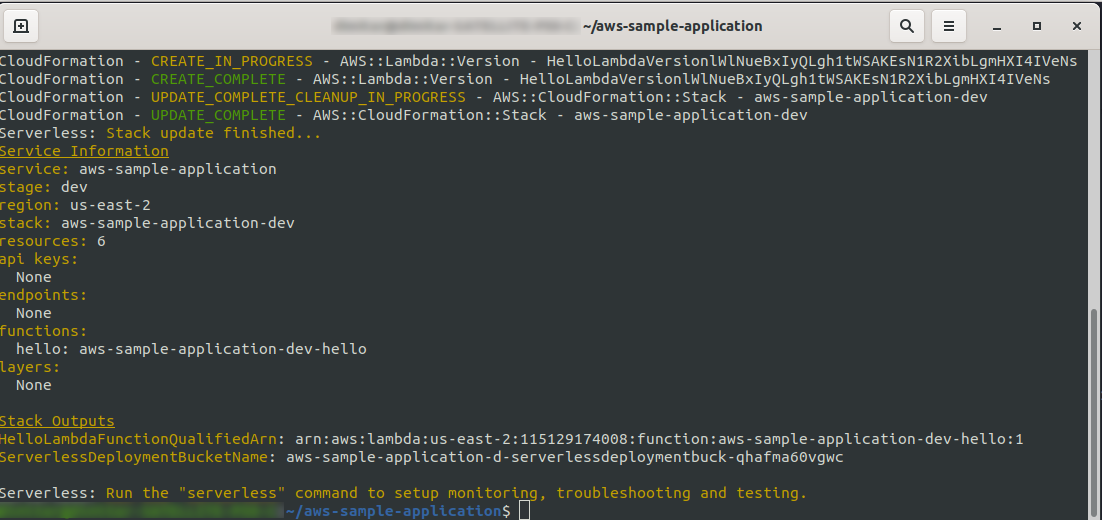
sls deploy -v
Wait for everything to finish, it may take a few minutes, if everything is OK you should end with something like this:
Now let’s check what happened in AWS. Go to Lambda (in “Find Services” type Lambda), and you should see your Lambda function created.

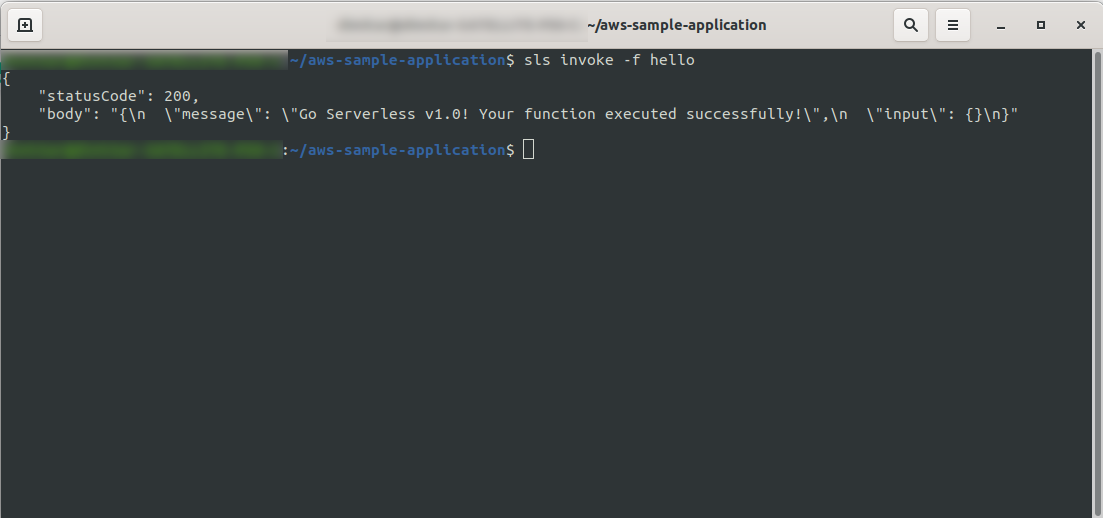
Now you can try to invoke your function from AWS Lambda. In the terminal type
sls invoke -f hello
It should return the same output as earlier (when we test locally):
You can check that you have triggered AWS’s function by opening the function in the AWS Lambda and going to the “Monitoring” tab and clicking “View logs in CloudWatch.“.
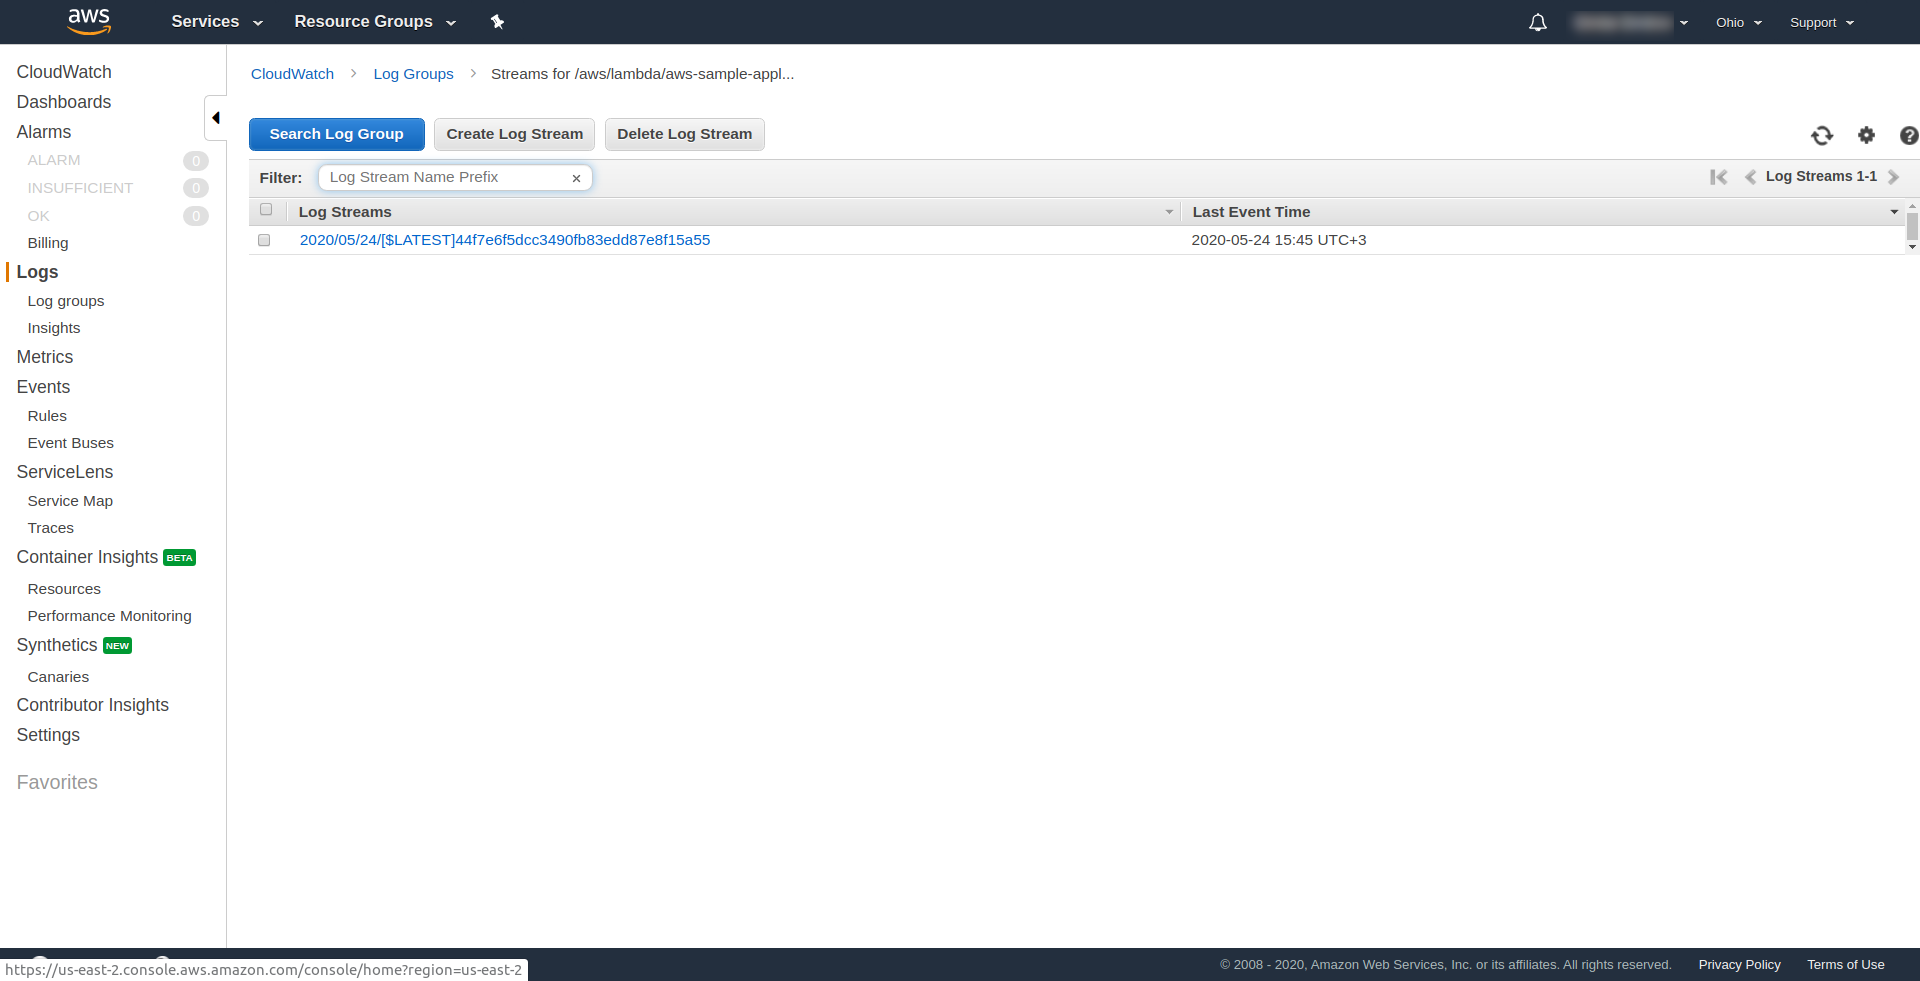
You should have one log there.
Now, one thing is still missing in your application, but what is it…? Well, you don’t have an endpoint to access for your app, so let’s create that using AWS API Gateway.
You have to open the serverless.yml file and clean out the comments first. You need to add an events property to our function and under its http property. That tells the Serverless framework to create an API Gateway and attach it to our Lambda function when deploying the app. Our config file should end in this:
service: aws-sample-application
provider:
  name: aws
  runtime: nodejs12.x
  profile: serverless-admin
  region: us-east-2
functions:
  hello:
    handler: handler.hello
    events:
      - http:
          path: /hello
          method: get
In http we specify the path and the HTTP method.
That’s it, let’s deploy our app again by running sls deploy -v
Once it’s finished, one new thing should appear in the output terminal, and that’s the endpoint that has been created:
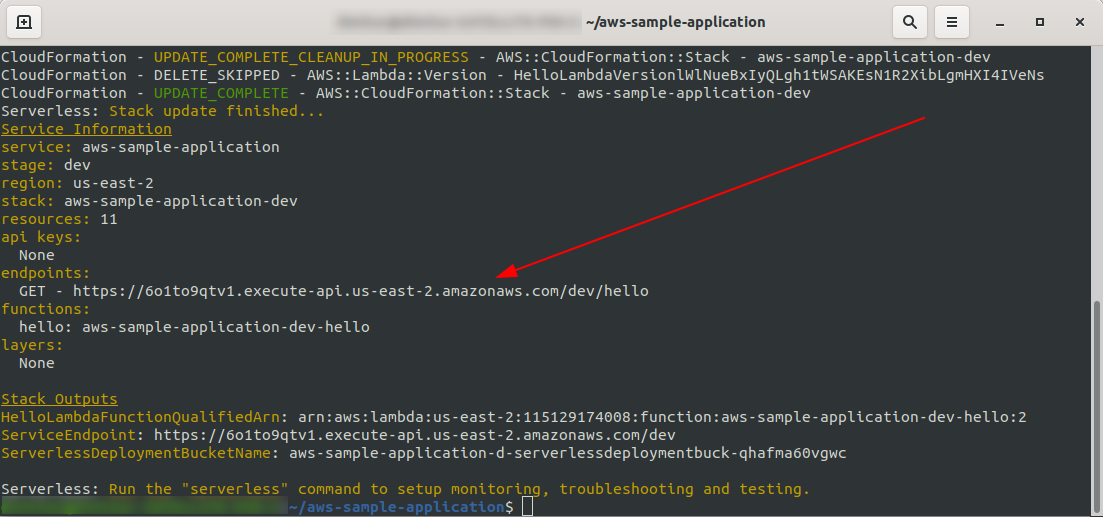
Let’s open the endpoint:
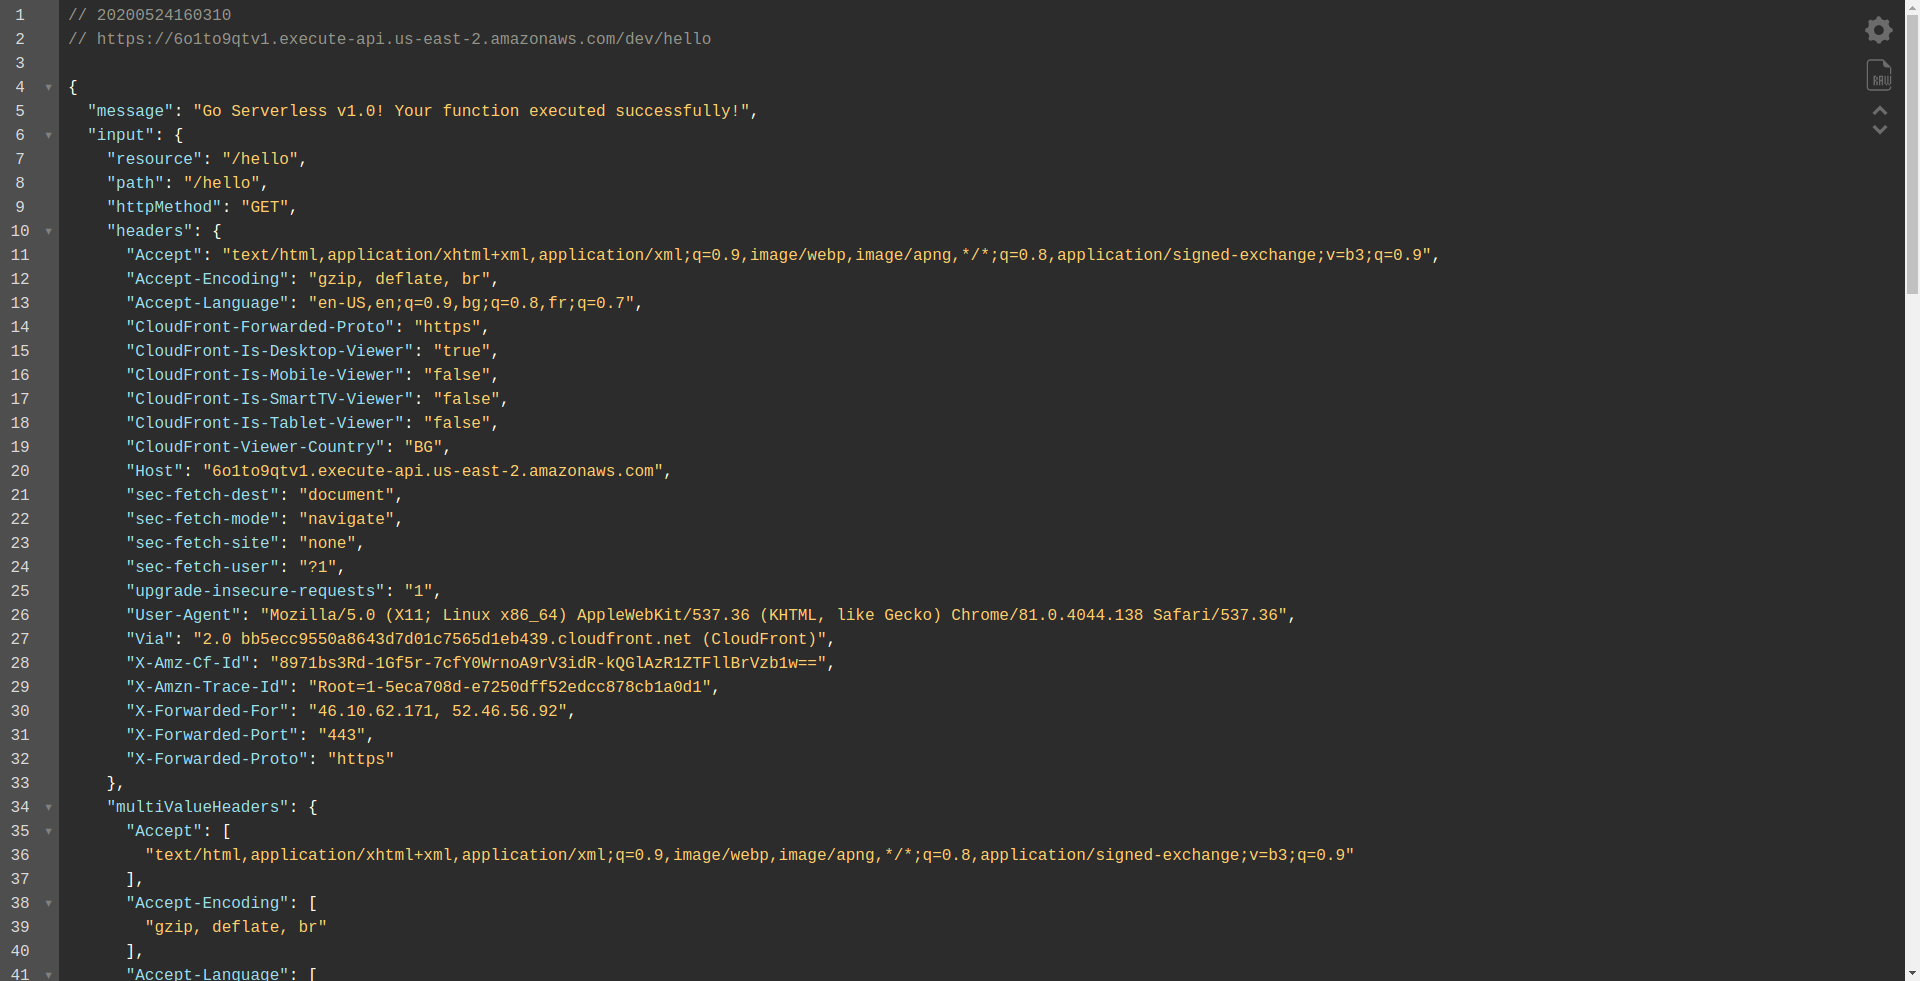
You should see that your function is executing, returning output, and some information about the request. Let’s check what is changing in our Lambda function.
Open AWS Lambda, and click on your function.
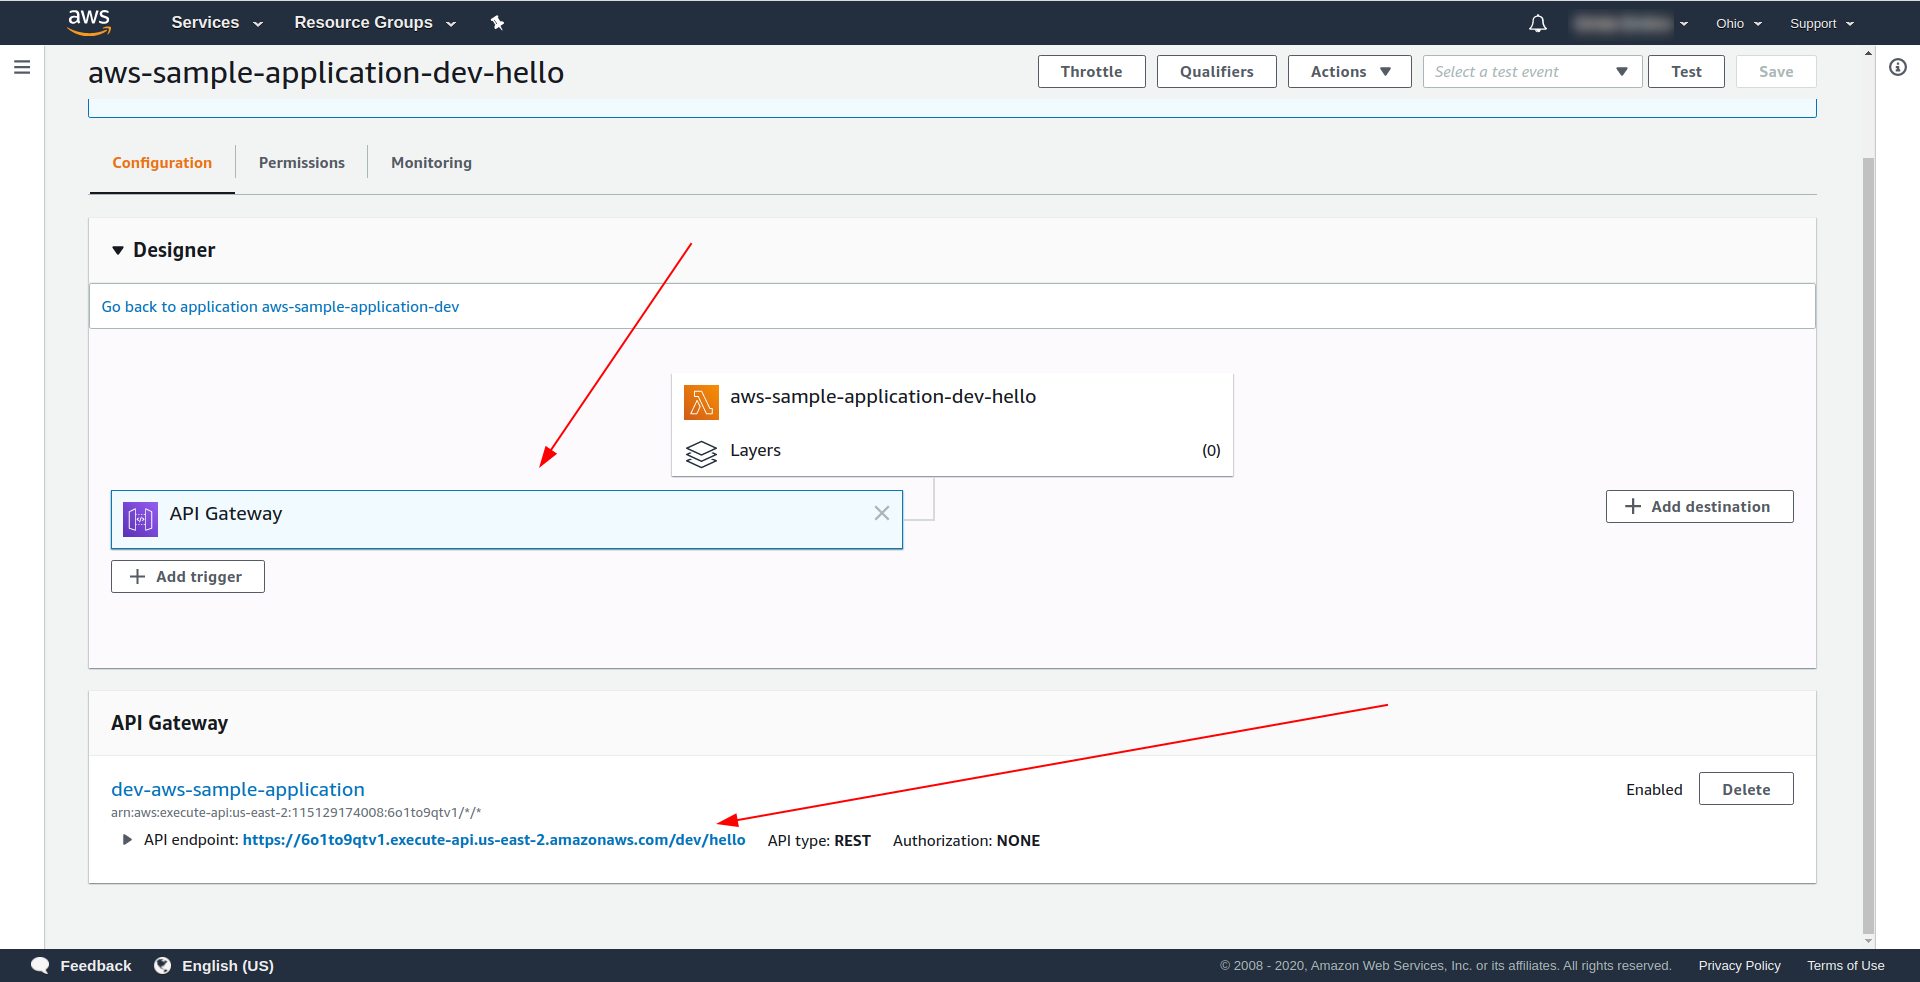
We see under the “Designer” tab that we have API Gateway attached to our Lambda and the API Endpoint.
Great! You have created a super simple serverless application, deployed it to AWS Lambda, and tested its functionality. Also, we have added an endpoint using the AWS API Gateway.
4. How to Run the Application Offline
So far, we know that we can invoke functions locally, but also, we can run our entire application offline using the serverless-offline plugin.
The plugin emulates AWS Lambda and API Gateway on your local/development machine. It starts an HTTP server that handles the requests and invokes your handlers.
To install the plugin run the command below in the app directory
npm install serverless-offline --save-dev
Then inside the project’s serverless.yml open the file and add the plugins property:
plugins:
  - serverless-offline
The config should look like this:
service: aws-sample-application
provider:
  name: aws
  runtime: nodejs12.x
  profile: serverless-admin
  region: us-east-2
functions:
  hello:
    handler: handler.hello
    events:
      - http:
          path: /hello
          method: get
plugins:
  - serverless-offline
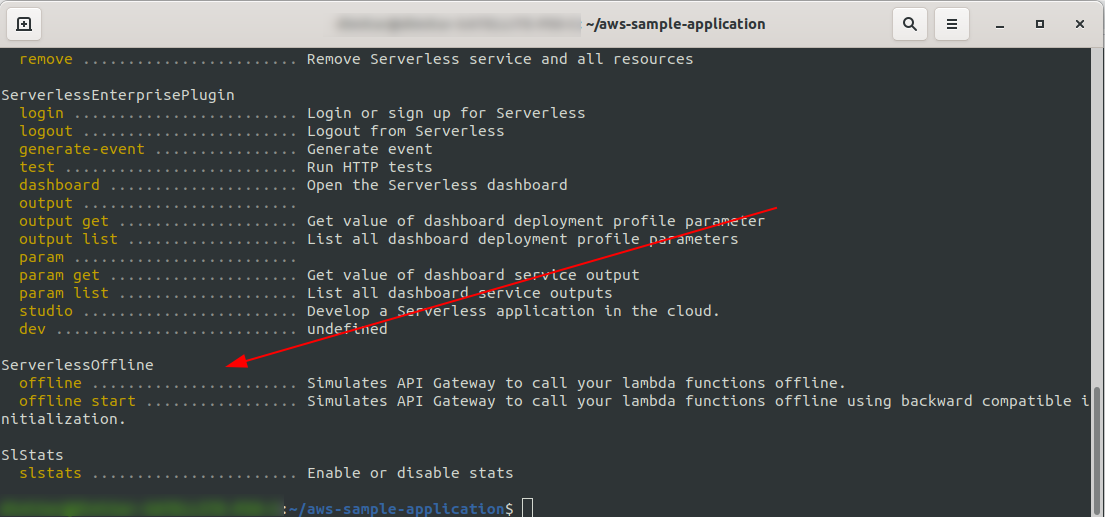
To check that we have successfully installed and configured the plugin run
sls --verbose
You should see this:
Now in your project’s root, run the command
sls offline
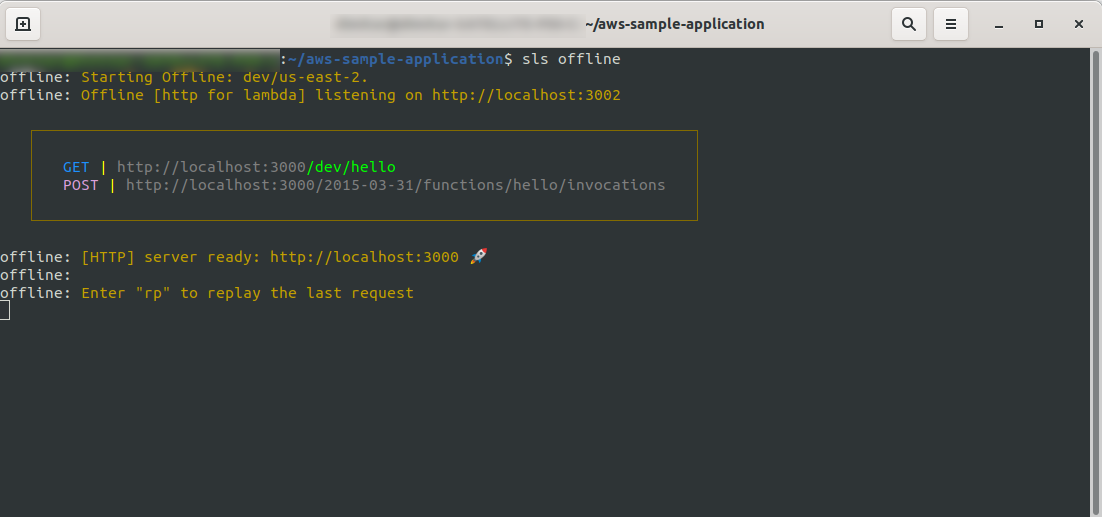
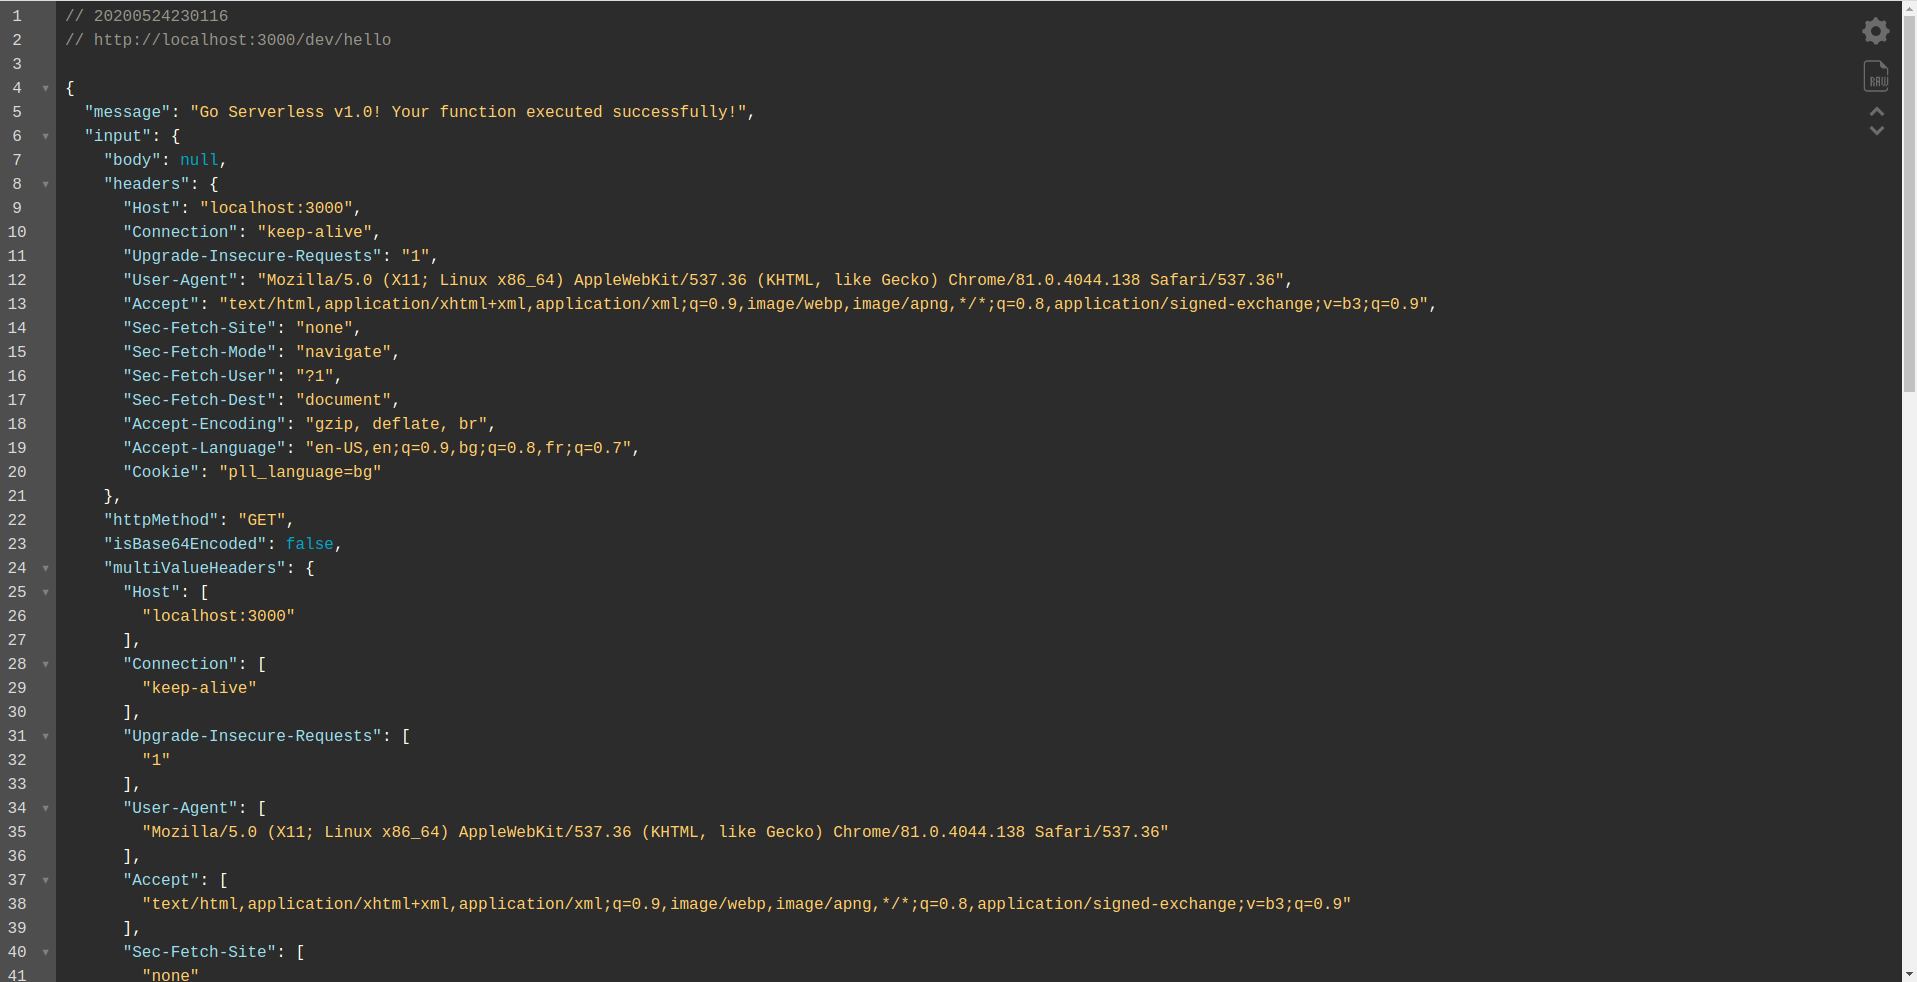
As you can see, an HTTP server is listening on port 3000, and you can access your functions, for example, here we have http://localhost:3000/dev/hello for our hello function. Opening that we have the same response as from the API Gateway, which we created earlier.
Add Google BigQuery Integration

You’ve done a great job so far! You have a fully working application using Serverless. Let’s extend our app and add BigQuery integration to it to see how it is working and how the integration is done.
BigQuery is a serverless Software as a Service (SaaS), that is a cost-effective and fast data warehouse that supports querying. Before we continue integrating it with our NodeJS app, we have to create an account, so let’s proceed.
1. Set Up Google Cloud Console
Go to https://cloud.google.com and login with your account, if you haven’t already – create an account and proceed.
When you log in to Google Cloud Console, you have to create a new project. Click on the three dots next to the logo and it will open a modal window where you choose “New project.”
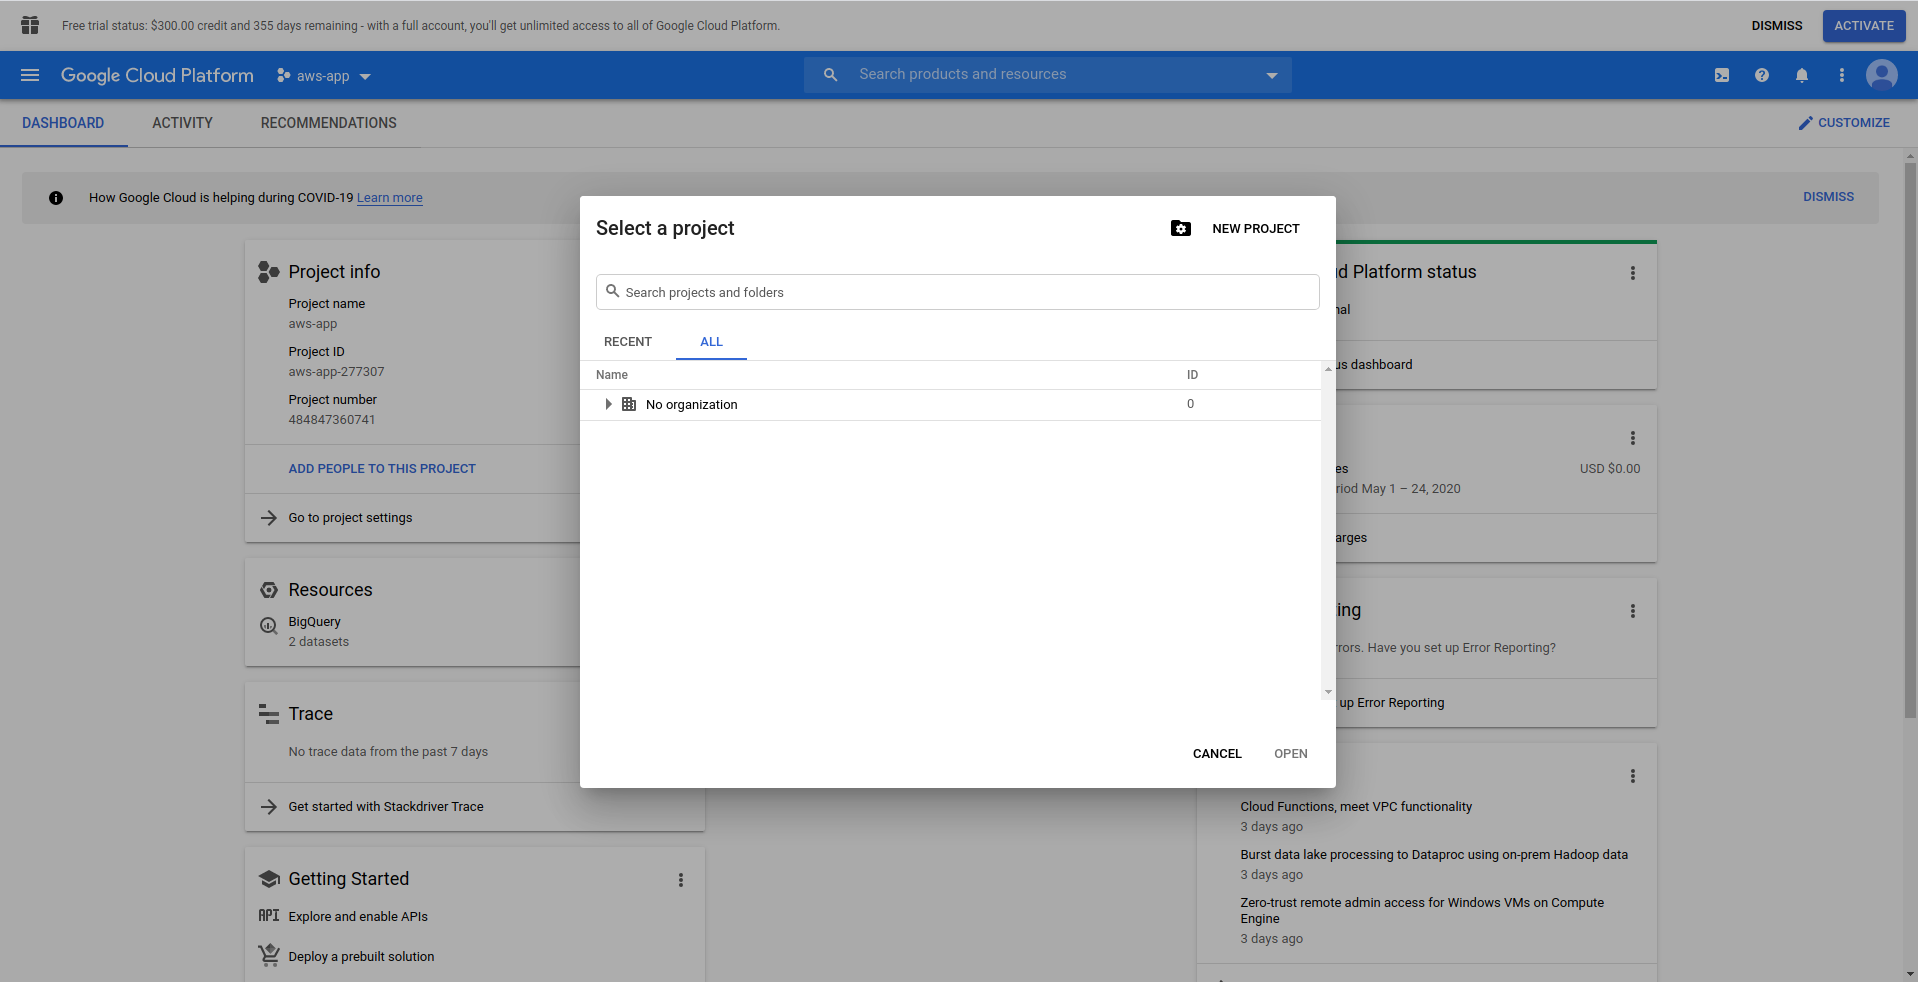
Enter a name for your project. We will use bigquery-example. Once you have created the project, navigate to BigQuery using the drawer:
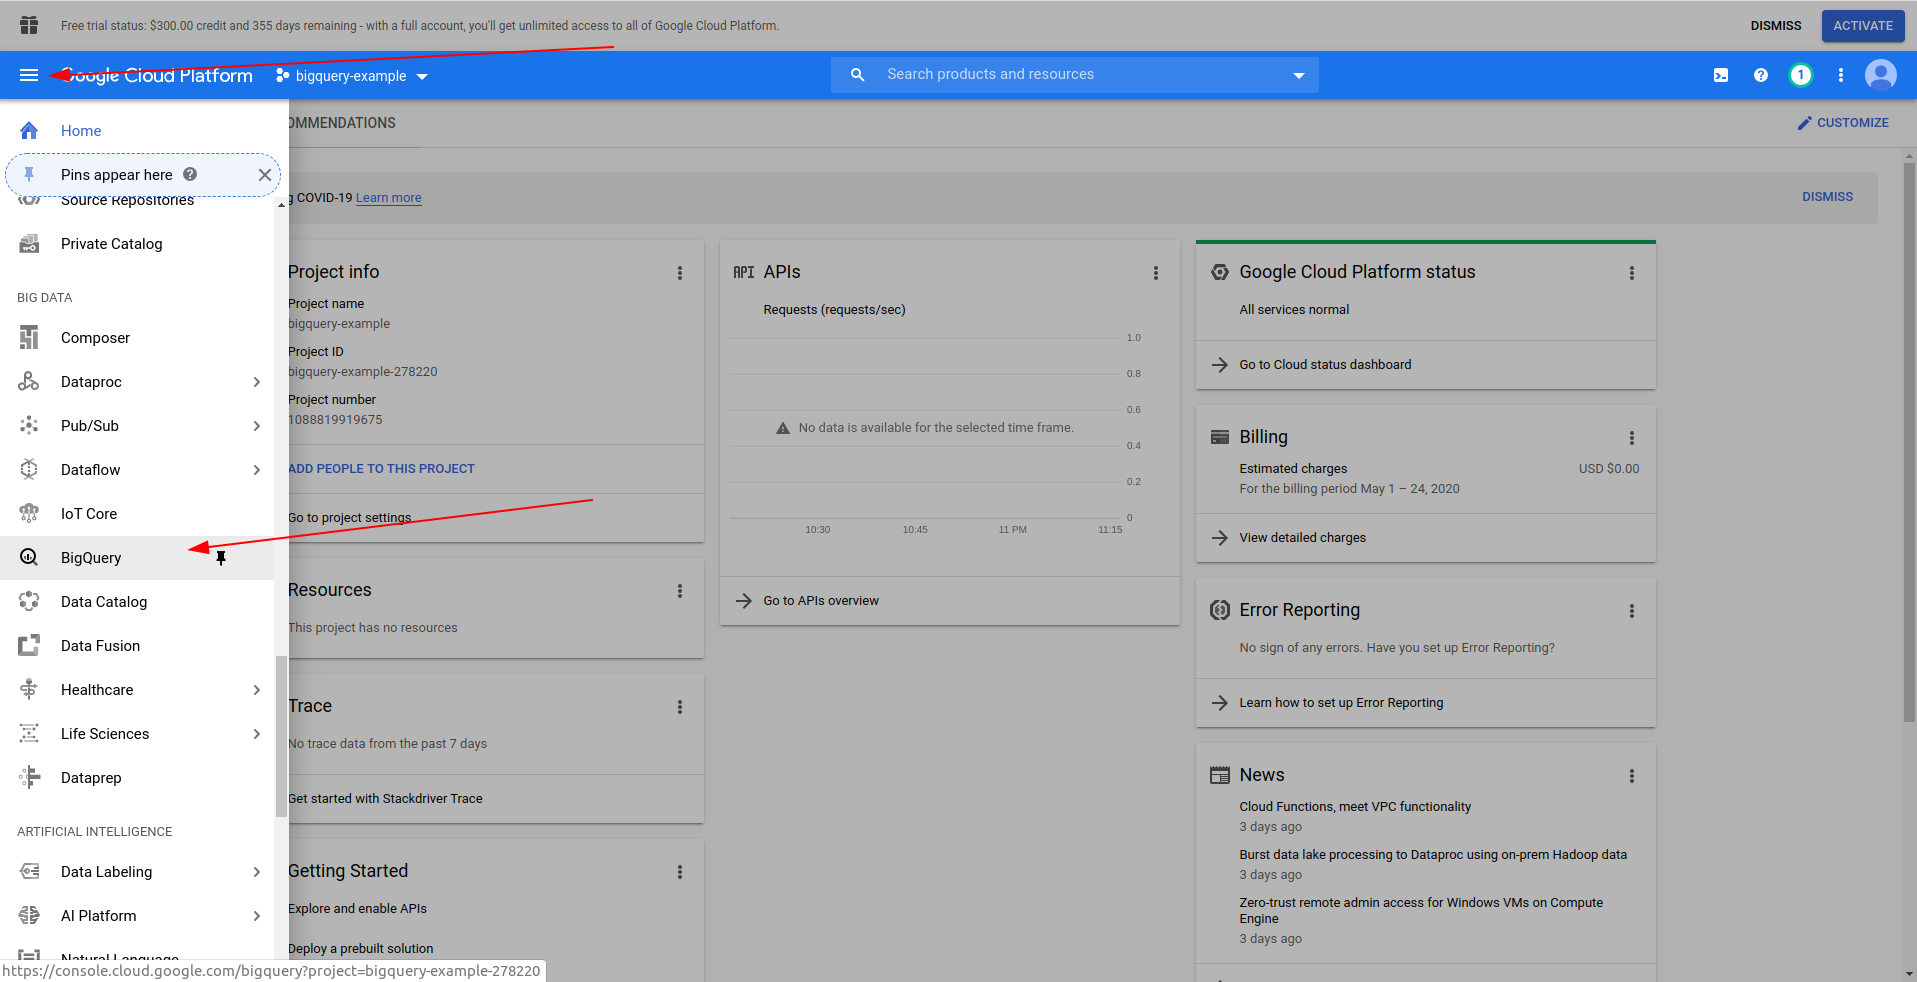
When the BigQuery loads, on the left side, you will see the project’s data, which you have access to, and also the public datasets. We are using a public data set for this example. It is named covid19_ecdc:
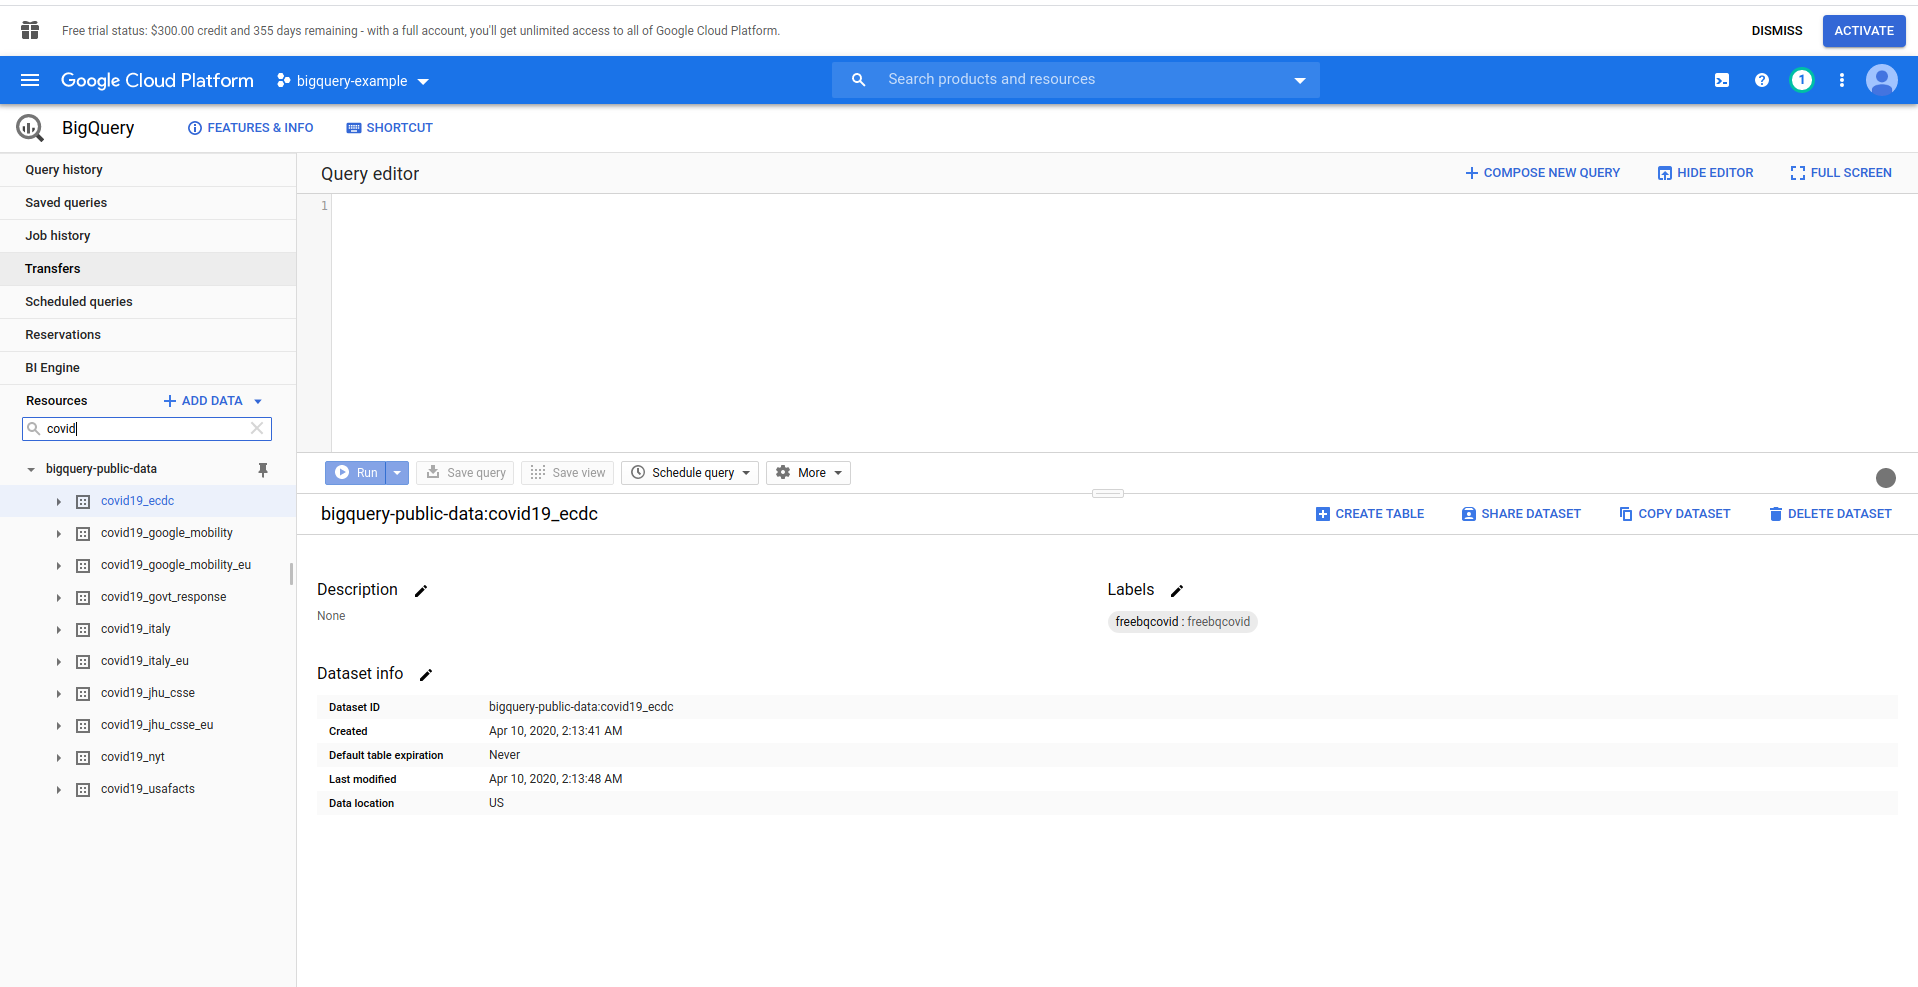
Play around the dataset and available tables. Preview the data in it. That is a public dataset that is updated hourly and contains information about COVID-19 worldwide data.
We have to create an IAM user -> Service account to be able to access the data. So, in the menu, click “IAM & Admin,” then “Service Accounts.”

Click on the “Create service account” button, enter the service account name and click “Create.” Next, go to “Service account permissions”, search for and choose, “BigQuery Admin”.
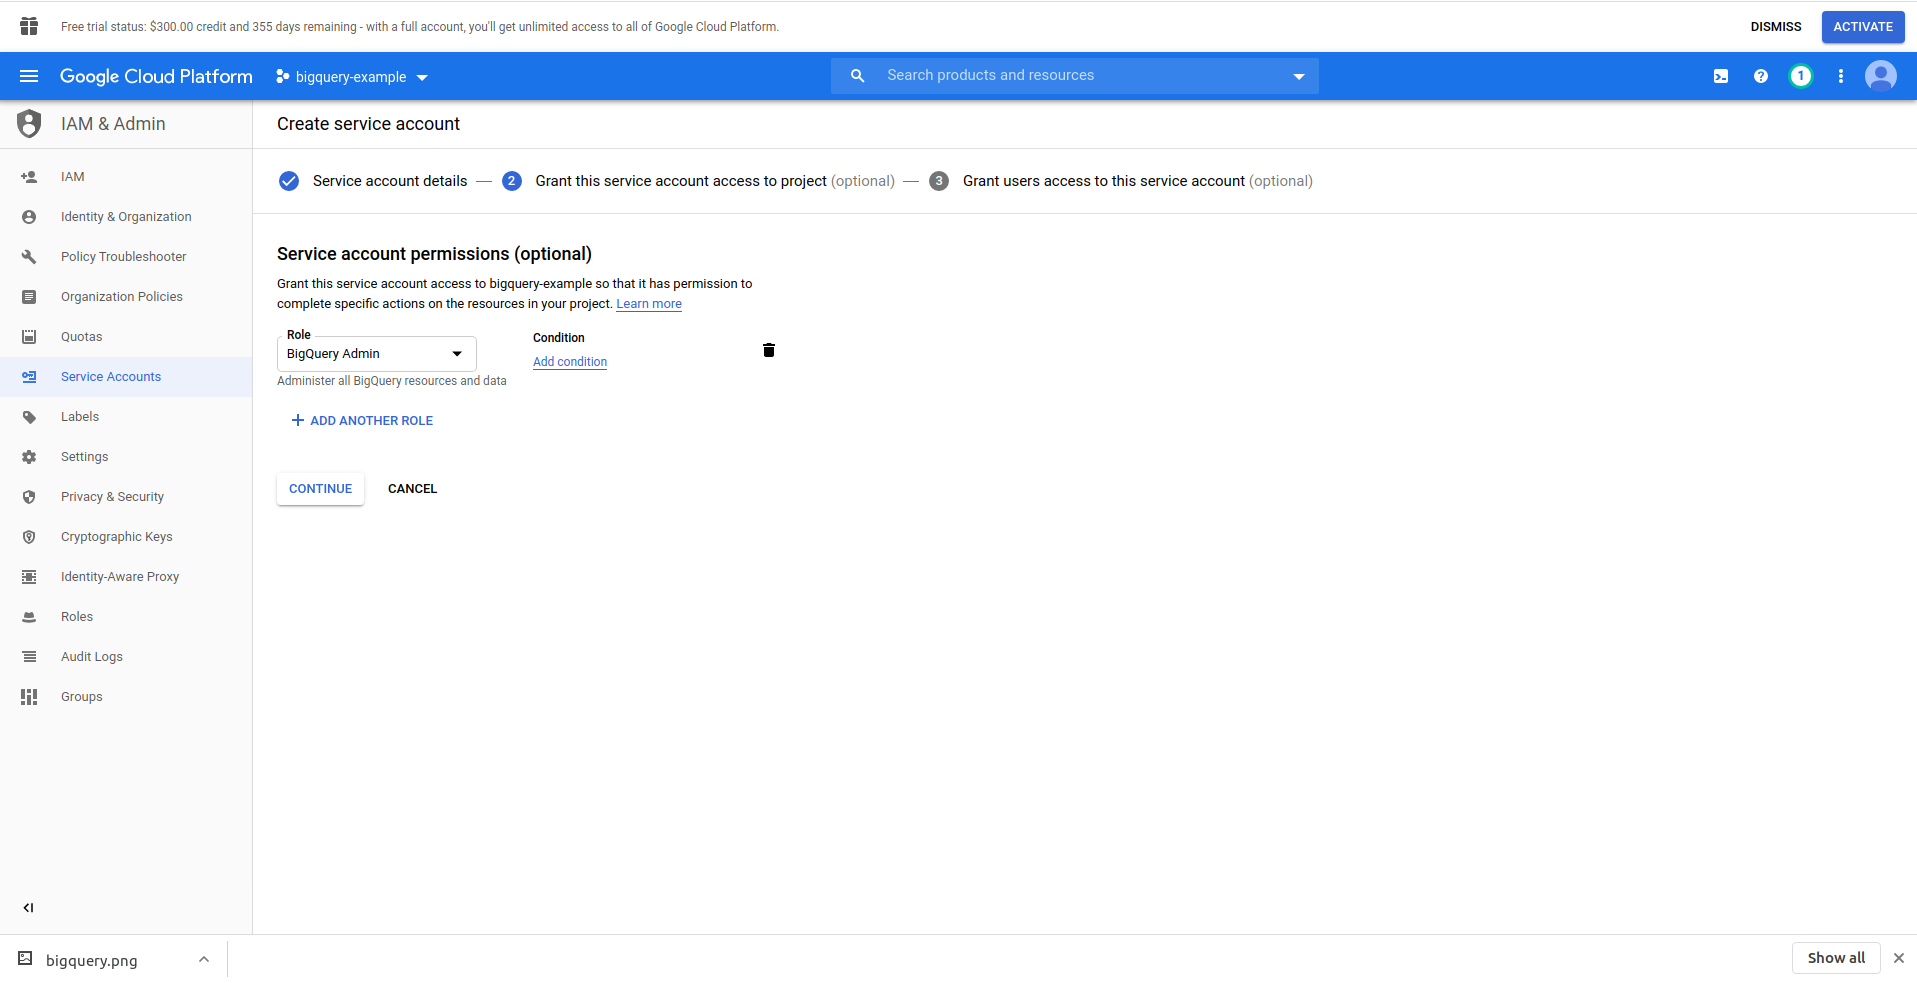
Click “Continue,” this is the last step, here you need your keys, so click the creation button under “Keys” and export as JSON. Save this somewhere securely, we’ll need it later on. Click Done to finish the service account creation.
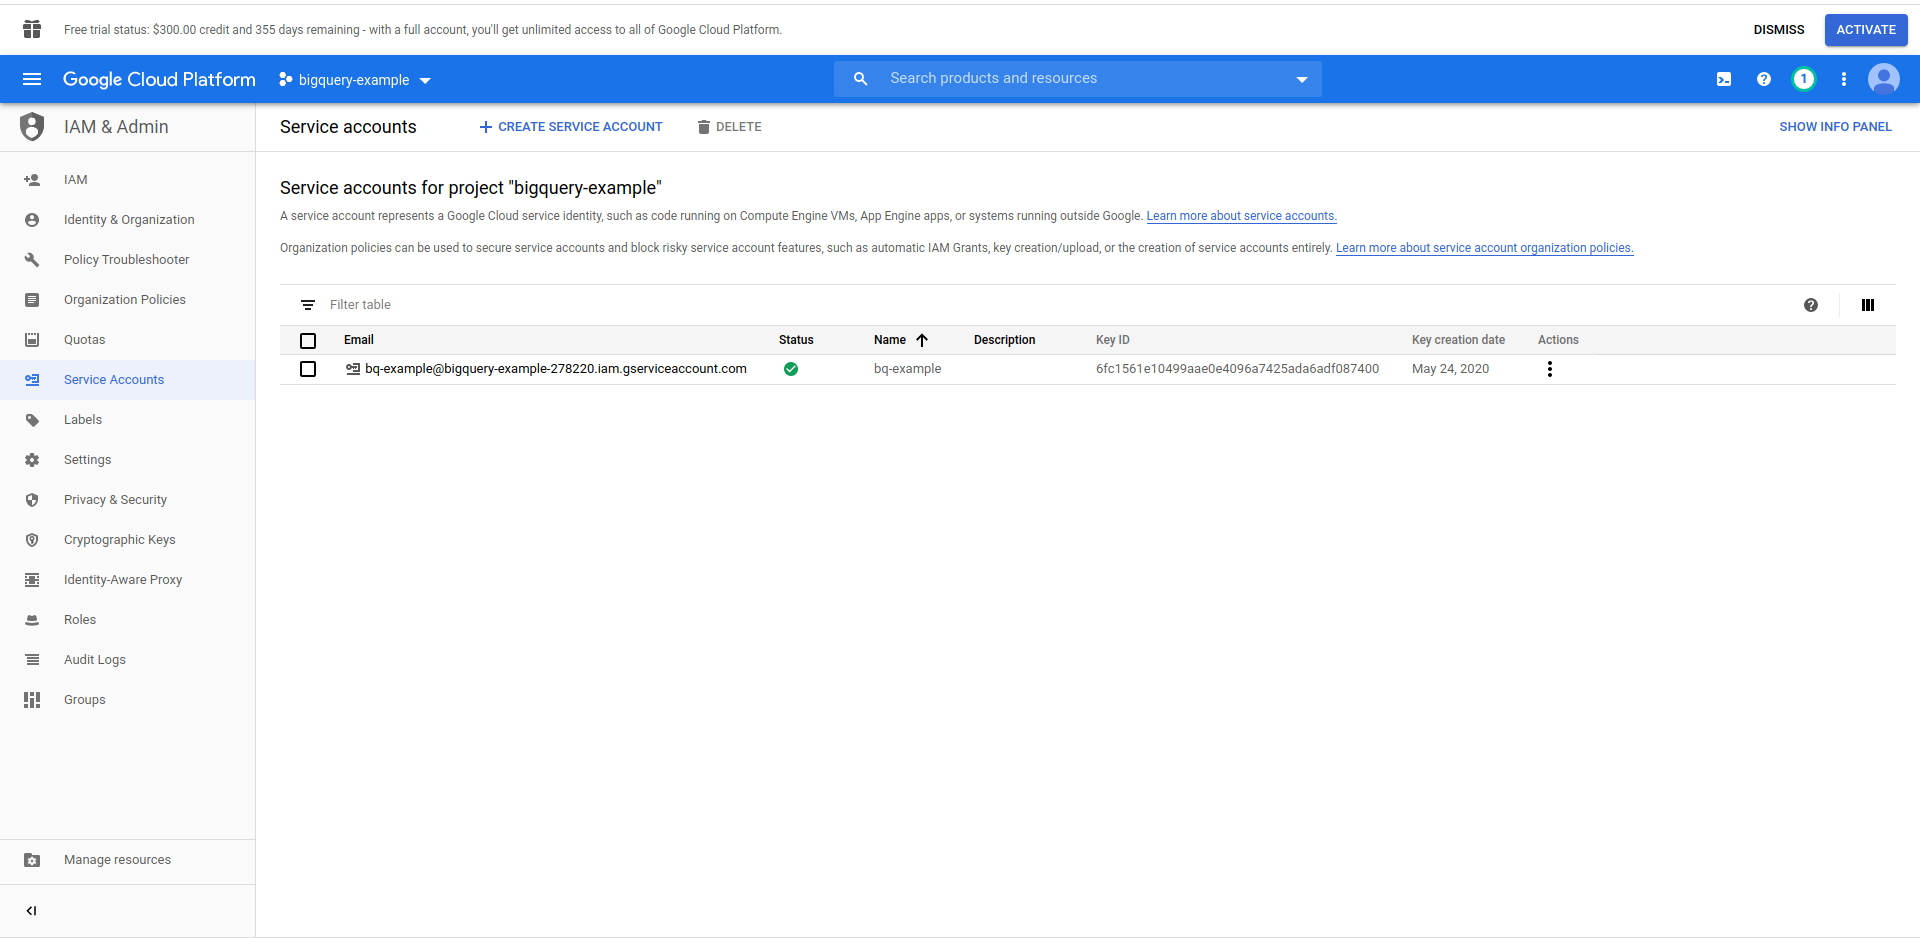
Now, we will use the credentials generated here to connect the NodeJS BigQuery library.
2. Install NodeJS BigQuery Library
You’ll need to install the BigQuery NodeJS library to use it in the project you have just created. Run the commands below in the app directory:
First, initialize npm by running npm init
Fill all the questions and proceed with installing the BigQuery library:
npm install @google-cloud/bigquery
Before we continue to change our function handler, we have to carry the private key from the JSON file that we have previously created. We are going to be using Serverless environment variables to do this. You can obtain more information here.
Open serverless.yml, and in provider property add environment property like this:
environment:
PROJECT_ID: ${file(./config/bigquery-config.json):project_id}
CLIENT_EMAIL: ${file(./config/bigquery-config.json):client_email}
PRIVATE_KEY: ${file(./config/bigquery-config.json):private_key}
Create PROJECT_ID, PRIVATE_KEY, and CLIENT_EMAIL environment variables, which takes the same properties (lower case) from the JSON file we have generated. We’ve placed it in the config folder and named it bigquery-config.json.
Right now, you should end up with the serverless.yml file looking like this:
service: aws-sample-application
provider:
  name: aws
  runtime: nodejs12.x
  profile: serverless-admin
  region: us-east-2
  environment:
    PROJECT_ID: ${file(./config/bigquery-config.json):project_id}
    CLIENT_EMAIL: ${file(./config/bigquery-config.json):client_email}
    PRIVATE_KEY: ${file(./config/bigquery-config.json):private_key}
functions:
  hello:
    handler: handler.hello
    events:
      - http:
          path: /hello
          method: get
plugins:
  - serverless-offline
Now open handler.js and lets import BigQuery library, at the top of the file under ‘use strict’ add the following line:
const {BigQuery} = require('@google-cloud/bigquery');
Now we have to tell the BigQuery library the credentials. For this purpose, create a new constant which is instantiating BigQuery with the credentials:
const bigQueryClient = new BigQuery({
    projectId: process.env.PROJECT_ID,
    credentials: {
        client_email: process.env.CLIENT_EMAIL,
        private_key: process.env.PRIVATE_KEY
    }
});
Next, let’s create our BigQuery SQL query. We want to retrieve the latest information about COVID-19 cases for Bulgaria. We are using the BigQuery query editor to test it out before we proceed, so we’ve created a custom query:
SELECT * FROM `bigquery-public-data.covid19_ecdc.covid_19_geographic_distribution_worldwide` WHERE geo_id = 'BG' ORDER BY date DESC LIMIT 1
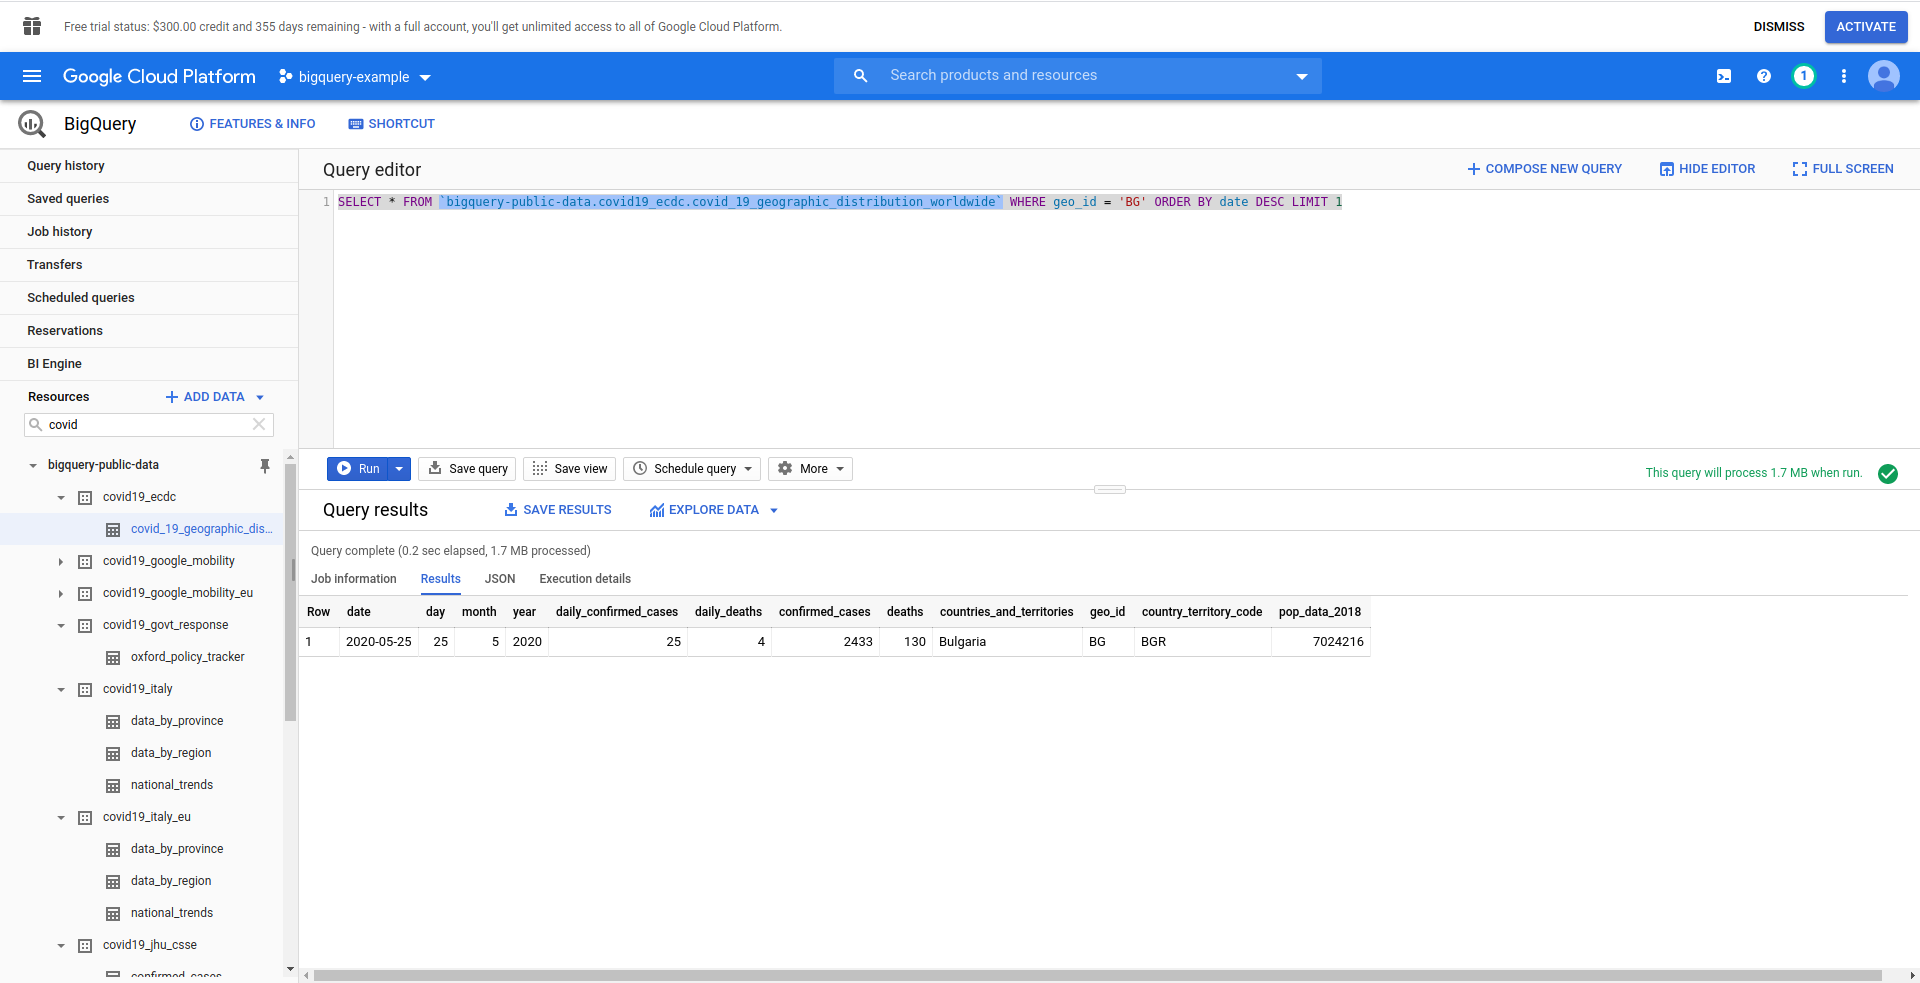
Good! Now let’s implement that in our NodeJS app.
Open handler.js and paste the code below
const query = 'SELECT * FROM `bigquery-public-data.covid19_ecdc.covid_19_geographic_distribution_worldwide` WHERE geo_id = \'BG\' ORDER BY date DESC LIMIT 1';
const options = {
    query: query
}

const [job] = await bigQueryClient.createQueryJob(options);
const [rows] = await job.getQueryResults();
We’ve created query and options constants. Then we proceed with running the query as a job and retrieving the results from that.
Let’s also change our return handler to return the generated rows from the query:
return {
    statusCode: 200,
    body: JSON.stringify(
        {
            rows
        },
        null,
        2
    ),
};
Let’s see the full handler.js:
'use strict';

const {BigQuery} = require('@google-cloud/bigquery');
const bigQueryClient = new BigQuery({
    projectId: process.env.PROJECT_ID,
    credentials: {
        client_email: process.env.CLIENT_EMAIL,
        private_key: process.env.PRIVATE_KEY
    }
});

module.exports.hello = async event => {
    const query = 'SELECT * FROM `bigquery-public-data.covid19_ecdc.covid_19_geographic_distribution_worldwide` WHERE geo_id = \'BG\' ORDER BY date DESC LIMIT 1';
    const options = {
        query: query
    }

    const [job] = await bigQueryClient.createQueryJob(options);
    const [rows] = await job.getQueryResults();

    return {
        statusCode: 200,
        body: JSON.stringify(
            {
                rows
            },
            null,
            2
        ),
    };
};
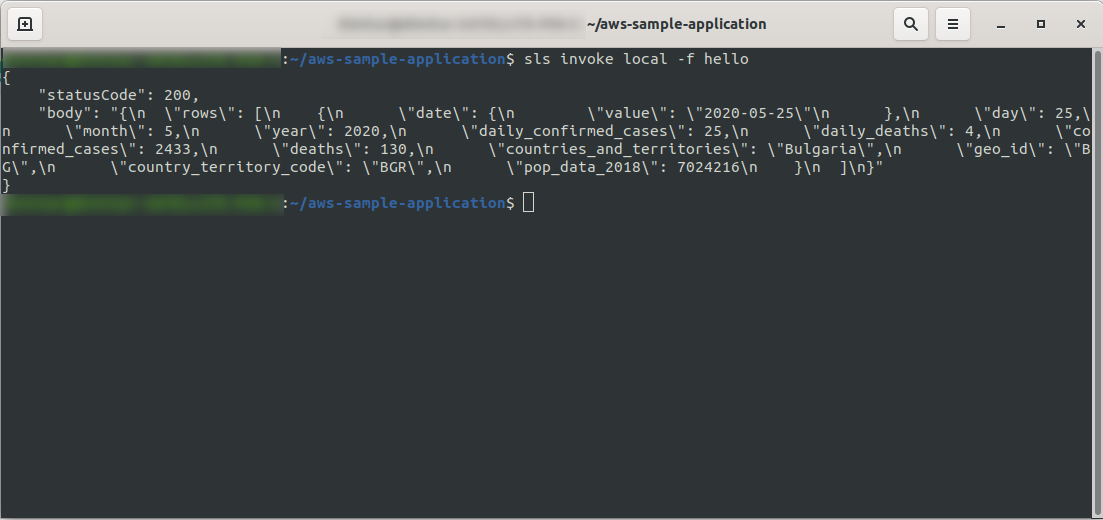
Okay! Let’s test our function locally:
sls invoke local -f hello
We should see the output:
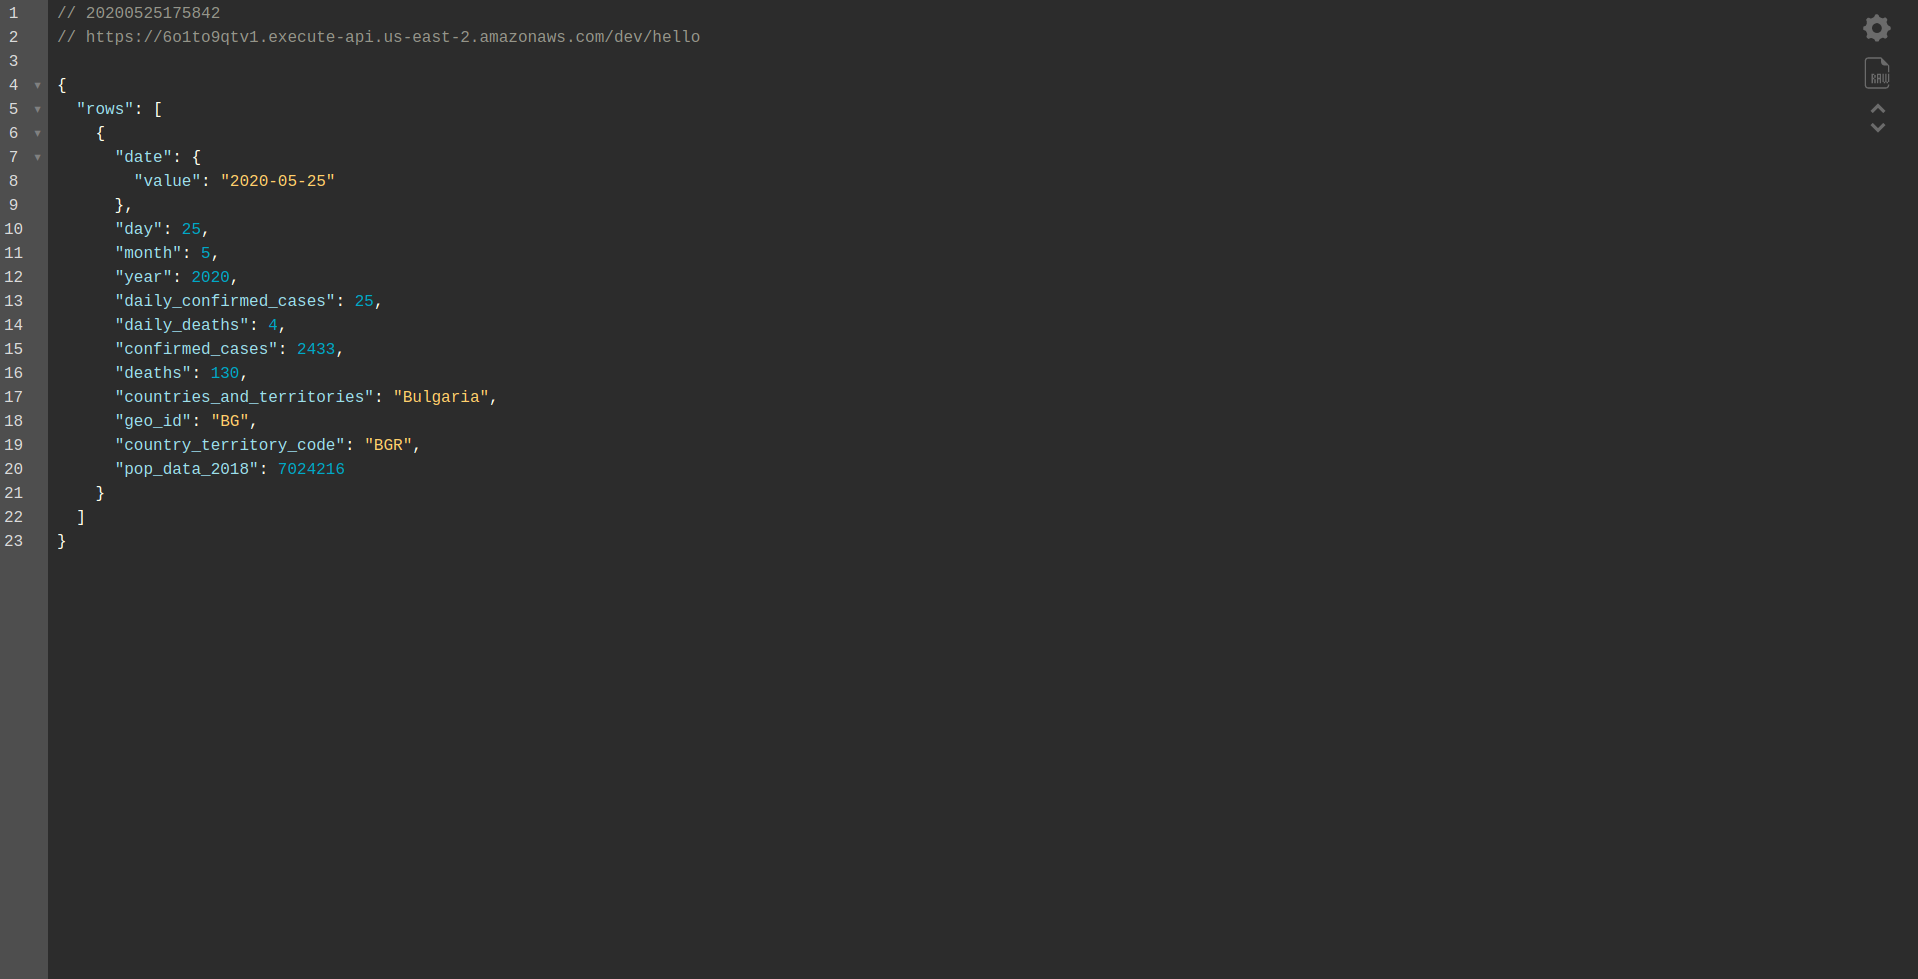
Proceed with deploying the application to test it via HTTP Endpoints so run sls deploy -v
Wait for it to finish and open the endpoint. Here are the results:
Well done! We now have an application to retrieve data from BigQuery and return a response! Let’s finally check that it is working offline. Run sls offline
And load the local endpoint:
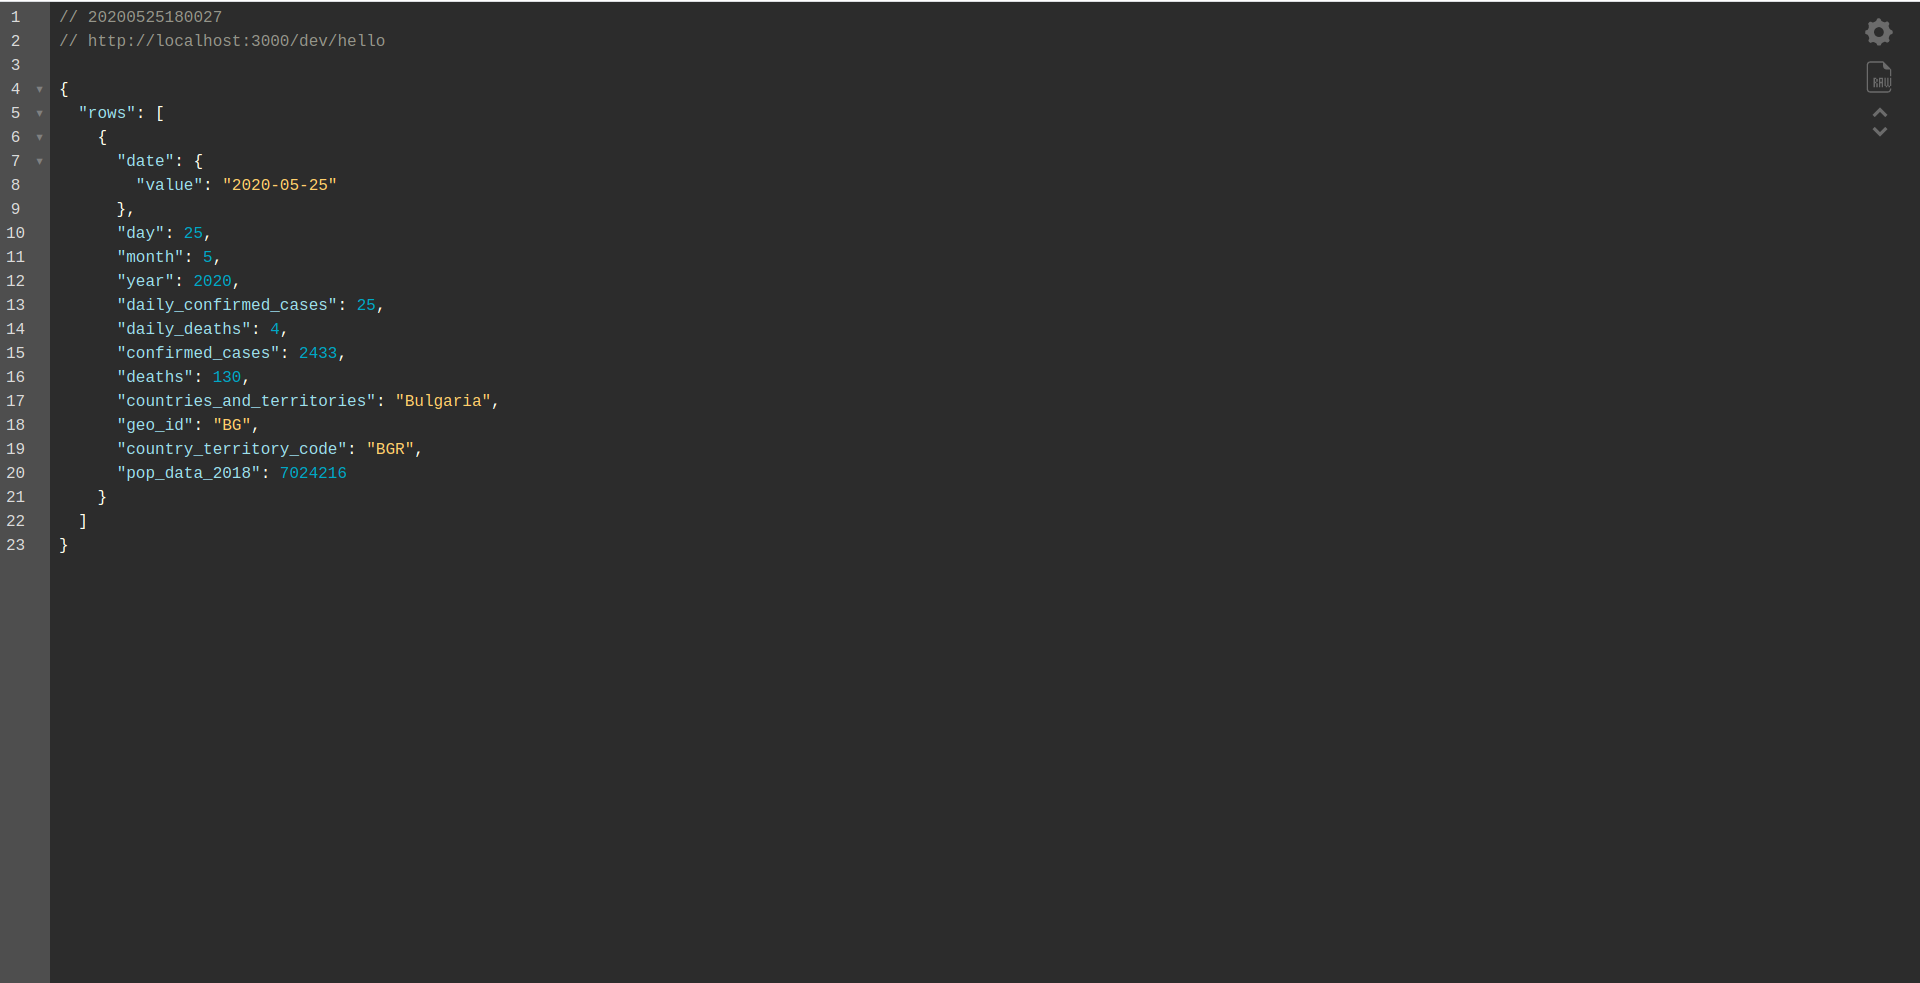
Well done job. We are almost at the end of the process. The last step is to change the app and the behavior slightly. Instead of AWS API Gateway, we want to use the Application Load Balancer. Let’s see how to achieve that in the next chapter.
ALB – Application Load Balancer in AWS
We have created our application using the AWS API Gateway. In this chapter, we will be covering how to replace the API Gateway with Application Load Balancer (ALB).
First, let’s see how the application load balancer works compared to the API Gateway:
In application load balancer, we map a specific path(s) (e.g.,/hello/) to a target group – a group of resources, in our case, the Lambda function.
A target group can have only one Lambda function associated with it. Whenever the target group needs to respond, the application load balancer sends a request to Lambda, and the function has to respond with a response object. Like the API Gateway, the ALB handles all the HTTP(s) requests.
There are some differences between the ALB and the API Gateway. One main difference is that the API Gateway supports only HTTPS (SSL), whereas the ALB supports both HTTP and HTTPS.
But, let’s see some pros and cons of the API Gateway:
API Gateway:
Pros:
- Excellent security.
- It’s straightforward to implement.
- It’s swift for deployment and good to go in a minute.
- Scalability and availability.
Cons:
- It can become quite expensive when faced with high traffic.
- It requires some more orchestration, which adds a level of difficulty for developers.
- Performance degradation, due to the API scenarios, can impact the speed and reliability of the application.
Let’s continue on with creating an ALB and switching to it instead of using the API Gateway:
1. What Is ALB?
The application load balancer allows the developer to configure and route the incoming traffic. It is a feature of “Elastic Load Balancing.” It serves as the single point of contact for clients, distributes incoming application traffic across multiple targets, such as EC2 instances in multiple zones.
2. Create an Application Load Balancer using the AWS UI
Let’s create our Application Load Balancer (ALB) through the UI in Amazon AWS. Log in to the AWS Console in “Find services.” type “EC2” and find “Load Balancers.”

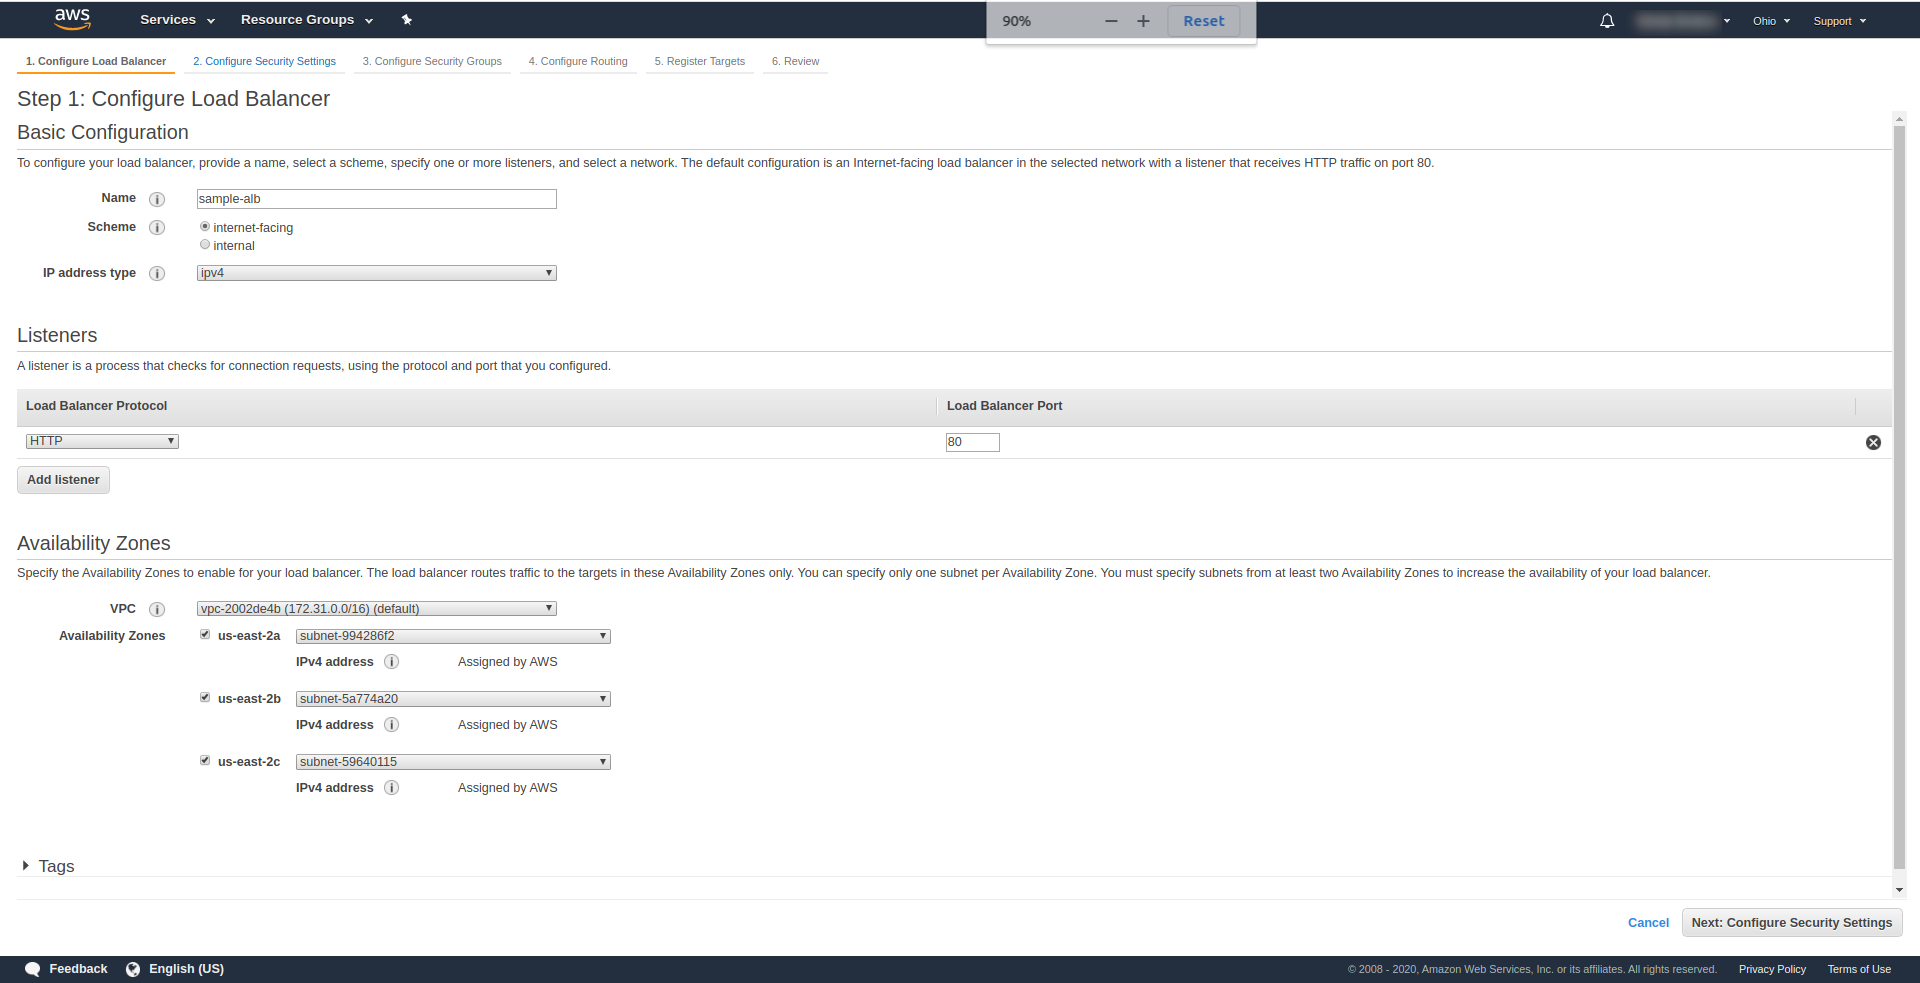
Click “Create Load Balancer,” under “Application Load Balancer,” choose “Create.”. For a name, enter your choice, we’ve used “sample-alb,” choose Scheme “internet-facing,” IP Address type ipv4.
On “Listeners”, leave it as it is – HTTP and port 80. It can be configured for HTTPS, although you have to have a domain and confirm it before you can use HTTPS.
Availability Zones – For VPC choose the one you have from the dropdown and mark all “Availability zones”:
Click “Next Configure Security Settings” to prompt you to improve your load balancer’s security. Click Next.
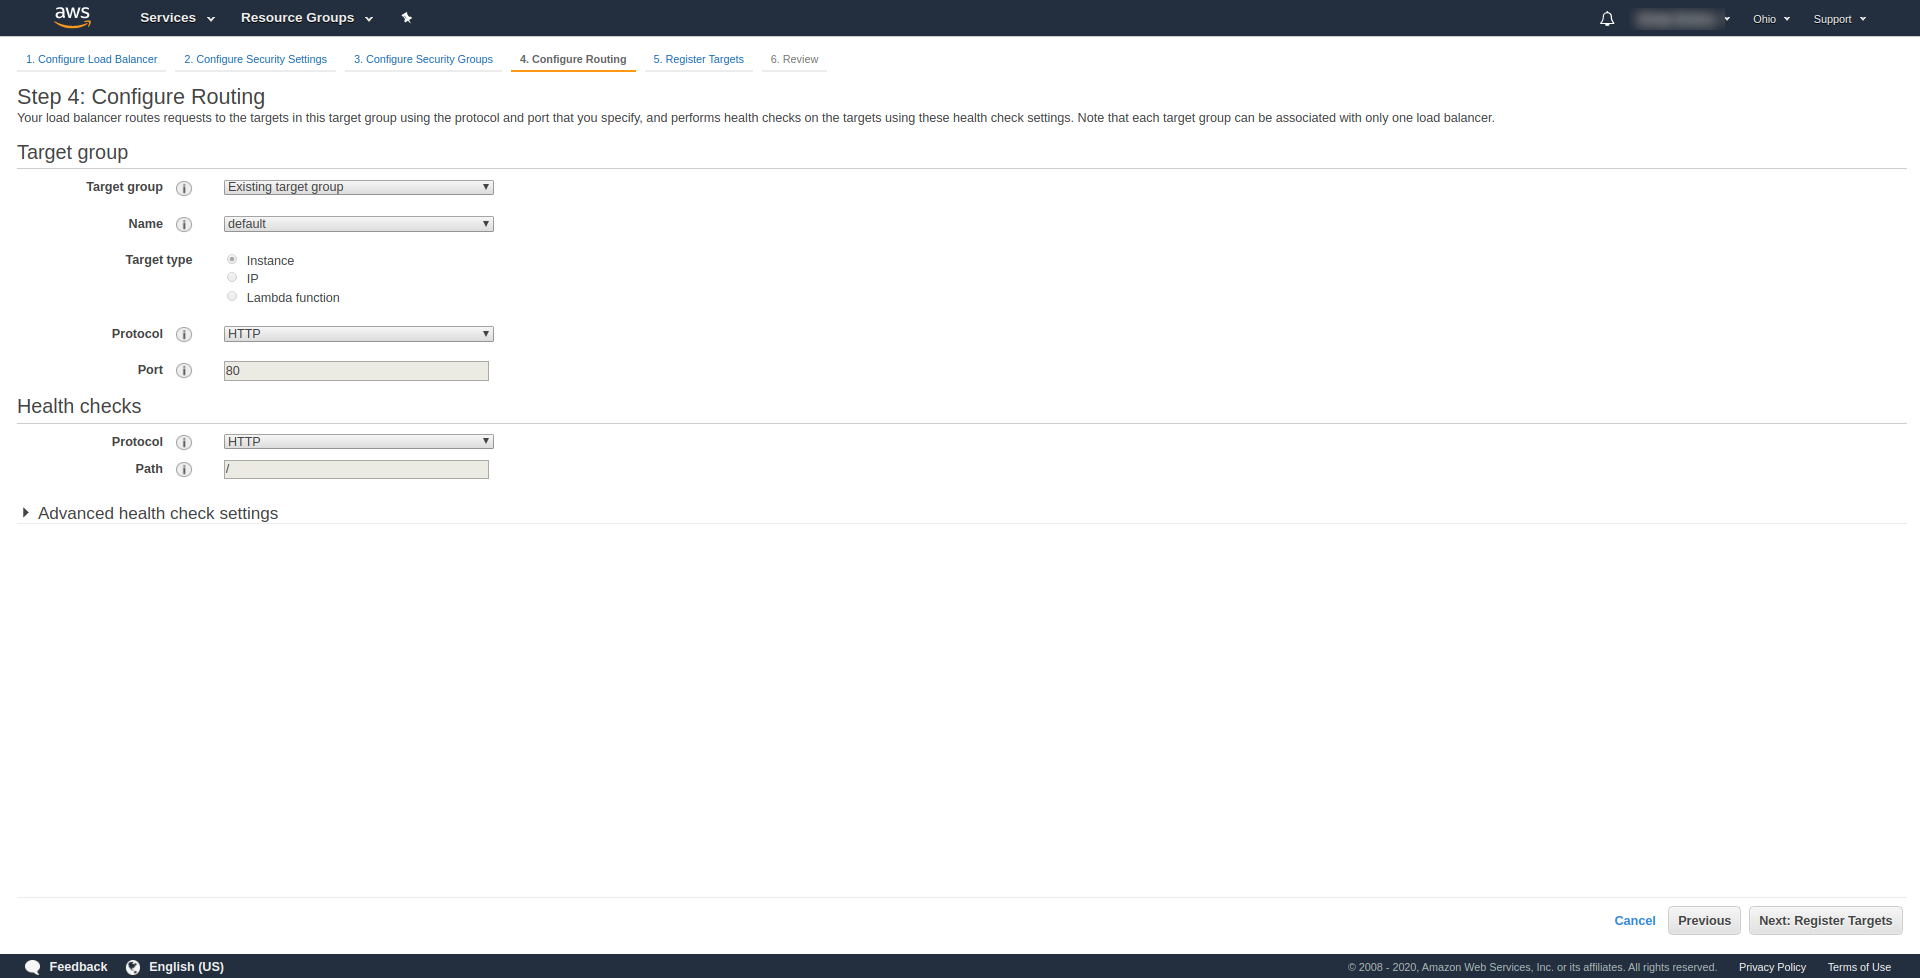
At “Step 3.Configure Security Groups“, at Assign a security group to choose “Create a new security group.” Proceed next with clicking “Next: Configure Routing.“. At step 4 configure it as is shown on the screenshot above:
Click Next, Next, and Create.
Get back to the load balancers and copy the ARN as shown in the screenshot:
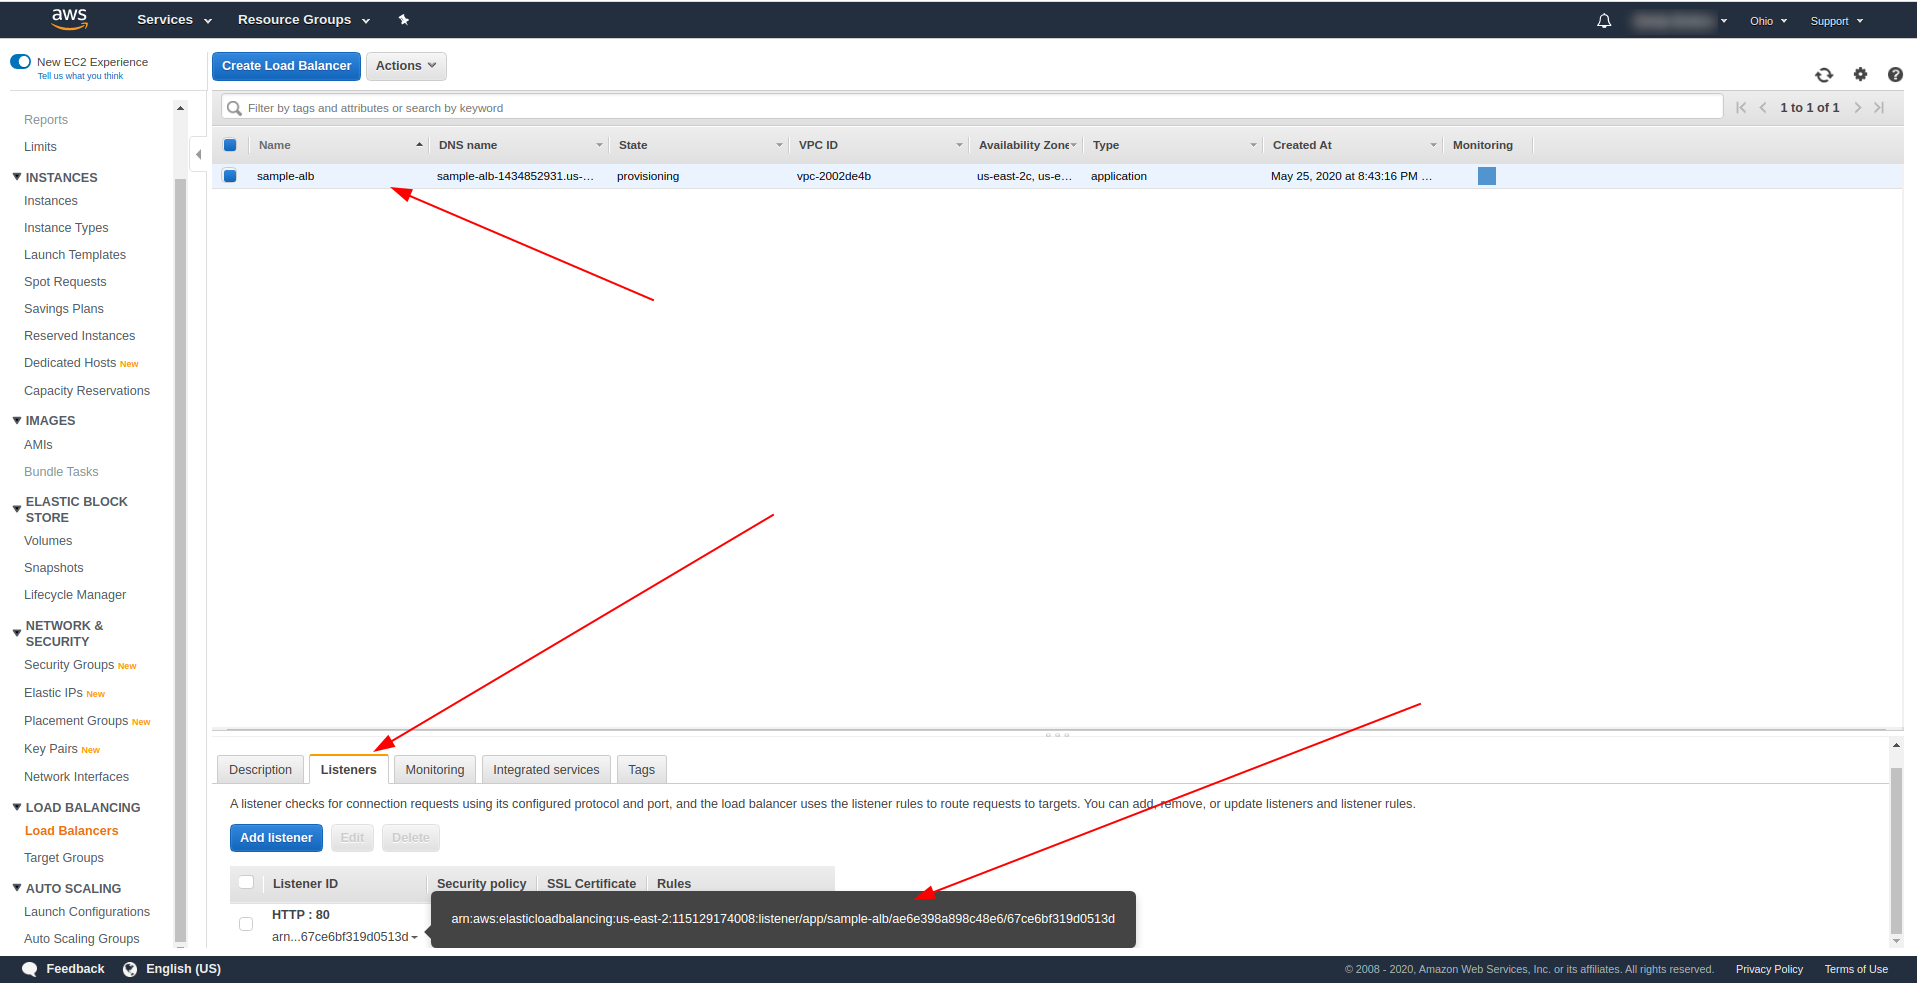
Now we have to change our serverless.yml and remove the API Gateway http property. Under events property, remove the http property and add an alb property. The function object should end like this:
hello:
  handler: handler.hello
  events:
    - alb:
        listenerArn: arn:aws:elasticloadbalancing:us-east-2:115129174008:listener/app/sample-alb/ae6e398a898c48e6/67ce6bf319d0513d
        priority: 1
        conditions:
          path: /hello
Save the file and run the command for deploying the application
sls deploy -v
After successfully deploying return to AWS Load Balancers and find your DNS name as shown on the screenshot:
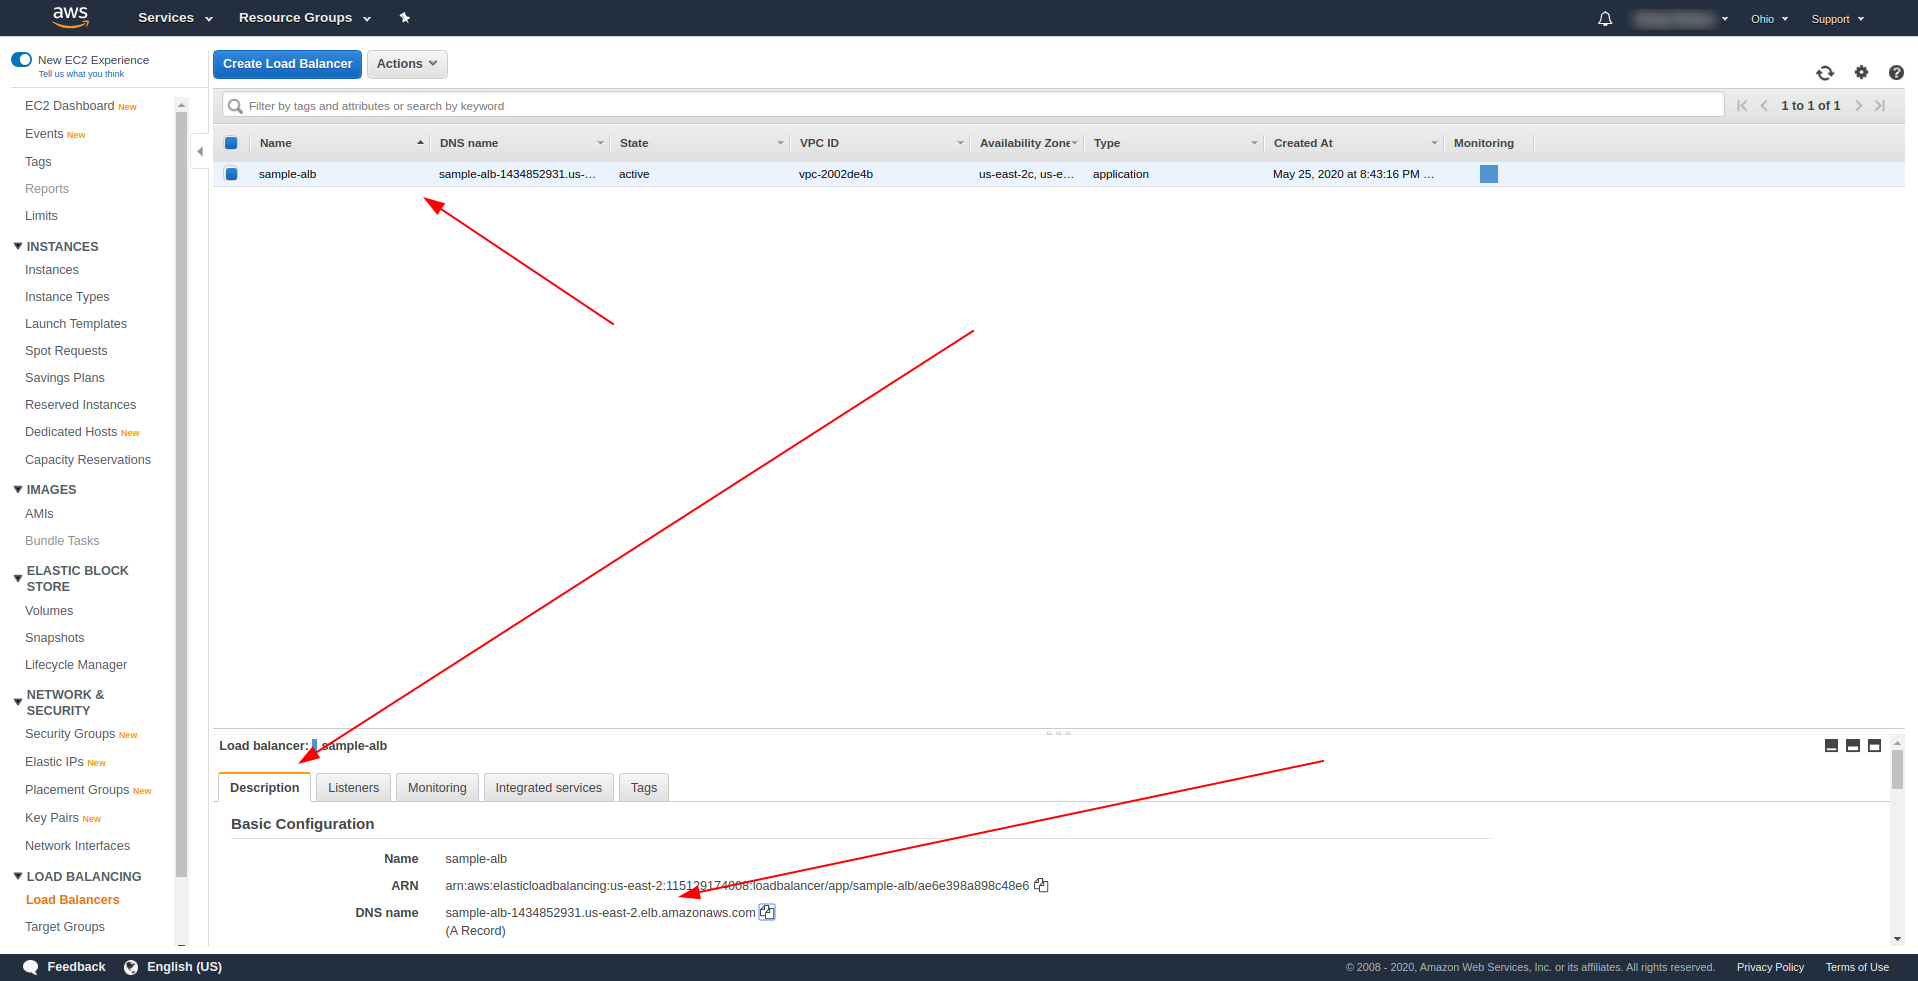
Copy the DNS name and enter path /hello.
It should work and eventually offer you the option to download content :). So far, the application load balancer is working wonderfully, but the application needs to return a proper response for our end users. To do this, open handler.js and replace the return statement with the one below:
return {
    statusCode: 200,
    statusDescription: "200 OK",
    headers: {
        "Content-Type": "application/json"
    },
    isBase64Encoded: false,
    body: JSON.stringify(rows)
}
The ALB’s difference is that the response must include container statusDescription, headers, and isBase64Encoded. Please save the file, and deploy again, but this time not the entire application, but instead, only the function we have changed. Run the command below:
sls deploy -f hello
This way, we are defining only the function hello to deploy. After successfully deploying, visit the DNS name with the path again, and you should have a proper response!

Great! Now we have replaced the API Gateway with Application Load Balancer. The application Load balancer is cheaper than the API Gateway, and we can now extend our application to meet our needs, especially if we expect to have higher traffic.
Final Words
We have created a simple application using the Serverless Framework, AWS, and BigQuery, and covered its primary usage. Serverless is the future, and it is effortless to handle an application with it. Keep learning and dive into the Serverless framework to explore all its functionality and the secrets it has. It’s also a pretty straightforward and convenient tool.
Team DevriX
This article is crafted by DevriX's seasoned marketing team, boasting over four decades of collective expertise in crafting sophisticated marketing funnels, devising comprehensive content frameworks and pillars, implementing engaging email campaigns, and creating impactful social media content designed for scalability.
Our marketing experts specialize in the complete spectrum of inbound marketing strategies. As an accredited HubSpot Agency Partner and a Semrush Partner, we engage in meticulous research, blending our extensive experience with the unique insights of our highly skilled team.
We set benchmarks in content creation by incorporating cutting-edge marketing trends, leveraging in-depth industry research, and utilizing state-of-the-art AI tools for data segmentation and captivating content hooks. Our proficiency extends across a diverse range of sectors, including working with SMEs, Fortune 1000 companies, global B2B brands, major publishing entities, WooCommerce platforms, business directories, and affiliate networks.