
Google Chrome is among the most widely used browsers out there with nearly 65% of the users globally. And there is a good reason for that, it works well, it supports a ton of web features, integrates natively with all that google provides and it’s easy to use.
But there is more than the user side. It’s very well built for developers as well. Firefox is another great browser that provides superb dev experience, though it’s userbase is relatively small. So for this reason, we are focusing on Chrome and it’s DevTools, but thankfully, the UI among most browsers remains very similar, so the tips here will be translated well to Firefox, Safari, Edge and other browsers.
What Is Chrome DevTools?
Chrome DevTools is a set of web developer tools built directly into the Google Chrome browser. DevTools can help you edit pages on-the-fly and diagnose problems quickly, which ultimately helps you build better websites, faster.
Chrome DevTools docs home page
The DevTools are what most front-end (and often back-end) developers use to inspect how a web page is performing, the HTML tags that define it and the styles that are applied in its most basic form. It provides a ton of other super helpful features that we will glance over as long as they work in the general use case for non-developers as well.
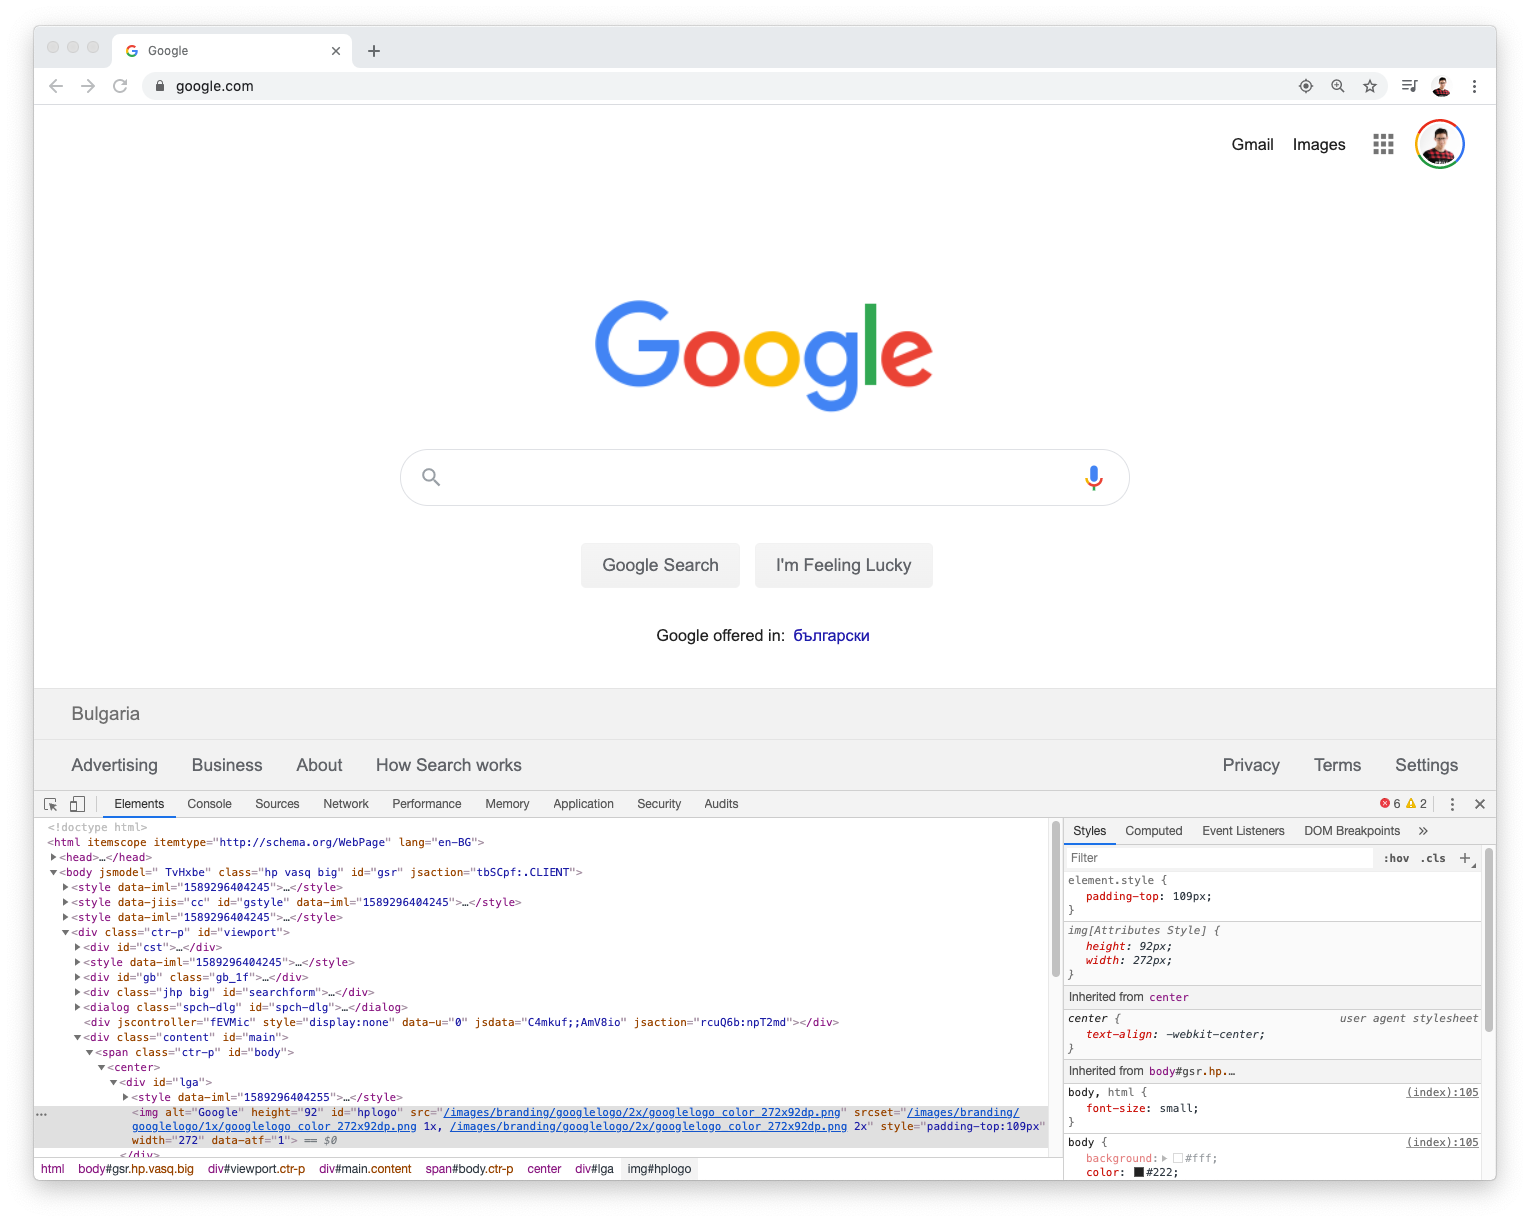
The dev tools is what you see in the screenshot above with the code to the left and various properties to the right. That is the default view you would see if you press Command+Option+C (Mac) or Control+Shift+C (Windows, Linux, Chrome OS).
DevTools offers a lot of capabilities, but the more notable ones would be:
- The generated document structure (HTML) once the page loads and while it’s loading.
- What CSS applies to specific HTML elements as well as what is inherited from parent ones.
View the viewport size, the element sizes, paddings, margins, borders and more. - The ability to modify everything on the page aside from the scripts that are running.
- Away to make changes to the code that are saved once you refresh the page (not possible by default though)
- All changes are client side – meaning, whatever you change, only you will see in until you refresh the page.
- Away to test without caches and with simulated slower network speed.
- Tools to measure performance and score a page’s performance as well as provide tips to solve it.
- Show the page’s console and it’s errors, warnings and messages as well as a way to execute javascript code there.
This is a very short list, but it covers some of the more notable features, mostly what we will cover.
Related: How to Create Your First Chrome Extension
Why Do You Need DevTools, What Are the Use Cases?
For developers it’s obvious, but what about non-developers? Well, there are a few neat tricks and tips that will move you closer to a power user status. Often site owners spot issues on the site, ask a question or two and sometimes receive a snippet of code to “paste” to fix a problem. One of the ways developers test such snippets is by directly applying them to the dev tools. It is also a way to provide a nice preview to your developers about how you want things to look.
Apply CSS Code
The first and most common use of DevTools is to modify and apply CSS. CSS is what defines how a page looks, it’s aesthetics. To do this, you simply have to point at the element you want to style, right click and pick “inspect”
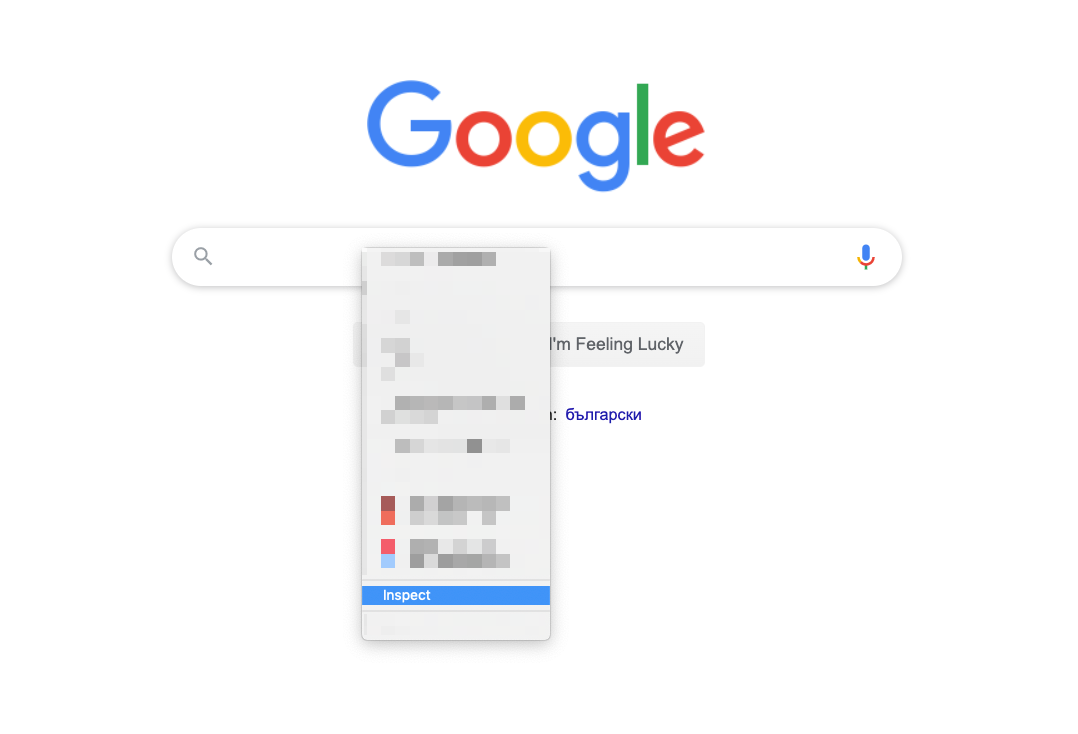
The same applies to most other browsers, though the menu item text might vary slightly. Once you do that, you will see the DevTools open up and directly select the element you needed. In there, you will see the two main parts of the dev tools. The HTML and CSS sides (left and right):
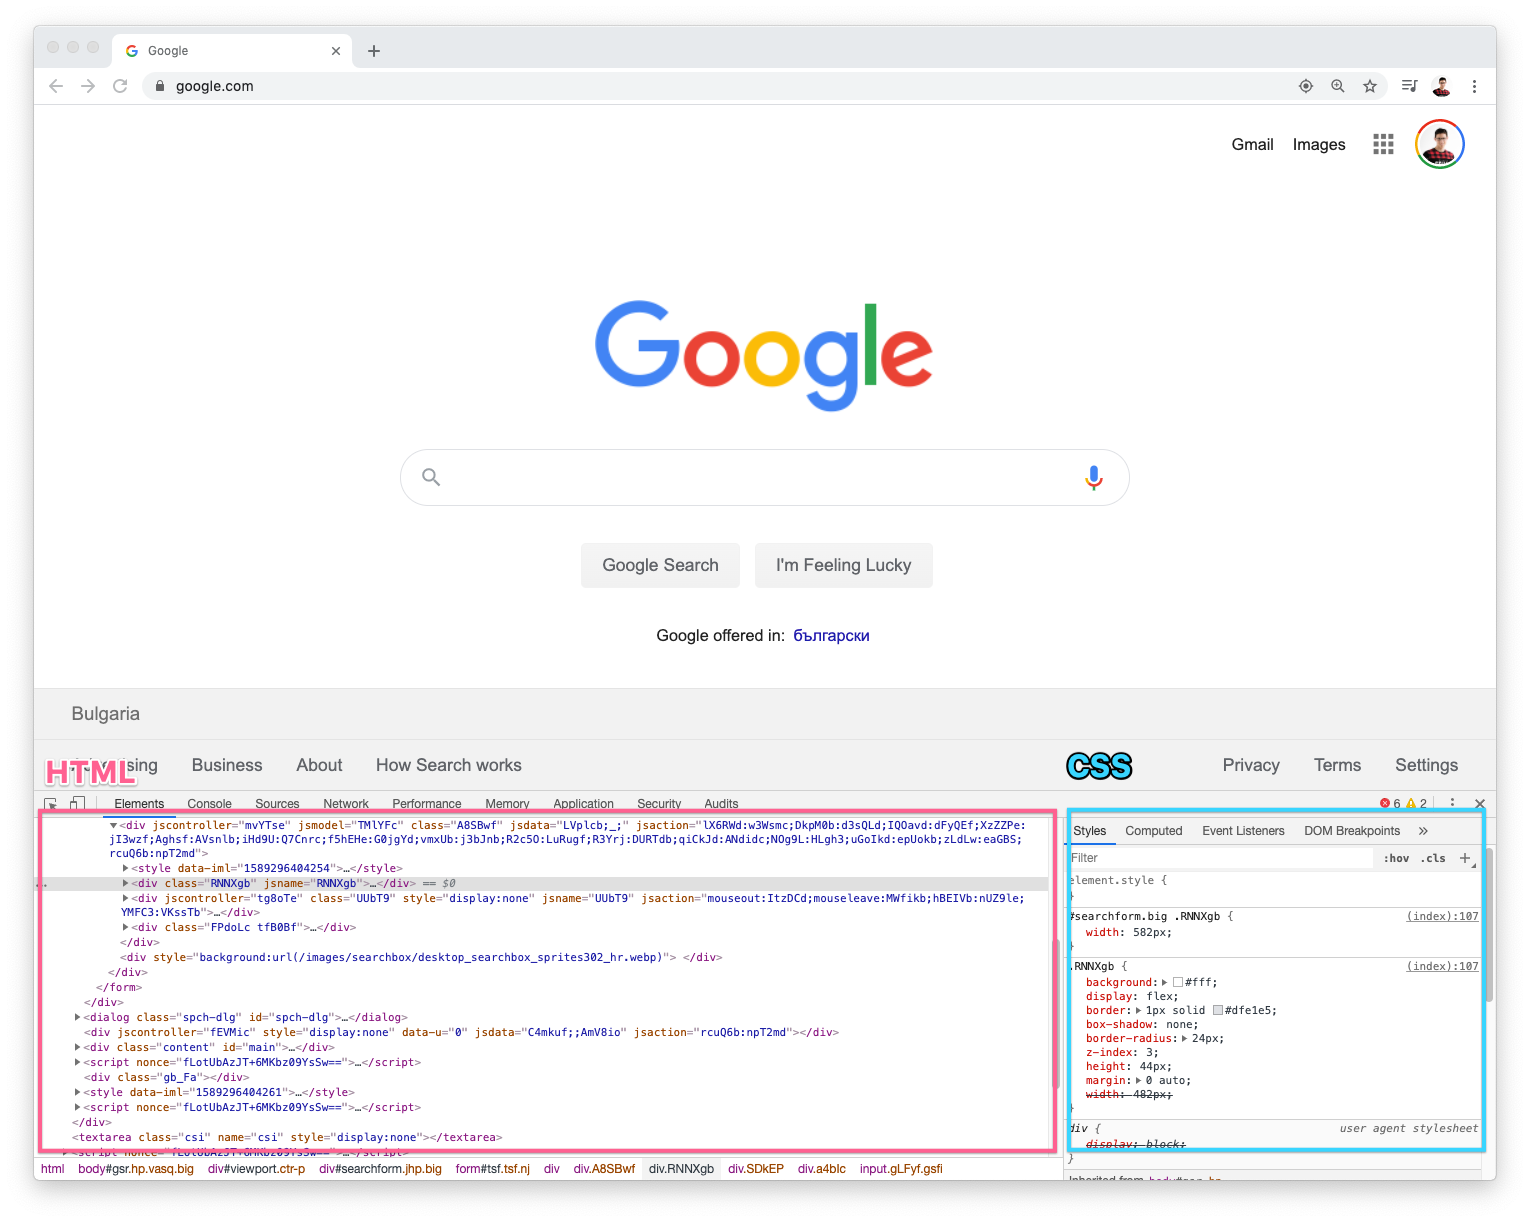
It could be a bit tricky to find your way around the HTML part, but don’t worry, DevTools will highlight the elements as you hover them on the left panel. Once you find what you need, to the right you can write styles. There are already a few added. So let’s change the background to read and see how it looks:
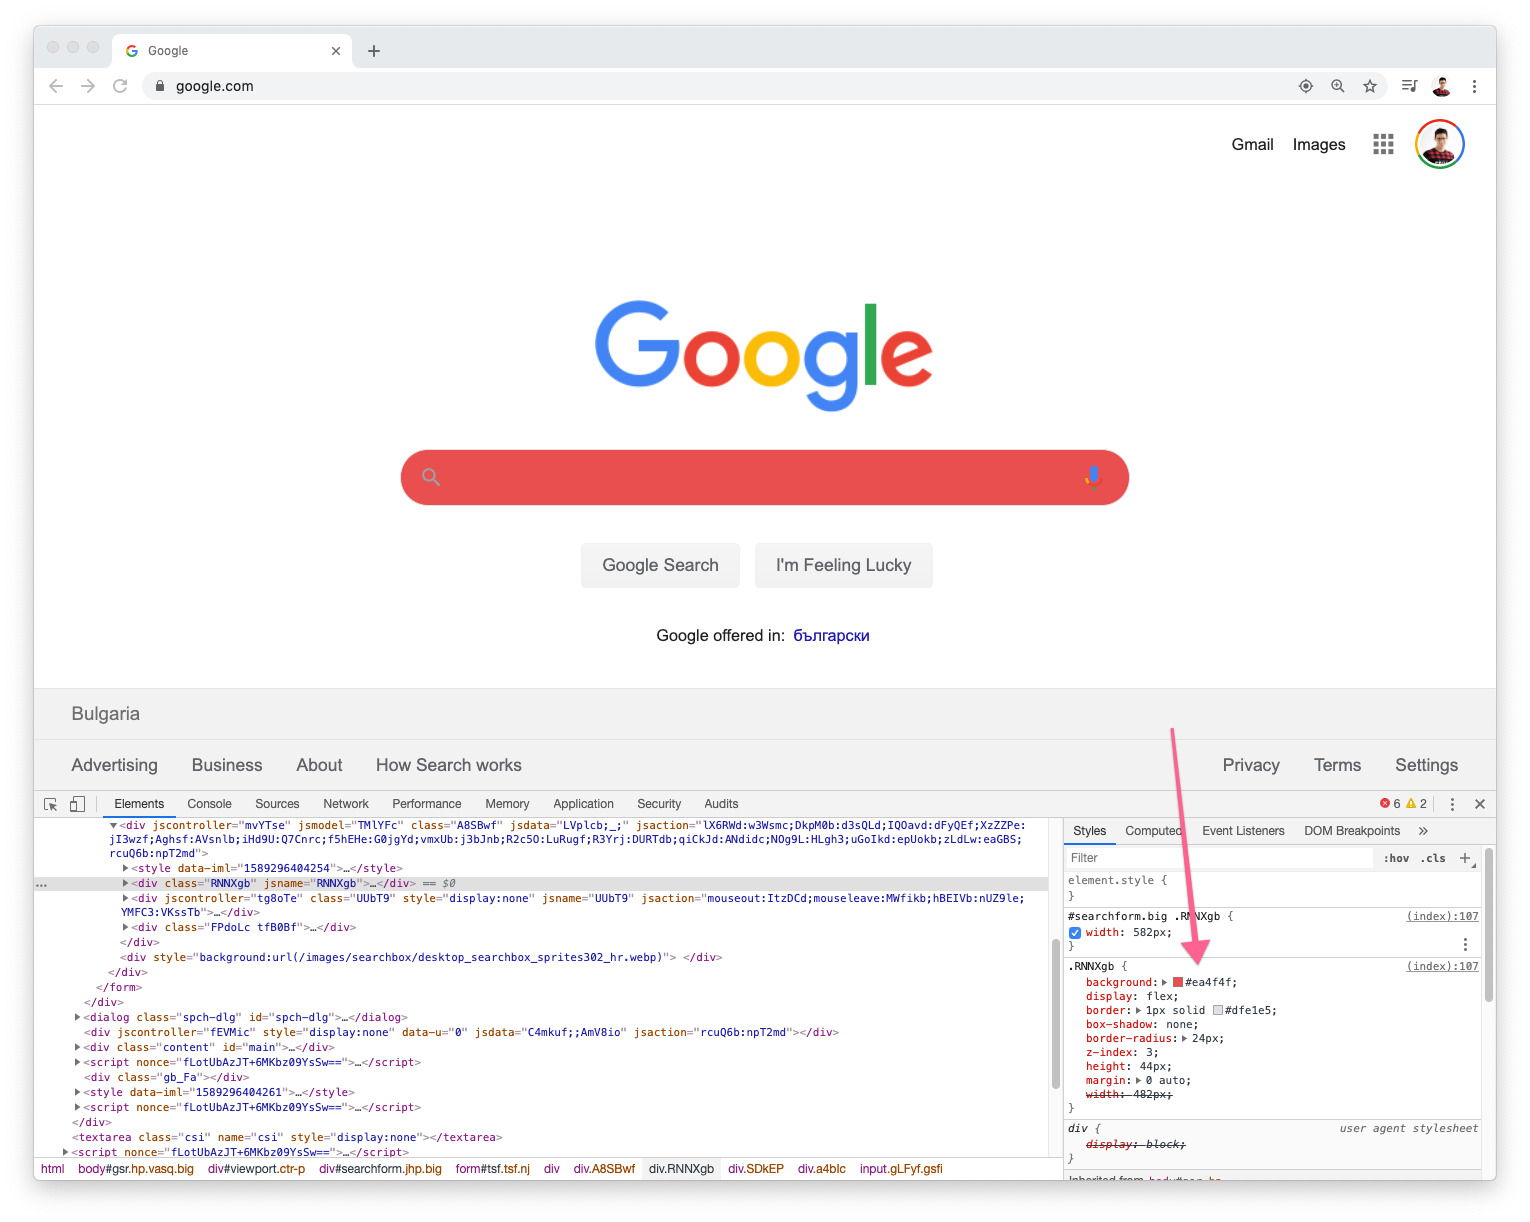
Right away as you type, the styles in the page will update. You can write any CSS here and it will be applied just as the styles already on the page. If you press near the end of the rules (under “width”), it will start adding new styles. Or you can write them at the top where it says “element.style”. Then if you want to share this to your developers, you can just select the code and copy-paste it. Pro tip, also grab the “selector” to the styles. This is the “.RNNXgb” in the screenshot above. This will tell the developers on which element you are adding styles.
Related: WordPress CSS: Basic Guide for Beginners
Pick a Color
Another neat thing you can do is find out what color exactly is used as well as use a color picker directly from the DevTools to see other colors. Just click on the square next to the color code (where the arrow above points) and it will open a color picker.
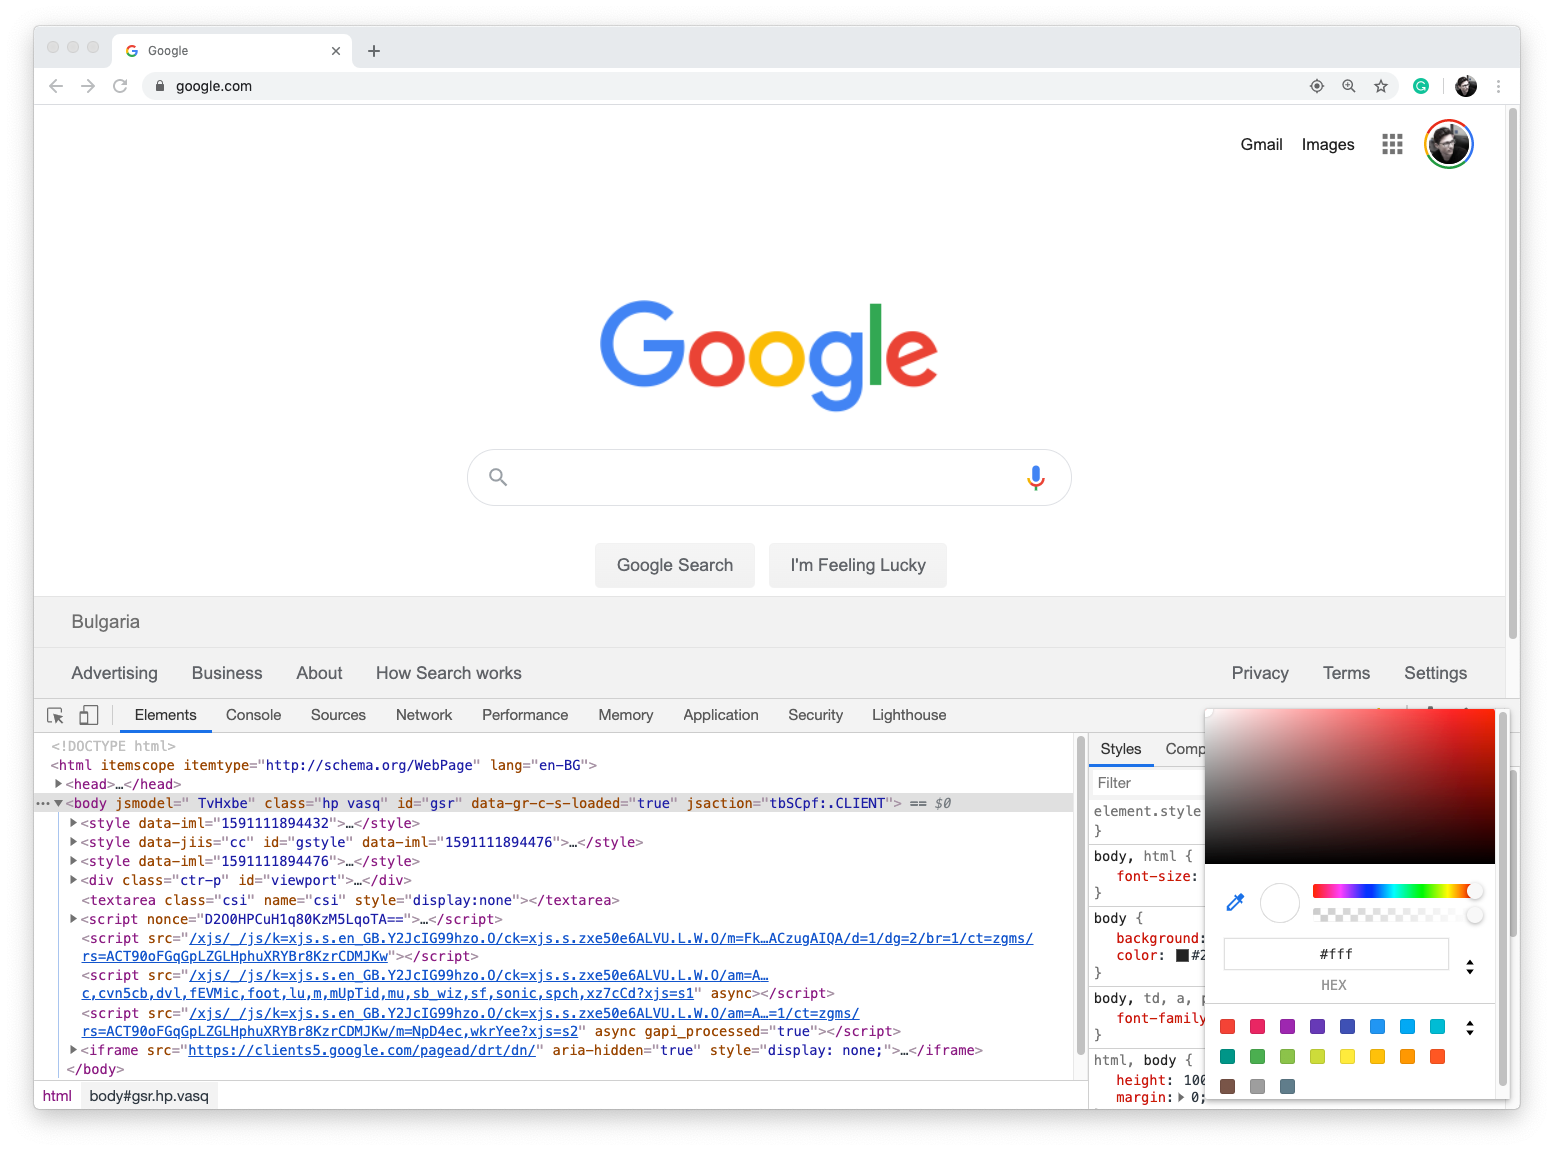
Find What Font Is Used
CSS developers also define the fonts in use, the font size, line height, color, font weight and other typography related properties. All of them would be shown on the right side. As long as it’s not crossed, the style you see is applied. Let’s find out what font is used for the search on the Google form. Right click, inspect and scroll down until you see the font or just search in in the “Filter” field above at the top of the right section:
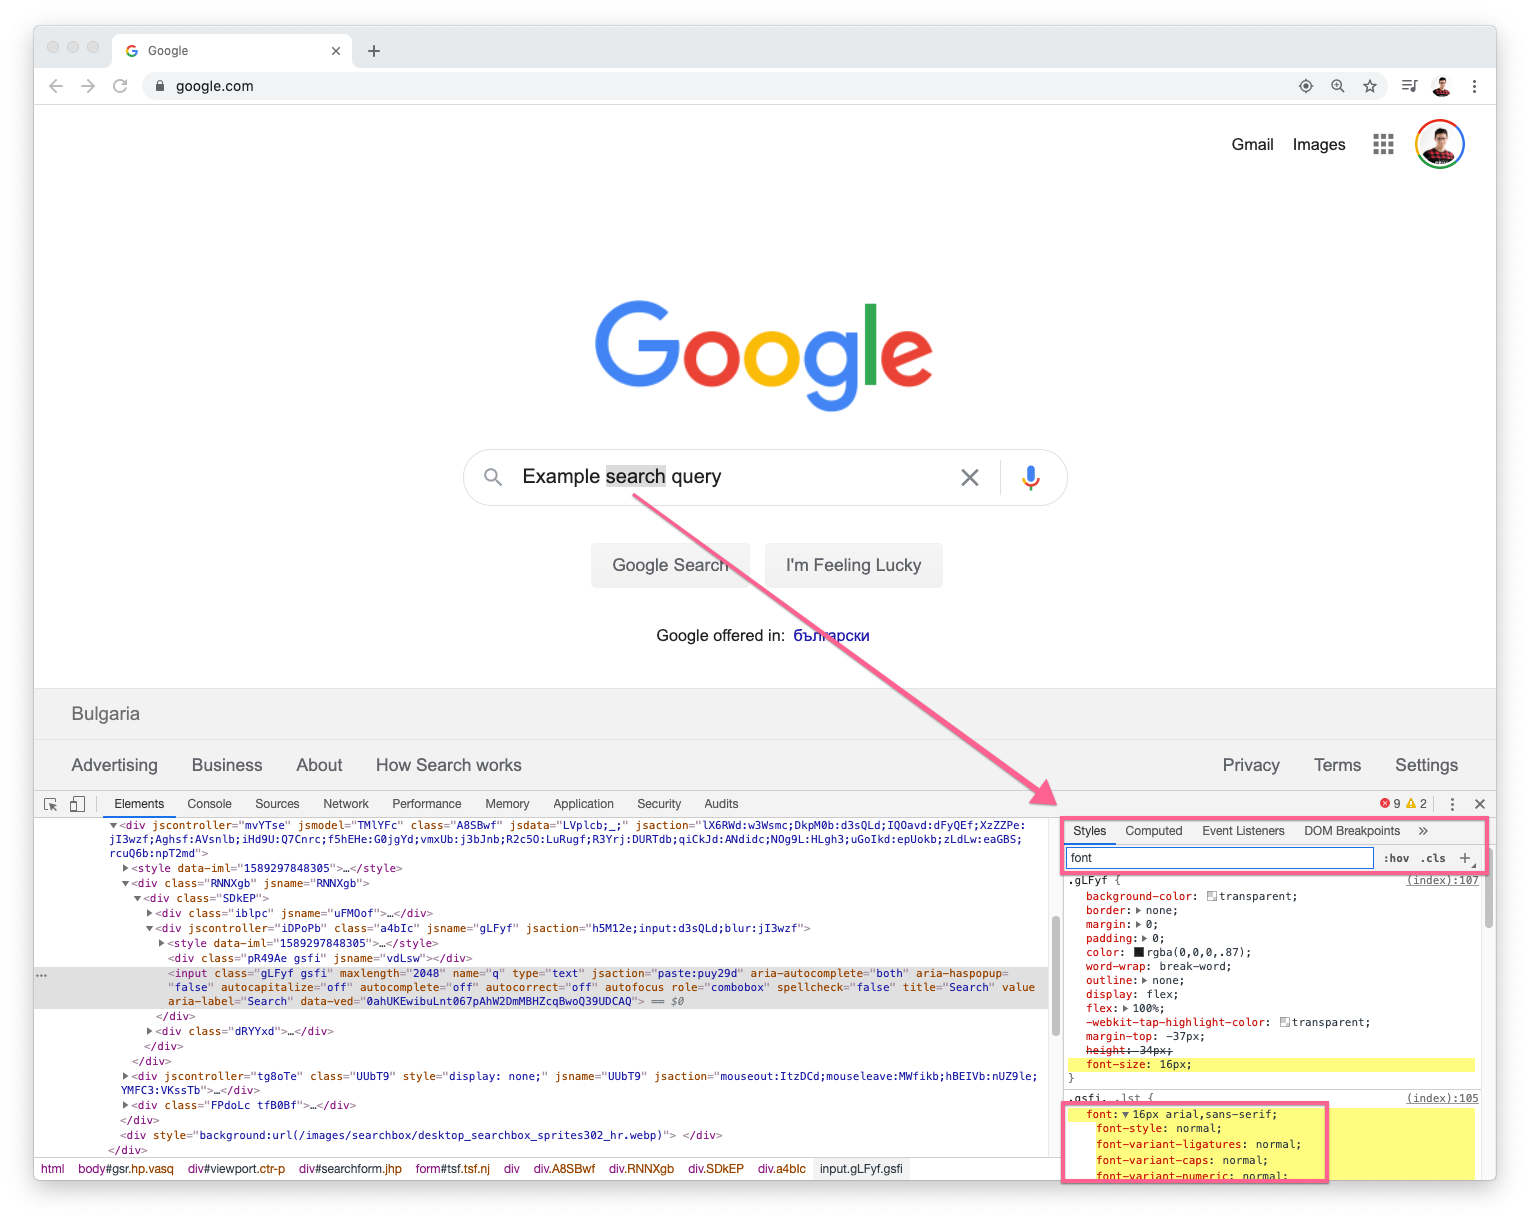
If you go ahead and update the font, you would see how the site would look with a different font, one that you might want to switch to soon. Of course, a developer will later have to modify the code and fix any issues a font change would create, but this method works great to test things out quickly without having any development environment set.
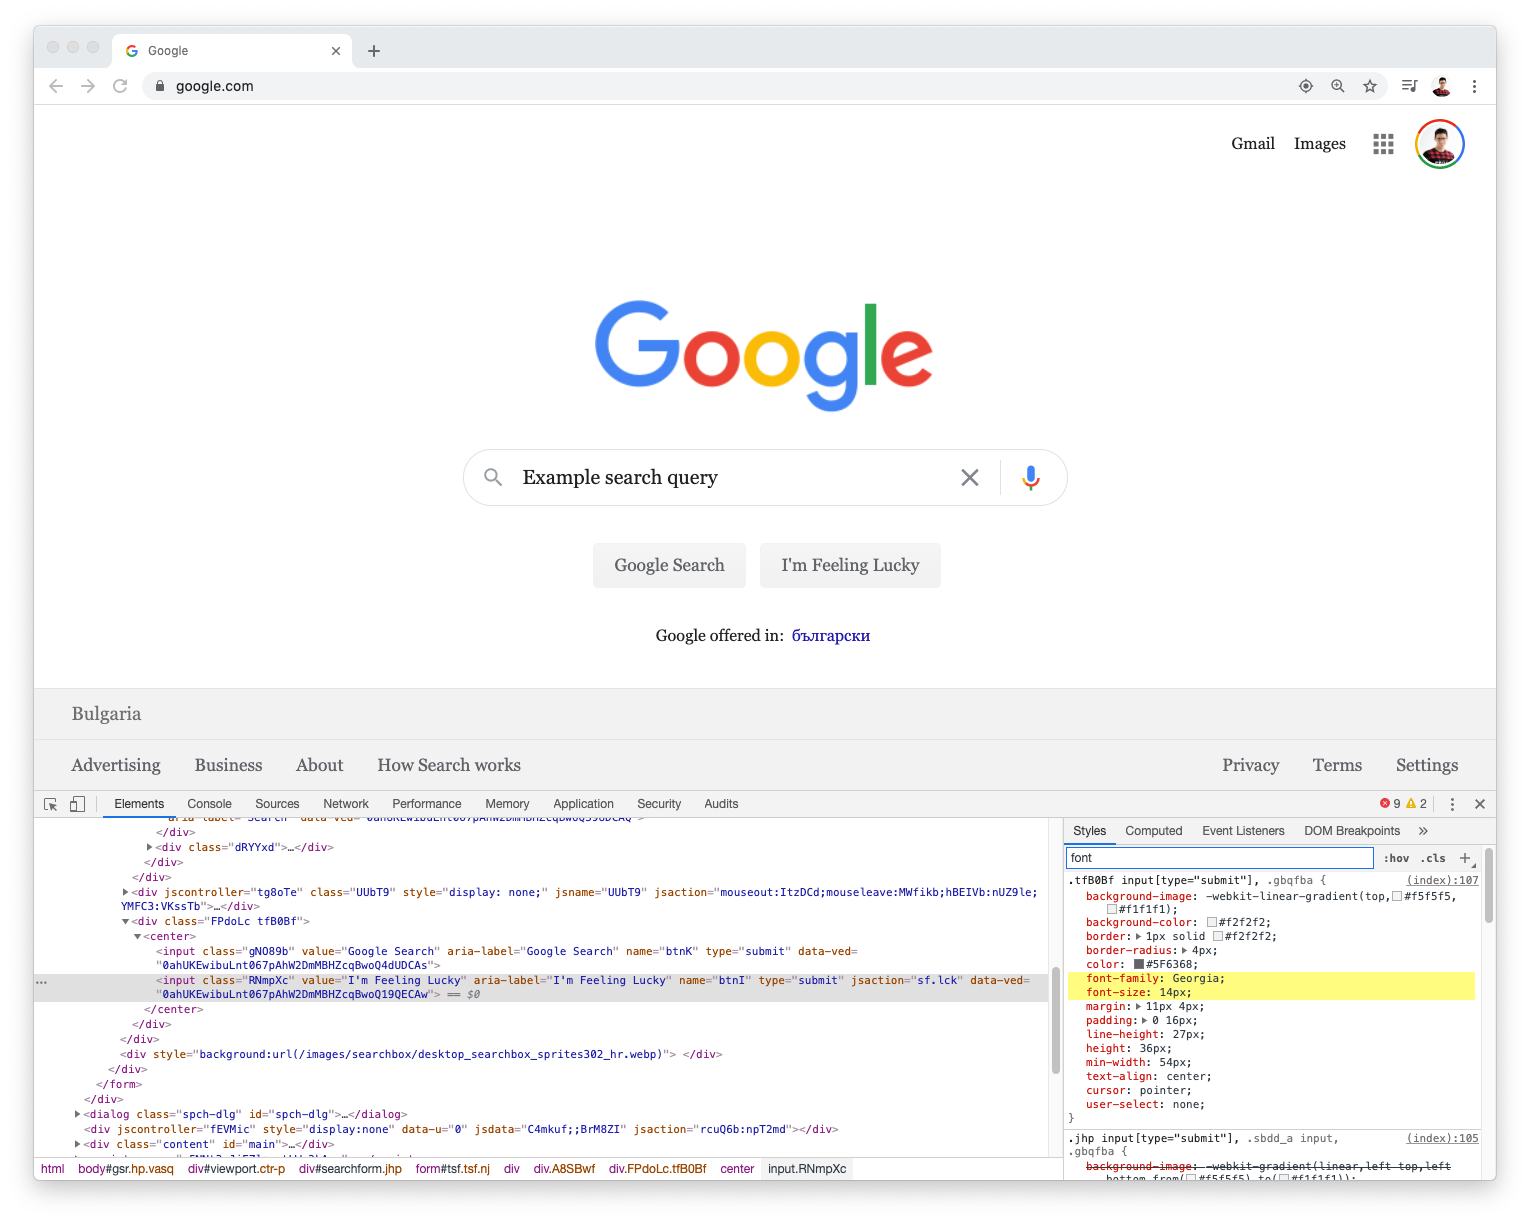
Here is how Google’s home page would look with “Georgia ” set as font. To achieve this, we had to update more than one property, but thanks to the good CSS Architecture from the Google developers, it was fairly easy. Most of the time, a poorly written site requires you to update a ton of properties to see the whole site updated.
Related: How to Choose the Best Fonts for Your Website
Cache, Throttle and Speed
What is cache? In simplest terms, a resource that is saved on your machine for future use. A resource could be JS, CSS file or an image. If it doesn’t change every time you open a page, there is no need to download it every time right? So the browser will simply keep it on your machine for a while.
But what happens, if there has been a change on the server and the setup doesn’t utilize best practices to update the resources? Or in short, even if the developers changed the codebase, you still see old styles. Well, then you just can stop the cache and do a “hard refresh”.
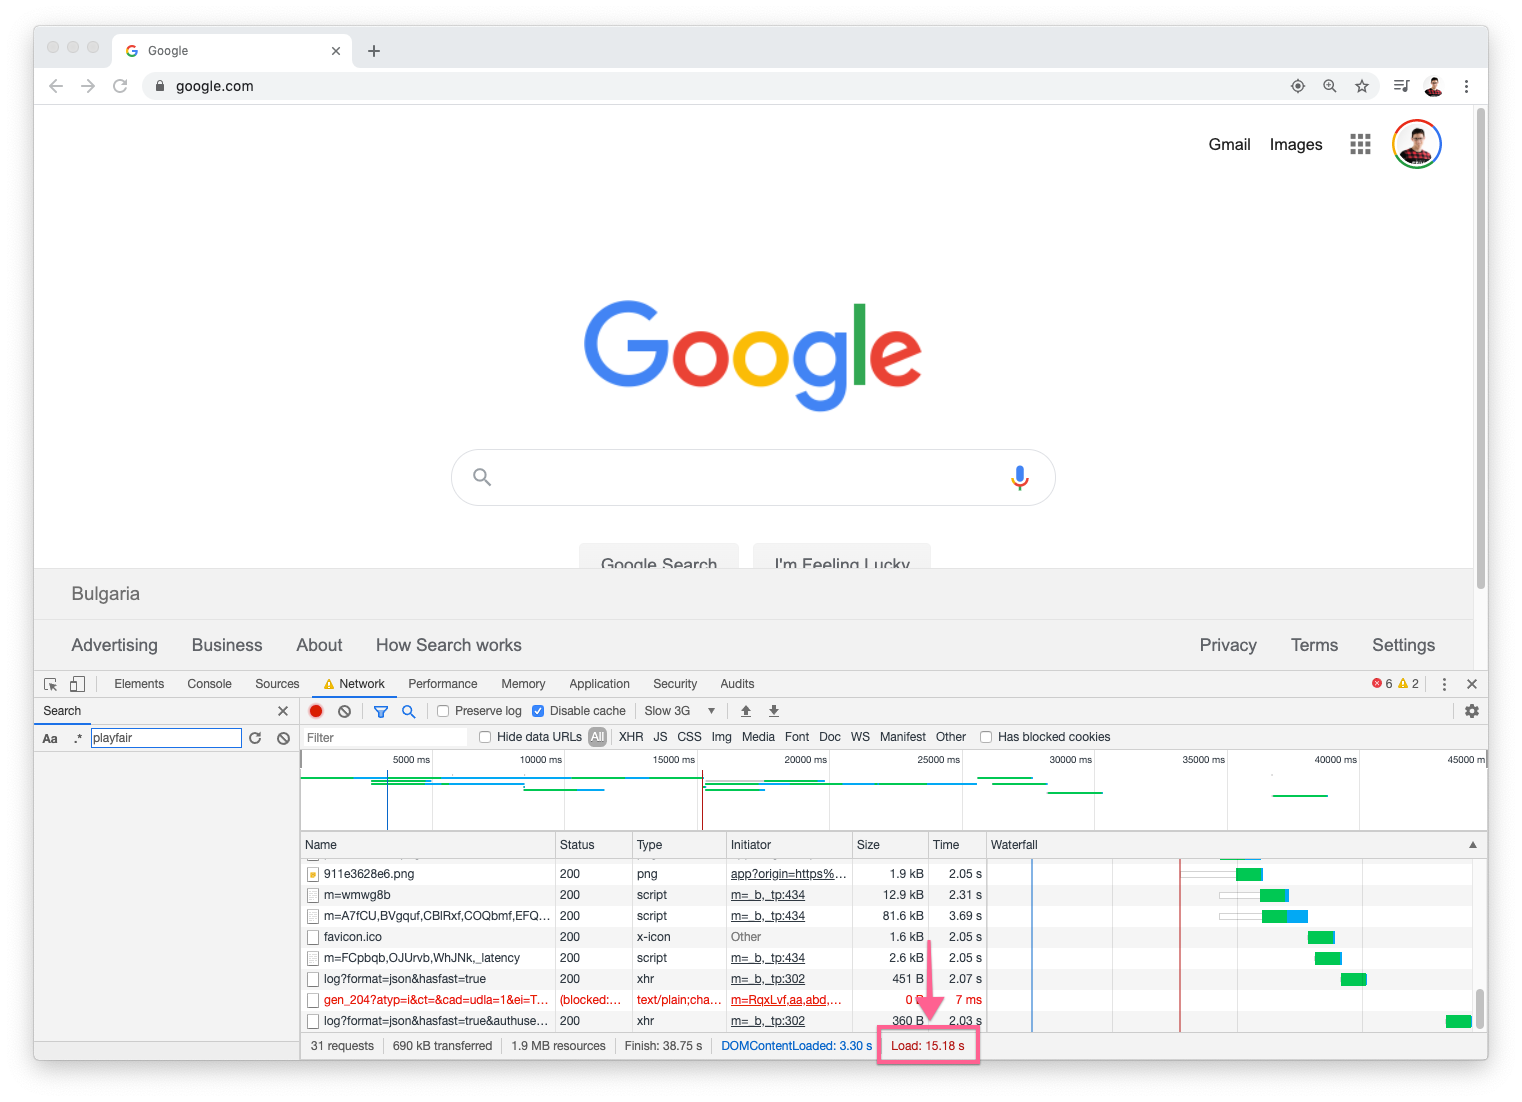
Open the dev tools and navigate to “Network” tab. Then click “disable cache” and do a “hard refresh”:
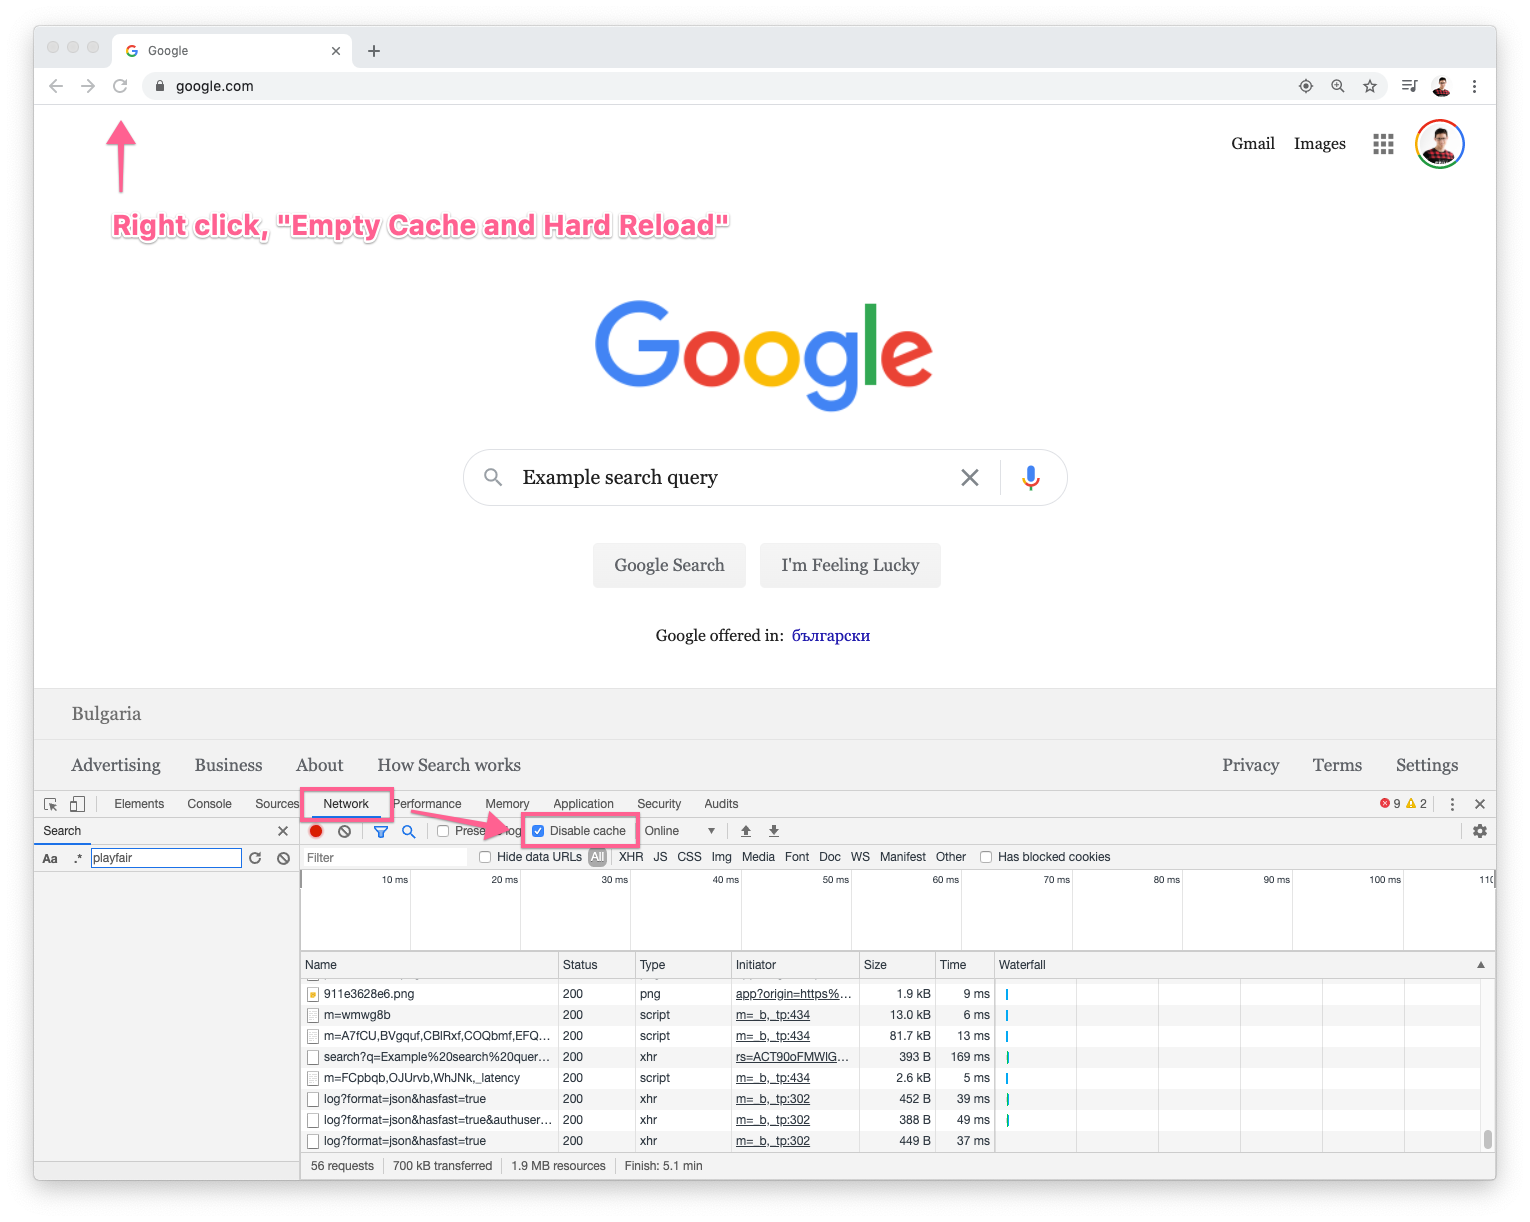
Now, while you browse pages with the DevTools open, there will be no cached resources from your browser. Pages will load slower as resources are loaded every time, but you will see the changes. Generally developers keep “Disable Cache” ON by default and only disable it when testing real user interactions when load times are important.

On the same tab after you refresh once you will also see measurements on the page speed and weight. How long until the “Load” is triggered (event when other scripts attach to do more work), how many files are requested (31 requests above, fairly good amount), how much has been downloaded and so forth. It’s simple, the lower the better for each value. Anything above 100-150 requests and you will start seeing big speed issues.
DevTools also provides a simulation of slow connection. A very helpful feature to see how your site would work on a slower network like 3G. To turn it on, just change the value next to “Disable cache” and hit refresh. When you refresh you will see each step of the site’s loading. With cache disabled, this would be the first visit for regular uses.
See the difference in speed when we select “Slow 3G” and refresh compared to the first example that uses the real connection speed. Here you can also test “Offline” – how would the site work without any internet connection. If that sounds weird, it’s not, progressive web apps already allow sites to function even without internet connection if they have been accessed at least once by the visitors.
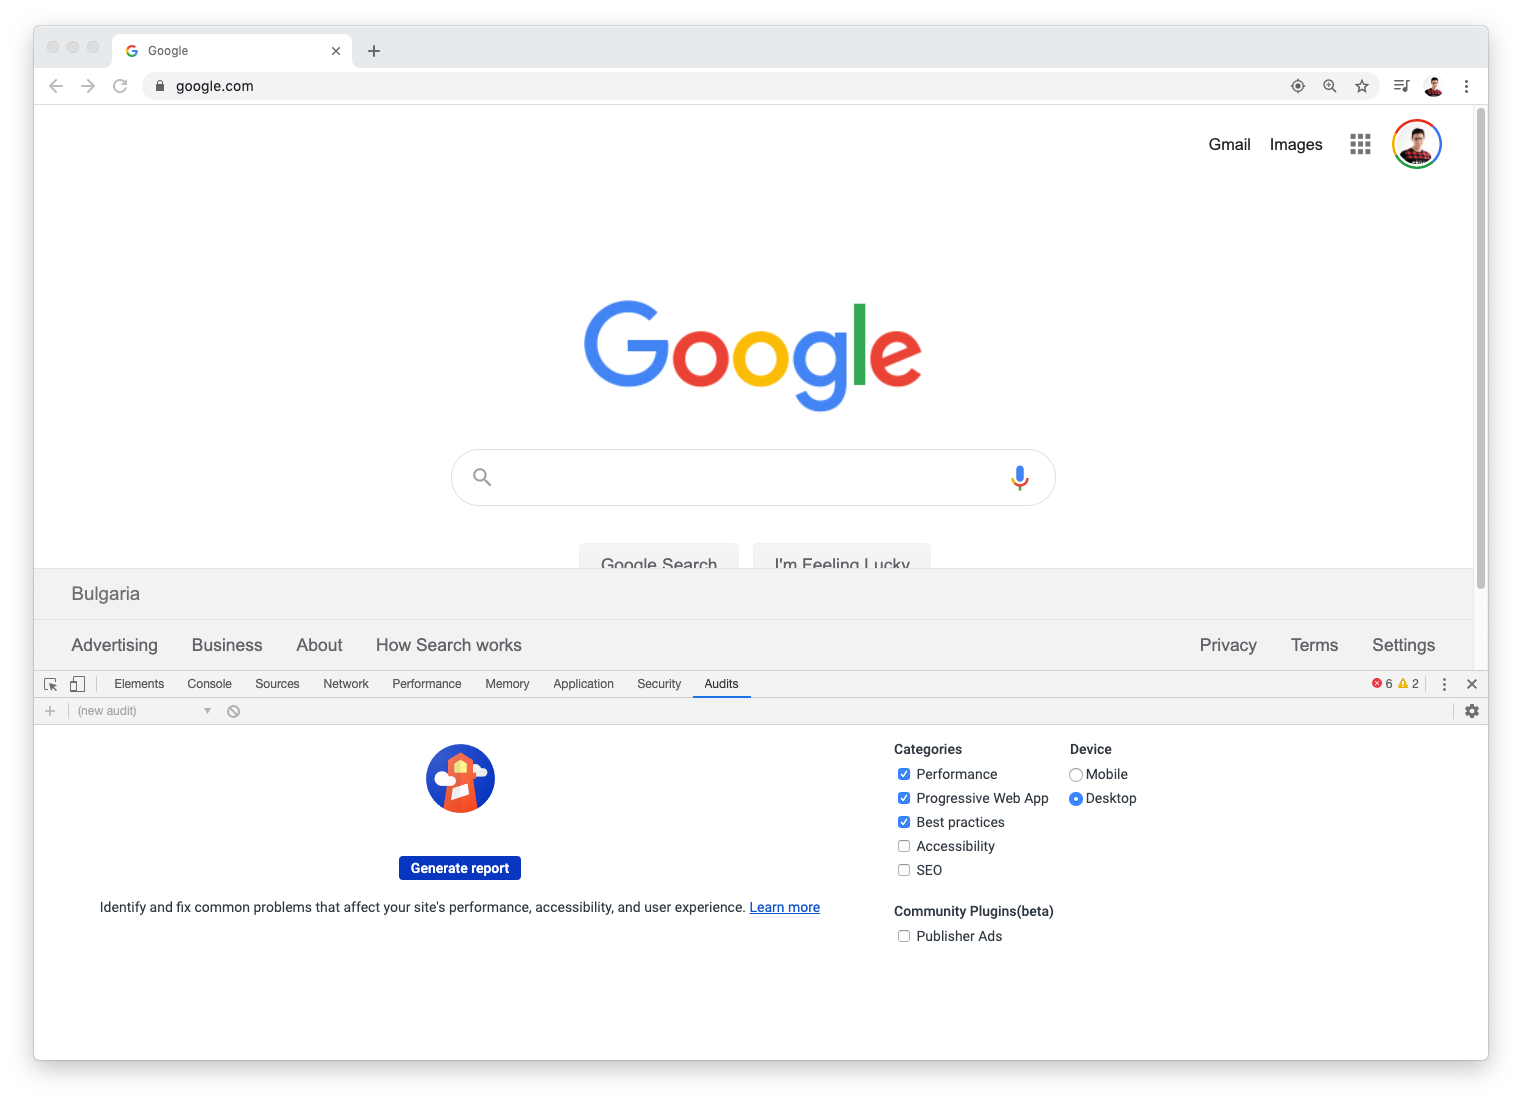
Audits are another great feature that provides user friendly speed analysis of a page. You can simply run it by going to “Audits” tabs and hit “Generate Report”:
To the right you have a few options to decide what to be tested as sometimes the tests can take a while (a minute or two), so if you run them a lot of times, you might pick just what is needed for the current test. Here is a sample result with the options above for Google’s home screen:
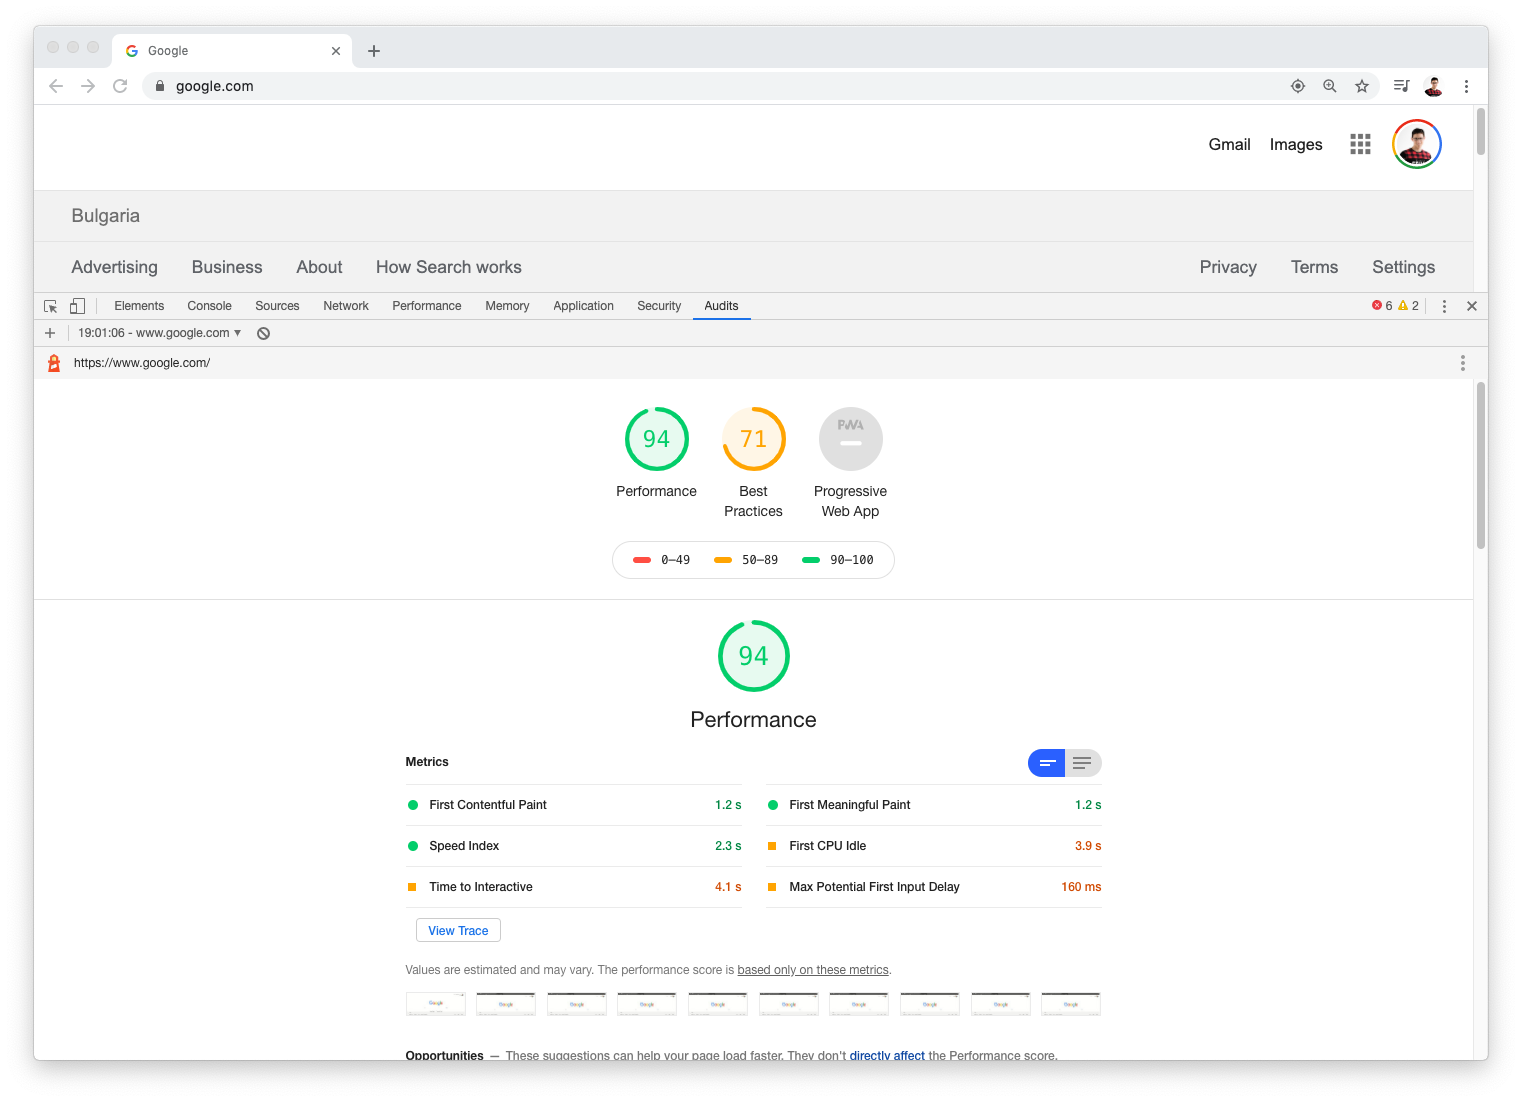
A great score! 94 is very good and showcases the great work put into this page. Remember that it may look very simple on the surface, but there are a ton of scripts running in the background that remain hidden and they slow down sites. There are a lot of other metrics tested and you can do this on any site to find what issues it has and what can be improved.
Related: What Does “Speeding up Your Site” Really Mean and How to Achieve it?
DevTools Console
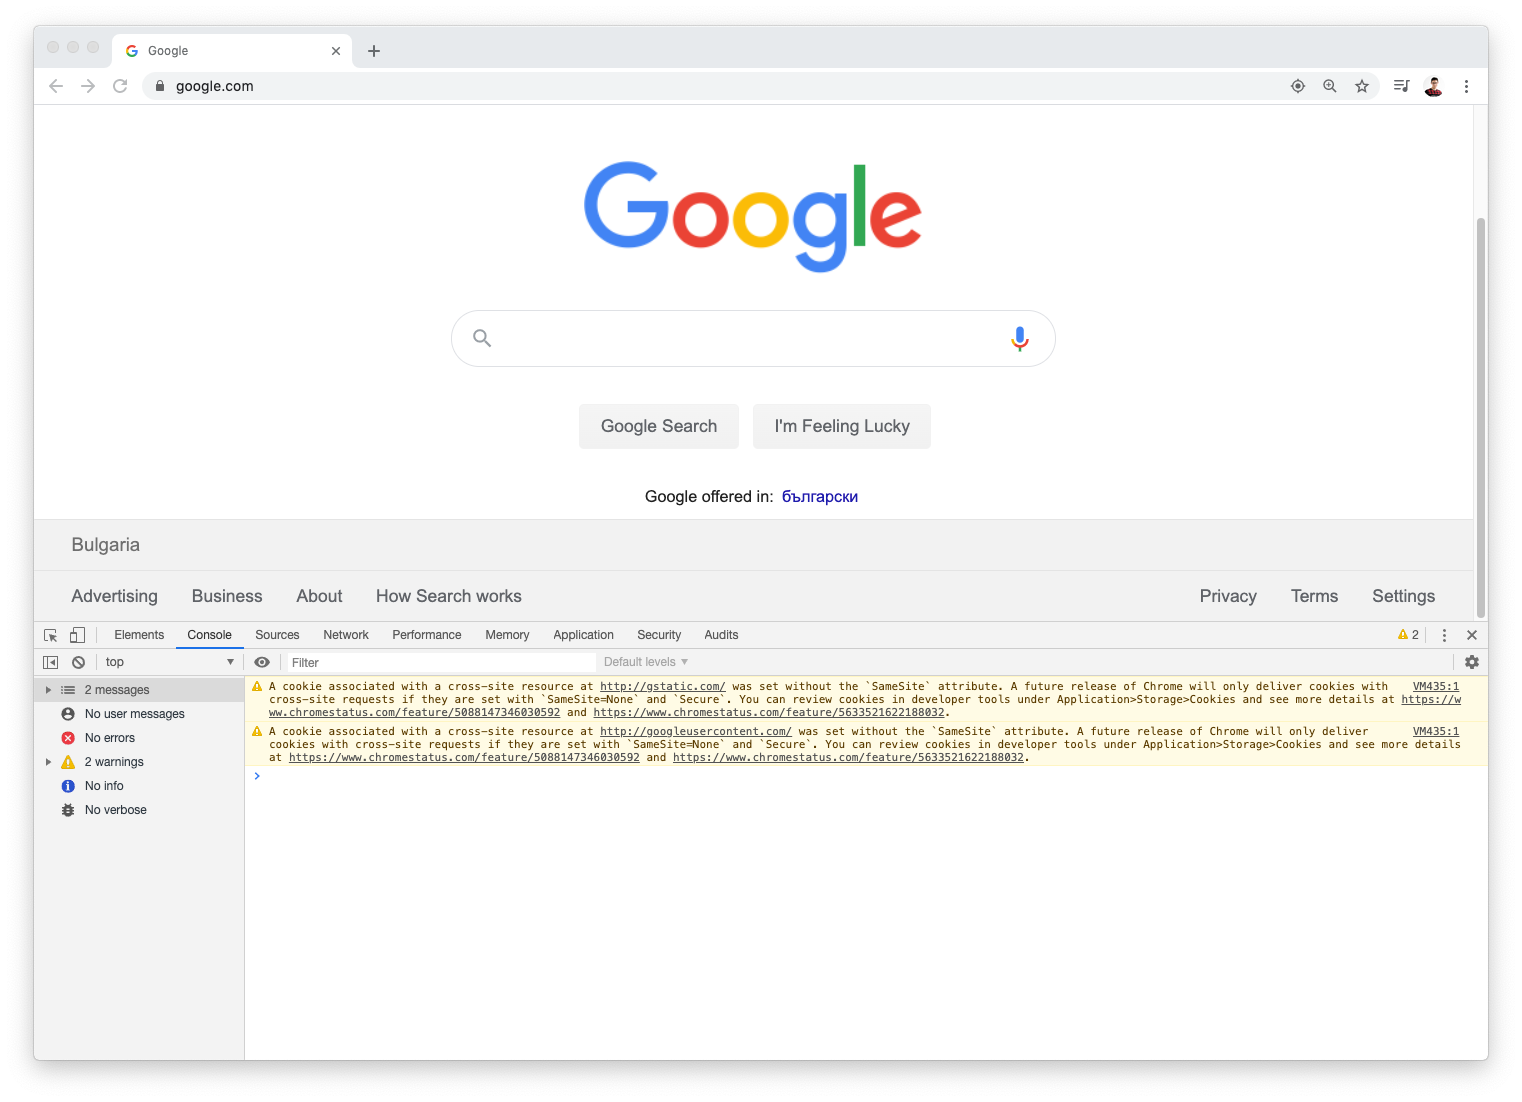
The final view that we will cover is the console. Easily accessed by simply pressing the ESC key or going to “Console” tab. As expected, there are no errors, just a few warnings that shouldn’t raise too many problems:
But, if for some reason after a recent update on your site, an interactive component (like a dropdown, menu, map, form) stops working, you can always take a look at the console. It might have errors that say what is the reason.
Here is an example of what such an error would look like:
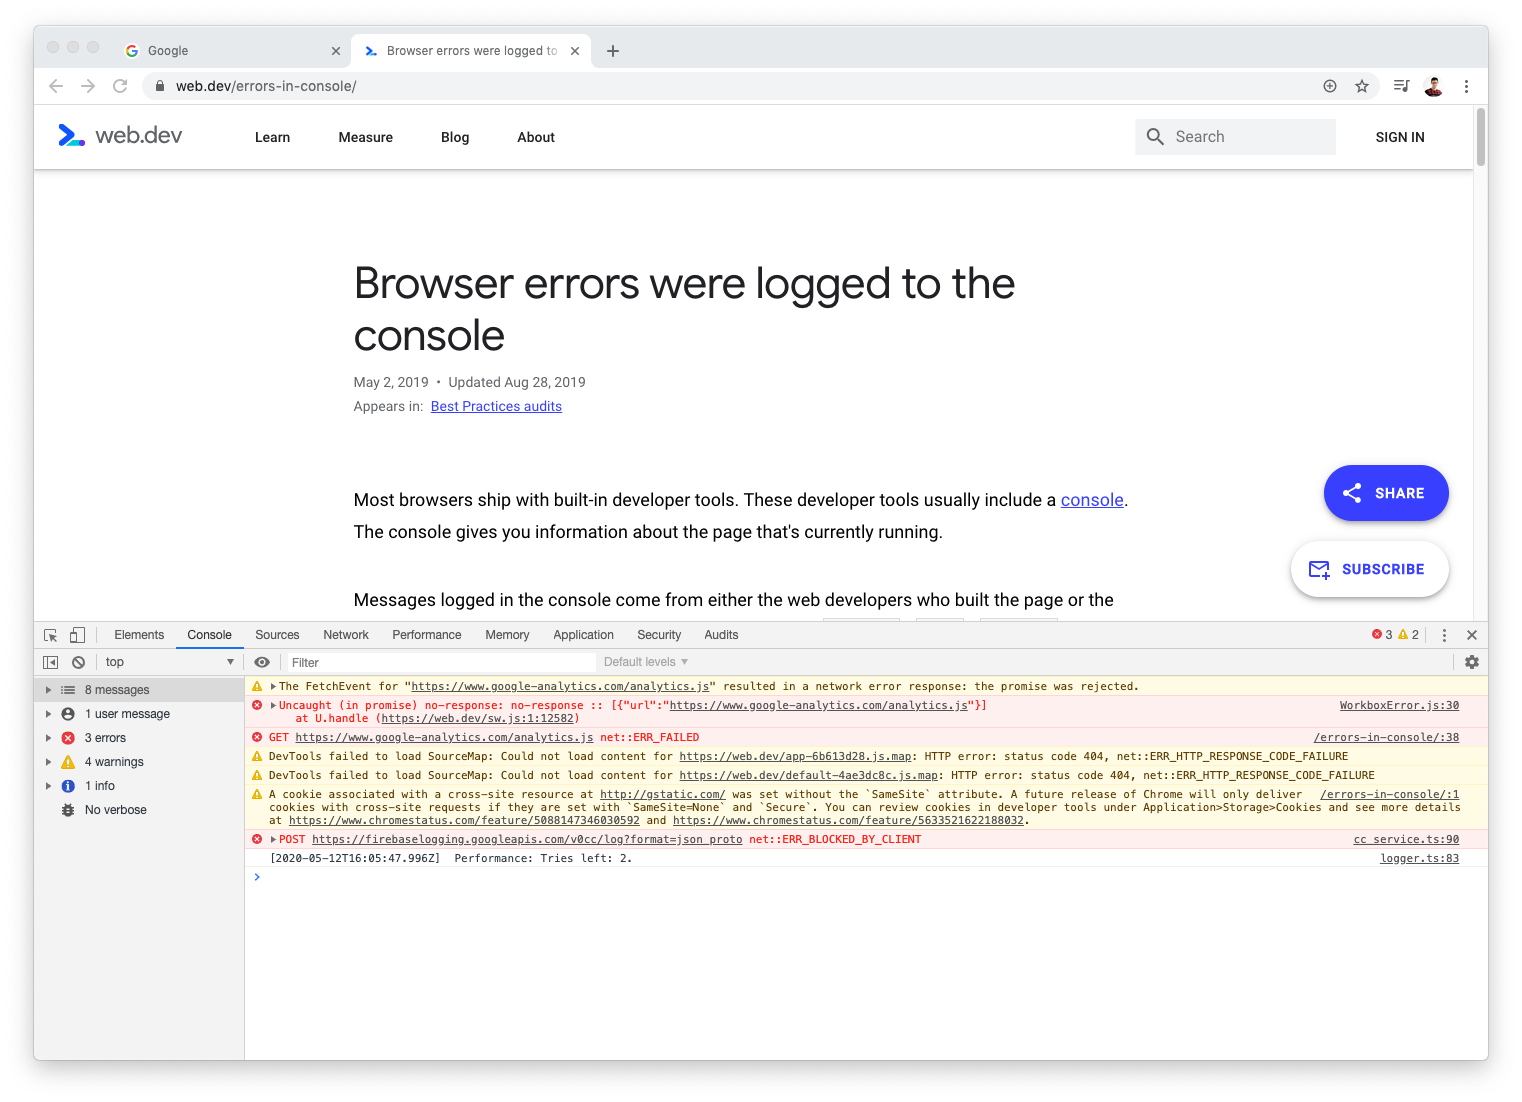
It’s a bit ironic to use the error logs documentation page to showcase errors, right? In any case, it serves a good purpose. These are errors that would stop some feature from working. You can always share such information with your developers and ask for assistance. Logs are posted live as you interact with the page, so if you click on a button and an error pops up, most likely the script behind it has a problem.
Related: The Path to Becoming a Good Web Designer
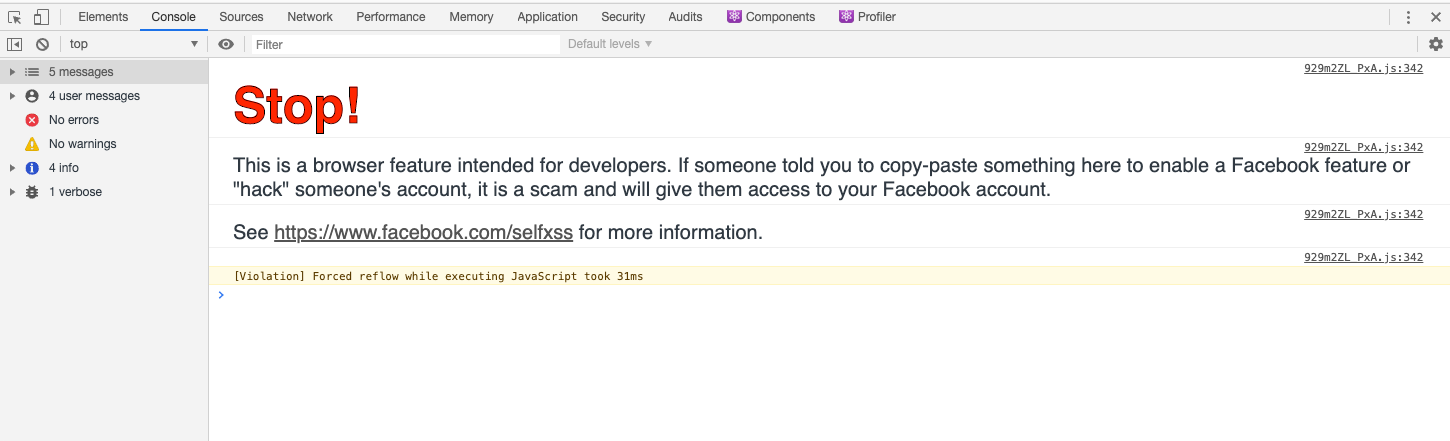
Security notice: It’s not a good idea to copy-paste code to the console without understanding what it does. Especially if it’s from an unreliable source and used on internal applications/websites of your company. Facebook has posted a warning because of that on their console:
Summary
DevTools is an amazing tool that aids both developers and site owners. It gives you everything you need to tweak and modify a page. Through it you can change CSS, modify HTML, delete and rearrange elements on the page, see speed reports and reported errors.
Site owners can use it to showcase ideas and examples of their needs to developers that might be easier to understand than writing paragraphs of text. With some CSS knowledge of the basic properties, you can be much more descriptive of your needs, which will greatly reduce the back and forth and time spent on new changes.
There are a ton of other features waiting to be used, don’t be afraid to explore!
Team DevriX
This article is crafted by DevriX's seasoned marketing team, boasting over four decades of collective expertise in crafting sophisticated marketing funnels, devising comprehensive content frameworks and pillars, implementing engaging email campaigns, and creating impactful social media content designed for scalability.
Our marketing experts specialize in the complete spectrum of inbound marketing strategies. As an accredited HubSpot Agency Partner and a Semrush Partner, we engage in meticulous research, blending our extensive experience with the unique insights of our highly skilled team.
We set benchmarks in content creation by incorporating cutting-edge marketing trends, leveraging in-depth industry research, and utilizing state-of-the-art AI tools for data segmentation and captivating content hooks. Our proficiency extends across a diverse range of sectors, including working with SMEs, Fortune 1000 companies, global B2B brands, major publishing entities, WooCommerce platforms, business directories, and affiliate networks.


