
Hey, have you ever wondered how applications like Slack work? Or about how hard it would be to create an app like that?
In this article, we will show you a step-by-step guide on how to create a Slack-like simple react chat application using ReactJS and SocketIO. We will build a rather simplified version of all the features Slack has to offer, so take this tutorial as a good starter example.
Before we get into the nitty-gritty development work, there are some essentials you need to have ready.
The 3 Key Prerequisites:
- You would need to have Basic JavaScript knowledge.
- You should have NodeJS and NPM installed on your device.
- Have an IDE, or any preferable text editor.
Once you have those set, we will go through the steps to achieve an application that has 3 very simple features:
- Login through providing a nickname.
- Switch between statically provided channels.
- Send messages to the channels (incl. emoji’s).
When we’re done, you should have an application that looks like this:
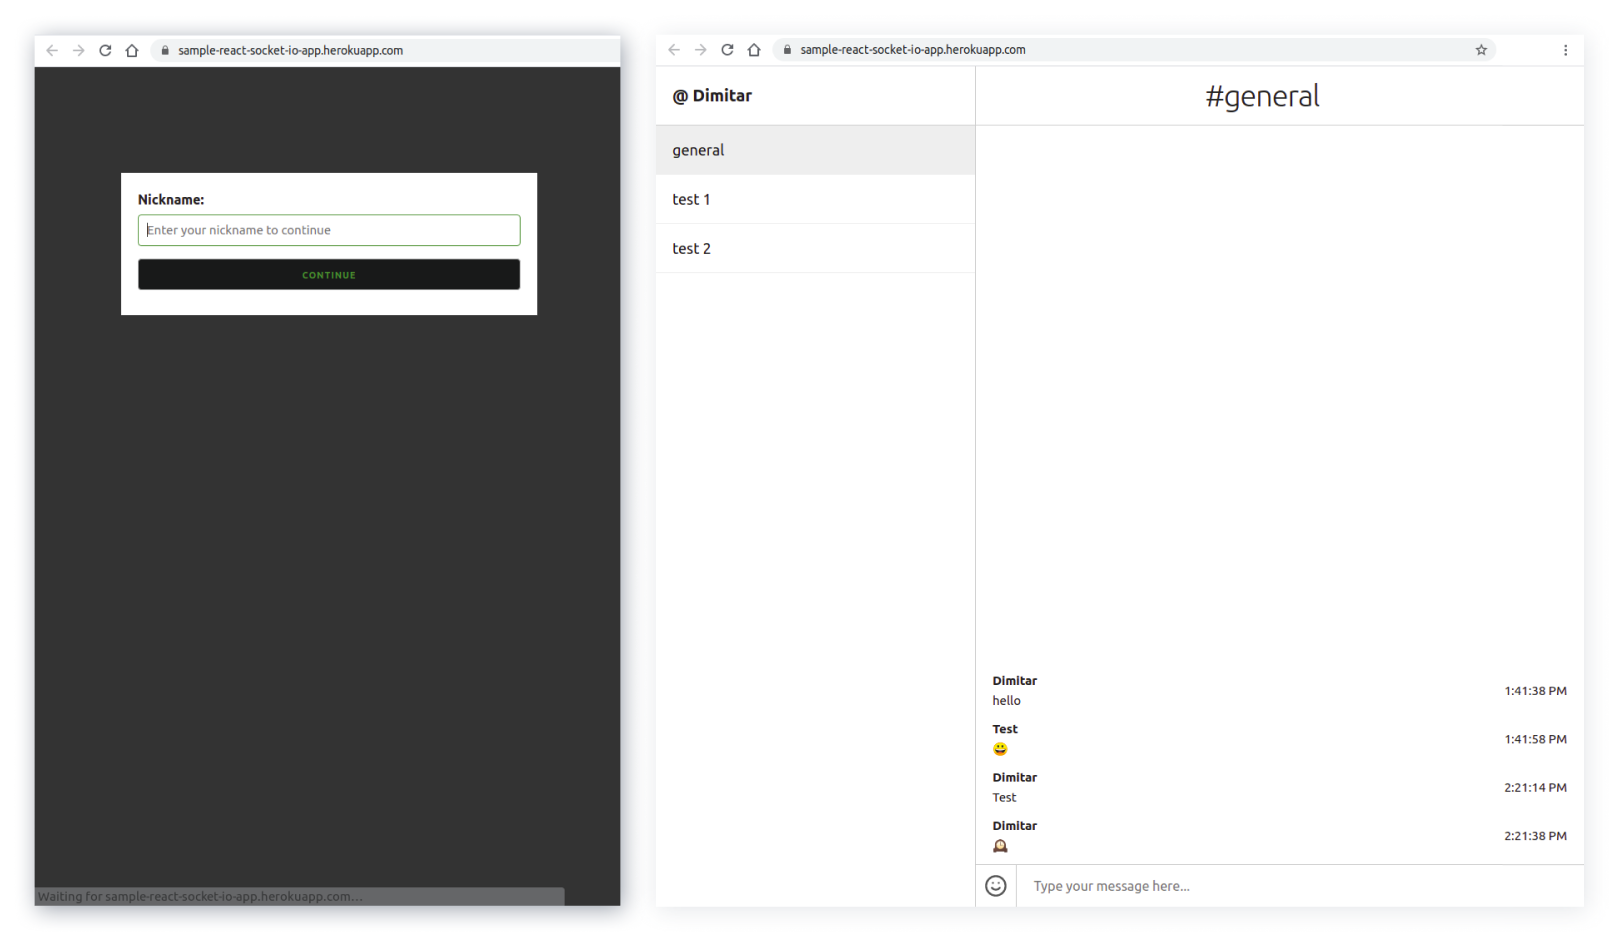
Do you have everything ready? Yes!? Let’s get to it then, shall we…
1. Initialize ReactJS Application
First, we need to create and initialize the ReactJS application. For that we’ll use create-react-app.
Open your terminal and run: npx create-react-app simple-react-js-chat-application
This will create a new directory simple-react-js-chat-application with the base ReactJS skeleton. We will not be going through the structure of the base project at the moment.
2. Install Dependencies
The next step is to install the needed dependencies for our front-end client. At your terminal:
- Go to the project directory:
cd simple-react-js-chat-application
- Run:
npm install axios emoji-mart node-sass skeleton-css socket.io-client uuid
This will install the prerequisites dependencies:
- axios – We are using it to make calls to the back-end to fetch channels and messages.
- emoji-mart – It’s React component for emojis.
- skeleton-css – A simple responsive CSS boilerplate.
- socket.io-client – NPM package for connecting to the socket.
- uuid – unique user id library
- node-sass – We’ll be using SCSS.
3. Create the Back-End Server
To use the Socket.IO we need to create a server which will handle the events and some of the API endpoints – i.e. retrieve channels and messages. In this case, we’ll be using a simple as possible server handled in NodeJS.
Start with creating a new directory server in the src folder. Then begin creating the following files:
A Package.json file
The package.json file specifies the npm handling, dependencies, and dev dependencies. It’s an actual JSON file, not a JavaScript object.
The main fields that Node.JS itself needs are name and version. The name holds the project’s name and version – the package version.
{
 "name": "server",
 "version": "1.0.0",
 "description": "",
 "main": "index.js",
 "scripts": {
   "test": "echo \"Error: no test specified\" && exit 1"
 },
 "author": "",
 "license": "ISC",
 "dependencies": {
   "cors": "^2.8.5",
   "express": "^4.17.1",
   "socket.io": "^3.0.4",
   "uuid": "^8.3.2"
 }
}
A Server.js File
This file follows the logic that the back-end server handles server instantiation, custom routes and the events/emit listeners.
const http = require("http");
const express = require("express");
const cors = require("cors");
const socketIO = require("socket.io");
const { addMessage, getChannelMessages } = require("./messages");
const { channels, addUserToChannel } = require("./channels");

const { addUser, removeUser } = require("./users");

const app = express();
app.use(cors());

const server = http.createServer(app);
const io = socketIO(server, {
 cors: {
   origin: "*",
 },
});

const PORT = process.env.PORT || 8080;

io.on("connection", (socket) => {
 // Get nickname and channel.
 const { nickname, channel } = socket.handshake.query;
 console.log(`${nickname} connected`);
 // Join the user to the channel.
 socket.join(channel);
 addUser(nickname, socket.id);
 addUserToChannel(channel, nickname);

 // Handle disconnect
 socket.on("disconnect", () => {
   console.log(`${nickname} disconnected`);
   removeUser(nickname);
 });

 socket.on("CHANNEL_SWITCH", (data) => {
   const { prevChannel, channel } = data;
   if (prevChannel) {
     socket.leave(prevChannel);
   }
   if (channel) {
     socket.join(channel);
   }
 });

 socket.on("MESSAGE_SEND", (data) => {
   addMessage(data);
   const { channel } = data;
   socket.broadcast.to(channel).emit("NEW_MESSAGE", data);
 });
});

app.get("/channels/:channel/messages", (req, res) => {
 const allMessages = getChannelMessages(req.params.channel);

 return res.json({ allMessages });
});

app.get("/getChannels", (req, res) => {
 return res.json({ channels });
});

server.listen(PORT, () => console.log(`Server listening to port ${PORT}`));
A Users.js FIle
This component is responsible for the “users” of the application we are building. In this case, we only have to add/delete a user.
const users = {};

const addUser = (nickname, socketId) => {
   users[nickname] = socketId;
}

const removeUser = (nickname) => {
   if(users.hasOwnProperty(nickname)) {
       delete users[nickname];
   }
}

module.exports = { users, addUser, removeUser };
A Messages.js File
This file adds the functionality for the messages – i.e. adding them to the array and getting specific channel messages.
const messages = [];

const addMessage = (data) => {
 messages.push(data);

 return data;
};

const getChannelMessages = (channel) =>
 messages.filter((message) => message.channel === channel);

module.exports = { addMessage, getChannelMessages };
A Channels.js FIle
This file holds the logic for the channels – initializing the default ones and a functionality to add users to a channel
const channels = [
 {
   id: 1,
   name: "general",
   users: [],
 },
 {
   id: 2,
   name: "test 1",
   users: [],
 },
 {
   id: 3,
   name: "test 2",
   users: [],
 },
];

const addUserToChannel = (channel, nickname) => {
 channels.filter((c) => c.name === channel).map((c) => {
   c.users.push(nickname);

   return c;
 });
}

module.exports = { channels, addUserToChannel };
Run the terminal and in the directory install the NPM dependencies:
npm run installWait for NPM to finish and the server is ready. You can try it by running
npm start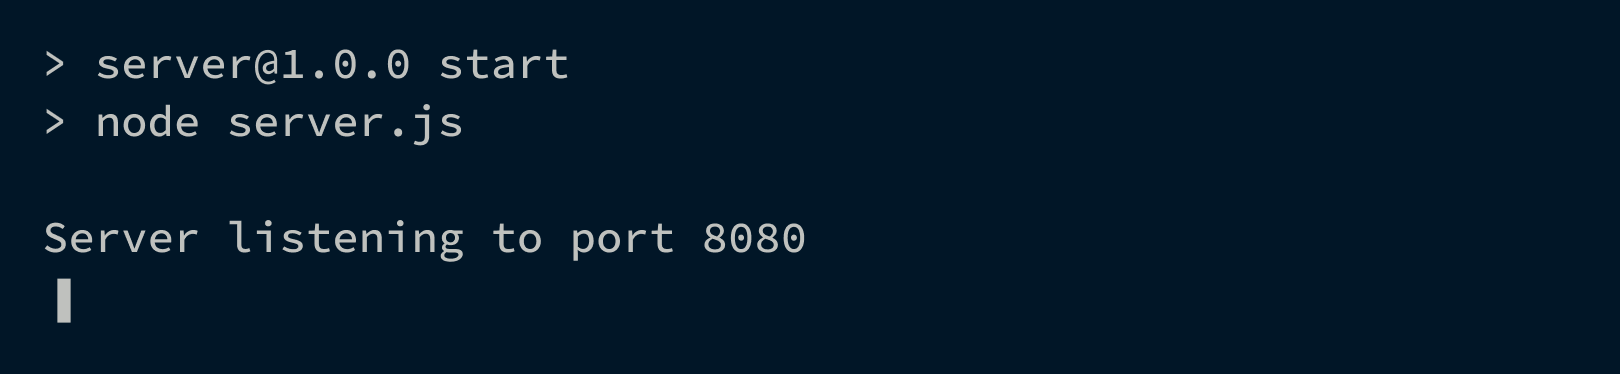
4. Create the Front-End Part
The last thing in order, but not in importance, to achieve is to create the front-end part of the application. The front-end will communicate with the back-end server to provide the core features – i.e. enter nicknames, switch between channels and send messages.
Let’s begin with the initial screen of the application.
Navigate to the src folder and open App.js. Then replace its content with the one below:
import "./index.css";
import "./App.css";
import { useState } from "react";
import Chat from "./components/Chat/Chat";
import LoginDialog from "./components/LoginDialog";

function App() {
 const [nickname, setNickname] = useState("");
 const [loggedIn, setLoggedIn] = useState(false);

 const handleNicknameChange = (event) => {
   setNickname(event.target.value.trim());
 };

 const handleNicknameSubmit = (e) => {
   if (!nickname.length) return;

   e.preventDefault();

   setLoggedIn(true);
 };

 return (
   <div className="main-div">
     {!loggedIn ? (
       <LoginDialog
         nicknameChange={handleNicknameChange}
         nicknameSubmit={handleNicknameSubmit}
       />
     ) : (
       <Chat nickname={nickname} />
     )}
   </div>
 );
}

export default App;
The App component contains the logic for the state for the nickname and whether a user is “logged in”. It also renders the appropriate component be it the LoginDialog or Chat – which depends on the state.
Add Some Shape
Open App.css and replace the content with:
.login-container {
   position: fixed;
   left: 10%;
   right: 10%;
   top: 50%;
   transform: translate(0, -50%);
   display: flex;
   flex-direction: column;
}

.text-input-field {
   padding: 24px 12px;
   border-radius: 7px;
   font-size: 24px;
 }
  .text-input-field:focus {
   outline: none;
 }

.login-button {
   margin-top: 20px;
   padding: 24px 12px;
   font-size: 28px;
   background-color: rgb(0, 132, 255);
   color: white;
   font-weight: 600;
   text-align: center;
   text-decoration: none;
   border-radius: 7px;
 }
Create new folder helpers and place a file with name socket.js inside.
import io from "socket.io-client";
import axios from "axios";

let socket;
const SOCKET_URL = "http://localhost:8080";

export const initiateSocket = (channel, nickname) => {
 socket = io(SOCKET_URL, {
   query: { channel, nickname },
 });

 console.log("Connecting to socket");

 if (socket && channel) {
   socket.emit("CHANNEL_JOIN", channel);
 }
};

export const switchChannel = (prevChannel, channel) => {
 if (socket) {
   socket.emit("CHANNEL_SWITCH", { prevChannel, channel });
 }
};
export const subscribeToMessages = (callback) => {
 if (!socket) {
   return;
 }

 socket.on("NEW_MESSAGE", (data) => {
   callback(null, data);
 });
};

export const sendMessage = (data) => {
 if (!socket) {
   return;
 }

 socket.emit("MESSAGE_SEND", data);
};

export const fetchChannels = async () => {
 const response = await axios.get(`${SOCKET_URL}/getChannels`);

 return response.data.channels;
};

export const fetchChannelMessages = async (channel) => {
 const response = await axios.get(
   `${SOCKET_URL}/channels/${channel}/messages`
 );

 return response.data.allMessages;
};
This component exports necessary helper functions that we’ll be using later in the React components to communicate with the back-end server.
We are almost ready!
Now we will continue with creating the dialog for nickname providing and the chat layout.
Set Up the Login
Create new folder components and let’s continue with creating the necessary components for the application.
LoginDialog.js:
function LoginDialog({ nicknameChange, nicknameSubmit }) {
 return (
   <div className="dialog-container">
     <div className="dialog">
       <form className="dialog-form" onSubmit={nicknameSubmit}>
         <label className="username-label" htmlFor="username">
           Nickname:
         </label>
         <input
           id="username"
           className="username-input"
           autoFocus
           onChange={nicknameChange}
           type="text"
           name="userId"
           placeholder="Enter your nickname to continue"
         />
         <button type="submit" className="submit-btn">
           Continue
         </button>
       </form>
     </div>
   </div>
 );
}

export default LoginDialog;
This is the login screen component which opens when the application is initially loaded. At this point no nickname is provided. It contains only markups and nothing related to the state here. As it seems from the code the state and handlers are passed through props to it.
Bring the Chat to Life
Continue with creating one more folder – Chat, in which we’ll create several components:
Chat.js
import { useEffect, useRef, useState } from "react";
import "skeleton-css/css/normalize.css";
import "skeleton-css/css/skeleton.css";
import "./Chat.scss";
import {
 initiateSocket,
 switchChannel,
 fetchChannels,
 fetchChannelMessages,
 sendMessage,
 subscribeToMessages,
} from "../../helpers/socket";
import { v4 as uuidv4 } from "uuid";
import "emoji-mart/css/emoji-mart.css";
import Channels from "./Channels";
import ChatScreen from "./ChatScreen";

function Chat({ nickname }) {
 const [message, setMessage] = useState("");
 const [channel, setChannel] = useState("general");
 const [channels, setChannels] = useState([]);
 const [messages, setMessages] = useState([]);
 const [messagesLoading, setMessagesLoading] = useState(true);
 const [channelsLoading, setChannelsLoading] = useState(true);
 const [showEmojiPicker, setShowEmojiPicker] = useState(false);

 const prevChannelRef = useRef();
 useEffect(() => {
   prevChannelRef.current = channel;
 });
 const prevChannel = prevChannelRef.current;

 useEffect(() => {
   if (prevChannel && channel) {
     switchChannel(prevChannel, channel);
     setChannel(channel);
   } else if (channel) {
     initiateSocket(channel, nickname);
   }
 }, [channel]);

 useEffect(() => {
   setMessages([]);
   setMessagesLoading(true);

   fetchChannelMessages(channel).then((res) => {
     setMessages(res);
     setMessagesLoading(false);
   });
 }, [channel]);

 useEffect(() => {
   fetchChannels().then((res) => {
     setChannels(res);
     setChannelsLoading(false);
   });

   subscribeToMessages((err, data) => {
     setMessages((messages) => [...messages, data]);
   });
 }, []);

 const handleMessageChange = (event) => {
   setMessage(event.target.value);
 };

 const handleMessageSend = (e) => {
   if (!message) return;

   e.preventDefault();
   const data = {
     id: uuidv4(),
     channel,
     user: nickname,
     body: message,
     time: Date.now(),
   };
   setMessages((messages) => [...messages, data]);
   sendMessage(data);
   setMessage("");
 };

 const handleEmojiSelect = (emoji) => {
   const newText = `${message}${emoji.native}`;

   setMessage(newText);
   setShowEmojiPicker(false);
 };

 return (
   <div className="chat-container">
     <Channels
       nickname={nickname}
       channelsLoading={channelsLoading}
       channels={channels}
       }channel={channel}
       setChannel={setChannel}
     />
     <ChatScreen
       channel={channel}
       messagesLoading={messagesLoading}
       messages={messages}
       showEmojiPicker={showEmojiPicker}
       handleEmojiSelect={handleEmojiSelect}
       handleMessageSend={handleMessageSend}
       setShowEmojiPicker={setShowEmojiPicker}
       message={message}
       handleMessageChange={handleMessageChange}
     />
   </div>
 );


export default Chat;
This is the main component that holds up the logic for the chat application, when a user is “logged in”. It holds up the handlers and states for the channels, messages, and sending messages.
Style It Up
Let’s continue with the stylings for the component and it’s child components:
Chat.scss
.chat-container {
 width: 100vw;
 height: 100vh;
 display: grid;
 grid-template-columns: 1fr 4fr;
}
.right-sidebar {
 border-left: 1px solid #ccc;
}

.left-sidebar {
 border-right: 1px solid #ccc;
}

.user-profile {
 height: 70px;
 display: flex;
 align-items: flex-start;
 padding-right: 20px;
 padding-left: 20px;
 justify-content: center;
 flex-direction: column;
 border-bottom: 1px solid #ccc;
}

.user-profile span {
 display: block;
}

.user-profile .username {
 font-size: 20px;
 font-weight: 700;
}

.chat-channels li,
.room-member {
 display: flex;
 align-items: center;
 padding: 15px 20px;
 font-size: 18px;
 color: #181919;
 cursor: pointer;
 border-bottom: 1px solid #eee;
 margin-bottom: 0;
}

.room-member {
 justify-content: space-between;
 padding: 0 20px;
 height: 60px;
}

.send-dm {
 opacity: 0;
 pointer-events: none;
 font-size: 20px;
 border: 1px solid #eee;
 border-radius: 5px;
 margin-bottom: 0;
 padding: 0 10px;
 line-height: 1.4;
 height: auto;
}

.room-member:hover .send-dm {
 opacity: 1;
 pointer-events: all;
}

.presence {
 display: inline-block;
 width: 10px;
 height: 10px;
 background-color: #ccc;
 margin-right: 10px;
 border-radius: 50%;
}

.presence.online {
 background-color: green;
}

.chat-channels .active {
 background-color: #eee;
 color: #181919;
}

.chat-channels li:hover {
 background-color: #d8d1d1;
}

.room-icon {
 display: inline-block;
 margin-right: 10px;
}

.chat-screen {
 display: flex;
 flex-direction: column;
 height: 100vh;
}

.chat-header {
 height: 70px;
 flex-shrink: 0;
 border-bottom: 1px solid #ccc;
 padding-left: 10px;
 padding-right: 20px;
 display: flex;
 flex-direction: column;
 justify-content: center;
}

.chat-header h3 {
 margin-bottom: 0;
 text-align: center;
}

.chat-messages {
 flex-grow: 1;
 overflow-y: auto;
 display: flex;
 flex-direction: column;
 justify-content: flex-end;
 margin-bottom: 0;
 min-height: min-content;
 position: relative;
}

.message {
 padding-left: 20px;
 padding-right: 20px;
 margin-bottom: 10px;
 display: flex;
 justify-content: space-between;
 align-items: center;
}

.message span {
 display: block;
 text-align: left;
}

.message .user-id {
 font-weight: bold;
}

.message-form {
 border-top: 1px solid #ccc;
 width: 100%;
 display: flex;
 align-items: center;
}

.message-form,
.message-input {
 width: 100%;
 margin-bottom: 0;
}

.rta {
 flex-grow: 1;
}

.emoji-mart {
 position: absolute;
 bottom: 20px;
 right: 10px;
}

input[type="text"].message-input,
textarea.message-input {
 height: 50px;
 flex-grow: 1;
 line-height: 35px;
 padding-left: 20px;
 border-radius: 0;
 border-top-left-radius: 0;
 border-top-right-radius: 0;
 border-bottom-left-radius: 0;
 border-bottom-right-radius: 0;
 border: none;
 font-size: 16px;
 color: #333;
 min-height: auto;
 overflow-y: hidden;
 resize: none;
 border-left: 1px solid #ccc;
}

.message-input:focus {
 outline: none;
}

.toggle-emoji {
 border: none;
 width: 50px;
 height: auto;
 padding: 0;
 margin-bottom: 0;
 display: flex;
 align-items: center;
 justify-content: center;
}

.toggle-emoji svg {
 width: 28px;
 height: 28px;
}

/* RTA
    ========================================================================== */

.rta {
 position: relative;
 border-left: 1px solid #ccc;
 display: flex;
 flex-direction: column;
}

.rta__autocomplete {
 position: absolute;
 width: 300px;
 background-color: white;
 border: 1px solid #ccc;
 border-radius: 5px;
}

.rta__autocomplete ul {
 list-style: none;
 text-align: left;
 margin-bottom: 0;
}

.rta__autocomplete li {
 margin-bottom: 5px;
 padding: 3px 20px;
 cursor: pointer;
}

.rta__autocomplete li:hover {
 background-color: skyblue;
}

/* Dialog
    ========================================================================== */

.dialog-container {
 position: absolute;
 top: 0;
 right: 0;
 bottom: 0;
 left: 0;
 background-color: rgba(0, 0, 0, 0.8);
 display: flex;
 justify-content: center;
 align-items: center;
}

.dialog {
 width: 500px;
 background-color: white;
 display: flex;
 align-items: center;
}

.dialog-form {
 width: 100%;
 margin-bottom: 0;
 padding: 20px;
}

.dialog-form > * {
 display: block;
}

.username-label {
 text-align: left;
 font-size: 16px;
}

.username-input {
 width: 100%;
}

input[type="text"]:focus {
 border-color: #5c8436;
}

.submit-btn {
 color: #5c8436;
 background-color: #181919;
 width: 100%;
}

.submit-btn:hover {
 color: #5c8436;
 background-color: #222;
}
ChatMessages.js
import ChatMessages from "./ChatMessages";
import MessageForm from "./MessageForm";

function ChatScreen({
 channel,
 messagesLoading,
 messages,
 showEmojiPicker,
 handleEmojiSelect,
 handleMessageSend,
 setShowEmojiPicker,
 message,
 handleMessageChange,
}) {
 return (
   <section className="chat-screen">
     <header className="chat-header">
       <h3>#{channel}</h3>
     </header>
     <ChatMessages messagesLoading={messagesLoading} messages={messages} />
     <footer className="chat-footer">
       <MessageForm
         emojiSelect={handleEmojiSelect}
         handleMessageSend={handleMessageSend}
         setShowEmojiPicker={setShowEmojiPicker}
         showEmojiPicker={showEmojiPicker}
         message={message}
         handleMessageChange={handleMessageChange}
       />
     </footer>
   </section>
 );
}

export default ChatScreen;
The main component for the chat screen contains the ChatMessages and MessageForm components.
MessageForm.js
import { Smile } from "react-feather";
import { Picker } from "emoji-mart";

function MessageForm({
 emojiSelect,
 handleMessageSend,
 setShowEmojiPicker,
 showEmojiPicker,
 message,
 handleMessageChange,
}) {
 let messageInput;
 const handleEmojiSelect = (emoji) => {
   emojiSelect(emoji);
   messageInput.focus();
 };

 return (
   <div>
     {showEmojiPicker ? (
       <Picker title="" set="apple" onSelect={handleEmojiSelect} />
     ) : null}
     <form onSubmit={handleMessageSend} className="message-form">
       <button
         type="button"
         onClick={() => setShowEmojiPicker(!showEmojiPicker)}
         className="toggle-emoji"
       >
         <Smile />
       </button>
       <input
         type="text"
         value={message}
         ref={(input) => (messageInput = input)}
         onChange={handleMessageChange}
         placeholder="Type your message here..."
         className="message-input"
       />
     </form>
   </div>
 );
}

export default MessageForm;
Contains the logic and rendering of the input fields for the message – the emoji picker and the input box for the message.
Create the Sidebar
The last component of the application structure contains the “sidebar” – i.e. the channels list.
Channels.js
import { useState } from "react";

function Channels({
 nickname,
 channelsLoading,
 channels,
 channel,
 setChannel,
}) {
 return (
   <aside className="sidebar left-sidebar">
     <div className="user-profile">
       <span className="username">@ {nickname}</span>
     </div>
     <div className="channels">
       <ul className="chat-channels">
         {channelsLoading ? (
           <li>
             <span className="channel-name">Loading channels....</span>
           </li>
         ) : channels.length ? (
           channels.map((c) => {
             return (
               <li
                 key={c.id}
                 onClick={() => setChannel(c.name)}
                 className={c.name === channel ? "active" : ""}
               >
                 <span className="channel-name">{c.name}</span>
               </li>
             );
           })
         ) : (
           <li>
             <span className="channel-name">No channels available</span>
           </li>
         )}
       </ul>
     </div>
   </aside>
 );
}

export default Channels;
The application is ready, the only thing to consider here is to check the API URL in helpers/socket.js:
const SOCKET_URL = "http://localhost:8080";Make sure to change it accordingly to the URL and PORT for the back-end server you are using.
Run both the front-end part and the server:
Navigate to the root directory and run:npm start
Navigate to src/server and run:npm start
Now you can open http://localhost:3000 or any other port you use for the front-end part and access it.
Keep in mind that this application has very basic features. There’s no log-in authentication – you only need a nickname. And you won’t be able to create your own channels – you can only switch between the static ones that are provided.
Well Done!
You followed our guide and now you have your own simplified Slack-like chat application.
Feel free to experiment and extend the app. You can add things like:
- A “user is typing” feature.
- A feature for joining/creating channels.
- Authentication.
- User avatars.
- An ability to show which users are active online.
Let us know how you like it. And if you need any further assistance, don’t hesitate to contact us.
Team DevriX
This article is crafted by DevriX's seasoned marketing team, boasting over four decades of collective expertise in crafting sophisticated marketing funnels, devising comprehensive content frameworks and pillars, implementing engaging email campaigns, and creating impactful social media content designed for scalability.
Our marketing experts specialize in the complete spectrum of inbound marketing strategies. As an accredited HubSpot Agency Partner and a Semrush Partner, we engage in meticulous research, blending our extensive experience with the unique insights of our highly skilled team.
We set benchmarks in content creation by incorporating cutting-edge marketing trends, leveraging in-depth industry research, and utilizing state-of-the-art AI tools for data segmentation and captivating content hooks. Our proficiency extends across a diverse range of sectors, including working with SMEs, Fortune 1000 companies, global B2B brands, major publishing entities, WooCommerce platforms, business directories, and affiliate networks.


